Each year I see hundreds of patients who get injured from running. Most of the time, these running injuries are due to a lack of preparation and an imbalance of proper strength and mobility.
Luckily, there are some biomechanical screens and exercises that you can perform to help make sure that you are ready for running.
Biomechanics of Running
Running produces a lot of force throughout the body. According to the research, the knee joint forces undergo 5x your bodyweight and the ankle joint undergoes 10x your bodyweight (Novacheck, 1999). With the amount of stress the body takes between joints and muscles, it is vital to prep your body for running.
Suffering from a sore neck, back and shoulders? Get our mobility guide to ease pain and soreness.
Get The FREE Mobility Guide To Fix Your Pain Today!
Muscle fatigue has been shown to have a huge biomechanical change, which is why it is so important to be able to perform proper single leg squats for reps before increasing distance. Just like endurance, strength is important for runners. Furthermore, if your core is not stable, oftentimes there is a premature foot strike. This can cause additional stress on your joints and muscles.
Mobility is just as important when prepping for running. Without adequate hip extension in the swing phase of running, you are at risk for not only decreasing your efficiency, but also producing additional movement at the lumbar spine. For those of you who like to increase speed during running, increased hip extension is required to allow for longer strides. In addition, adequate ankle dorsiflexion range of motion is important for midstance to terminal swing transition when running.
Running Screens
Now that we’ve discussed the mechanics required for running, let’s talk about how you can screen your own body. A movement screen is a tool to break down motion to find specific restrictions. In other words, screens help guide us to find any potential flaws and/or risk factors for poor movement or running injuries. We will use four primary screens to break down potential restrictions so that you know exactly where to spend most of your time.
Squat (Overall Full Body Assessment)
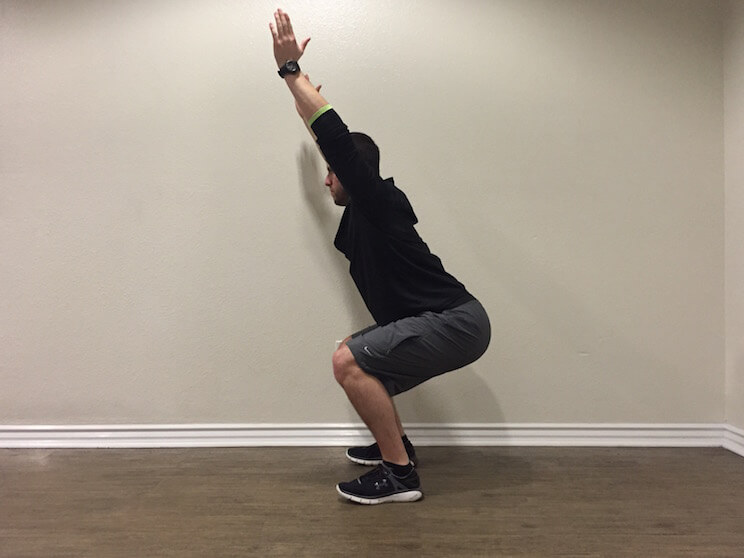
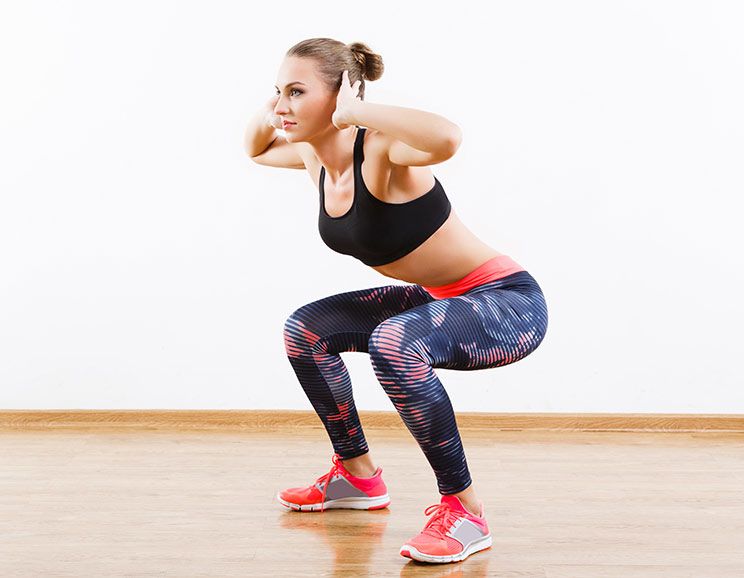
The first screen is a deep squat assessment. This screen helps us get a global look at how our body is moving. The deep squat looks at symmetrical hip, knee, ankle, thoracic spine, and shoulder movement at the same time.
Components for a “passing” grade:
- Squat as low as possible with arms overhead
- Feet facing forward with heels staying on ground and shoulder width apart
- Knees over the feet and no valgus collapse (knees buckling inwards)
- Trunk remains upright (parallel or vertical to the tibia bone)
- Heels don’t come off the ground
Single Leg Squat (Motor Control, Quadricep Dominant vs Gluteal Dominant Pattern)
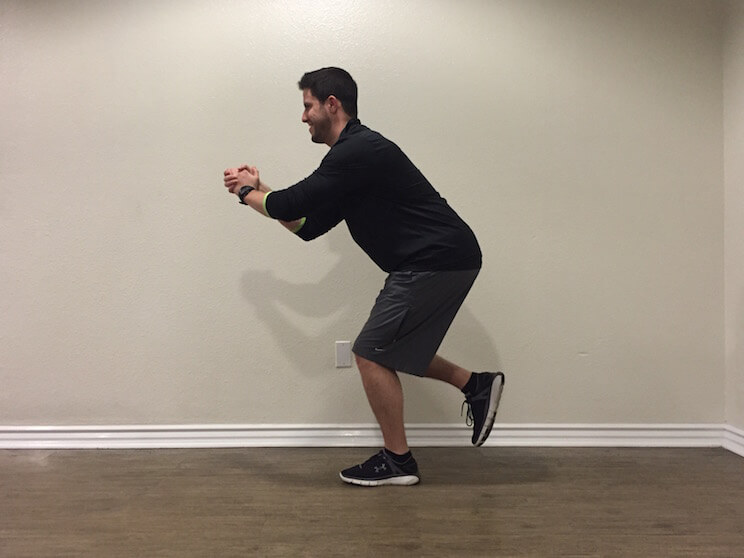
The next screen is a single leg squat assessment. The purpose of the single leg squat is to determine a broad assessment of single leg control and preference of movement. To perform this movement, stand in a single leg position. Once you have set yourself up, begin to squat down to approximately 45°.
When looking at single leg squat assessment, we want to look at trunk control (trunk lean to one side or not), hip control (hip drop), knee control (valgus/varus), and pattern (quadriceps vs glute dominant pattern).
Components for “passing” grade:
- Squat to 45° under control
- No trunk lean to either side
- Even hips, no hip dropping
- Knee straight, not buckling in or out
- If the opposite leg is forward, you prefer to use a knee pattern. If the opposite leg backwards, you prefer to use a hip pattern. Hip patterns are more favorable for decreasing knee stress.
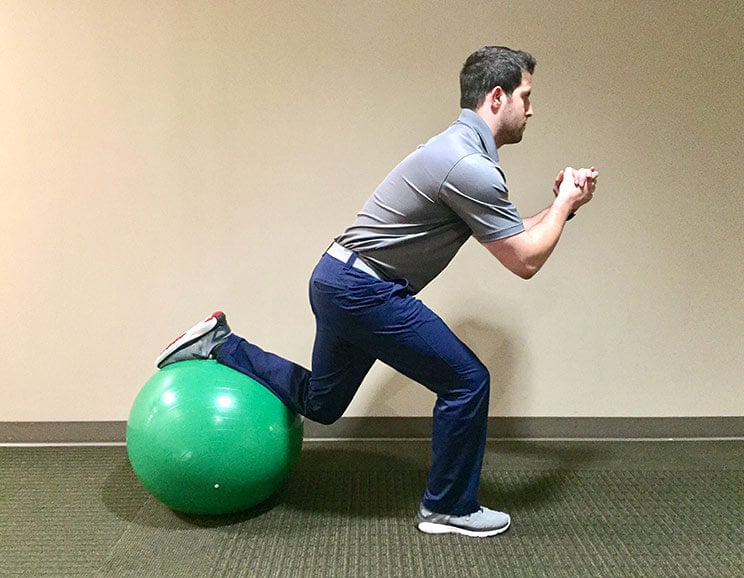
Lunge (Trail Leg and Great Toe Mobility)
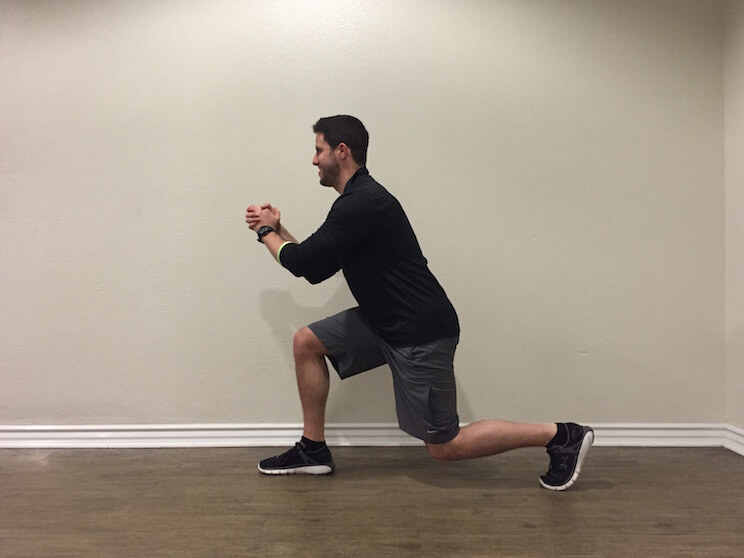
The next screen is a lunge. The purpose of the lunge assessment is to determine trail leg control and mobility. By looking at the lunge position, we want to look at the ability to load through the rear leg and great toe. Often overlooked, the great toe is responsible for that last push-off in running as well as walking.
Components for “passing” grade:
- Symmetrical lunge side-to-side (you can get your rear leg back the same distance)
- Equal great toe extension side-to-side
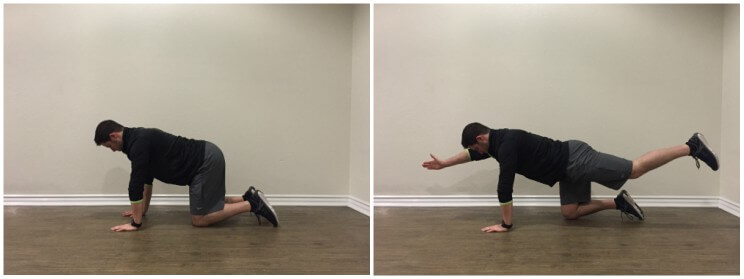
Quadruped Opposite Arm-Leg Raise (Trunk Stability-Dynamic Core Control)
Finally, we want to look at trunk stability in a dynamic way. As I’ve written about before in this core article, the core’s purpose is to resist movement, not produce it. To perform this movement, get in an all-fours position with your knees directly under your hips and your hands directly under your shoulders. Find a neutral spine position and while trying to maintain that, reach opposite arm and leg, just as you would during running stride.
When looking at the quadruped opposite arm and leg assessment, we want to look as the ability to maintain a neutral spine position, the ability to maintain balance, and the ability to minimize rotation when reaching with both arm and leg.
Components for “passing” grade:
- Maintaining “neutral” spine position
- Little to no rotation of the trunk (not shifting your body to one side when picking up leg/arm)
- Control of movement side-to-side
Running Correctives
Oftentimes, when I see a patient or training client fail these screens, it is for one of two reasons: mobility or strength. However, I would be lying if I didn’t point out the ability to be strong but not be able to control that strength (motor control). Therefore, after practicing these correctives, the screens above must be repeated for both testing and for improving motor control.
Mobility Correctives
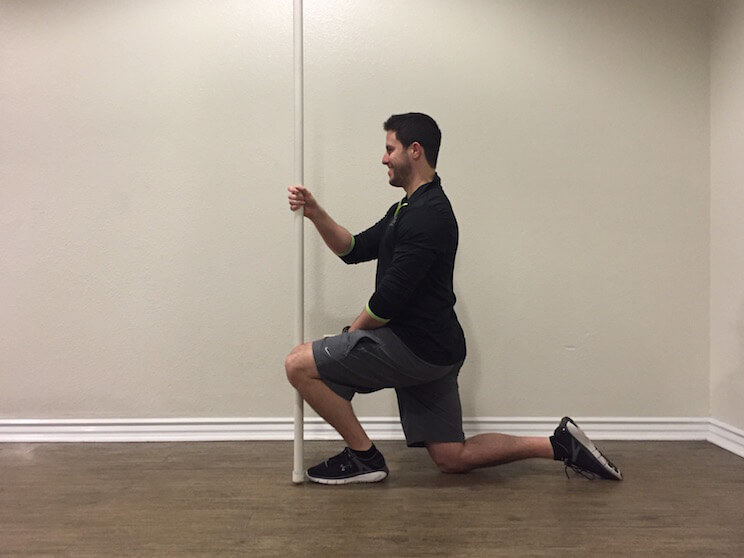
Half Kneeling DF in Closed Chain | 15 reps, 3X
One of the most overlooked mobility restrictions I see in the squat assessment is dorsiflexion ROM. Adequate DF is important during the terminal swing phase and initial contact phase of running. In other words, when you are on the last part of push-off and when striking the ground.
To perform this exercise, use a stick and rock forward, inside and outside of your ankle. Be sure to keep your heel down. Perform 3 sets of 15.
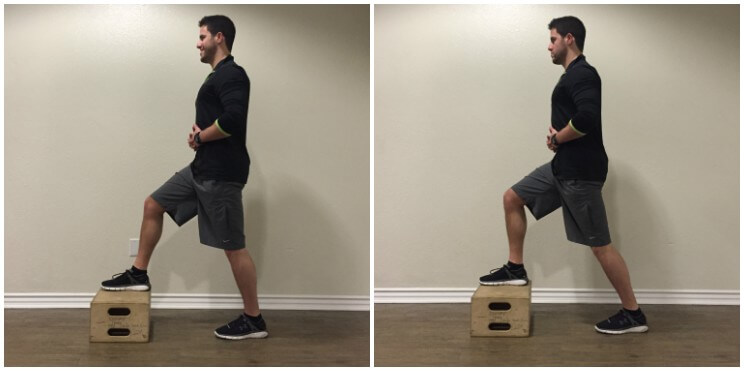
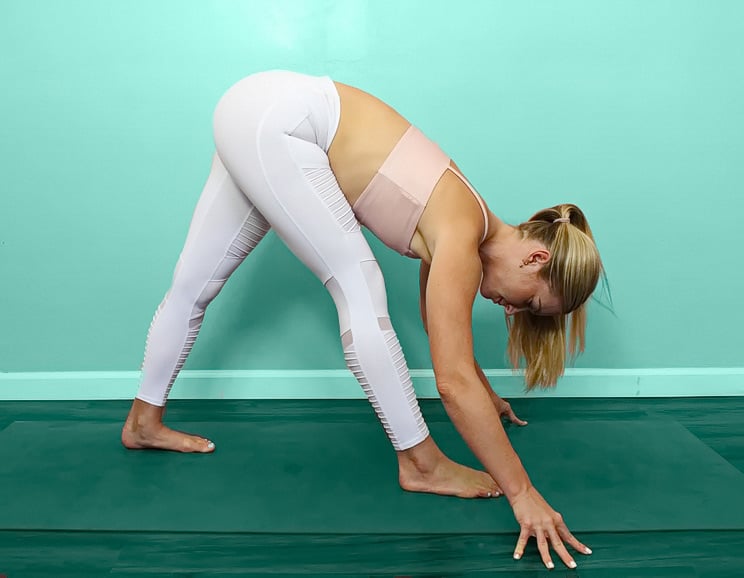
Elevated Hip Flexor Stretch | Hold 60 sec, 2X
The second most common mobility restriction I see is lack of hip extension. This may be due to the amount of time we spend sitting, which keeps our hips in a constant state of hip flexion. However, having proper hip extension is crucial to allow both the glute and hamstring muscles to work properly and complete the running cycle. Without it, compensations must occur, such as gaining additional motion from the lumbar spine (lumbar extension).
To perform this exercise, place one foot on top of an elevated surface and the other leg to the rear. The rear leg is the hip you will be stretching. Maintain good core control and shift forward at your hips, being sure not to arch your back. You should feel a stretch on the rear leg hip flexor. To enhance this stretch, contract your rear leg glute muscle while stretching. Hold for 2 sets of 60 seconds.
Stability Correctives
The other component for running is proper stability. Unfortunately, a common theme I see with running injuries is the lack of a strength component in their training program. For example, those who struggled with the single leg squat assessment could benefit from both isolated and integrated glute strengthening.
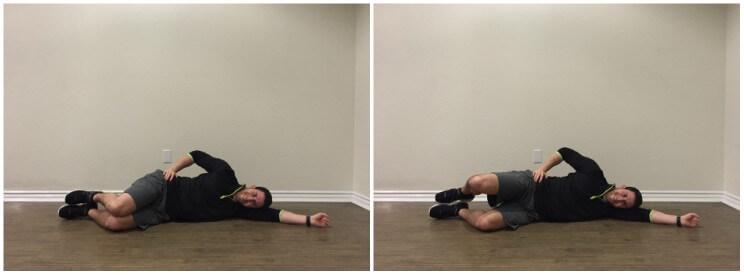
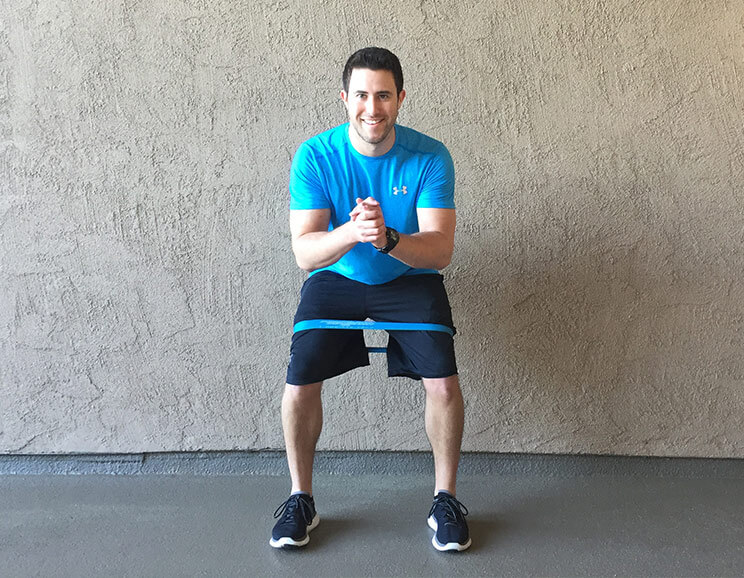
Clamshell | 15 reps, 3X
The first exercise is a clamshell. This is the most basic exercise for the glute muscles but often the most botched. The key is to feel this muscle work. You should feel this in the side part of your gluteal muscle. If you feel this in the front of your hip, then you may need to correct your form.
Get into a side lying position with your head resting on a pillow or your arm. Bend your knees up to a 45° position with your heels on top of each other. Keep your core in a neutral position and the opposite hand on the back of your pelvis. Roll yourself forward into a neutral position. Open up at your knee slowly, being sure to not roll your pelvis backwards. Repeat 3 sets of 15.
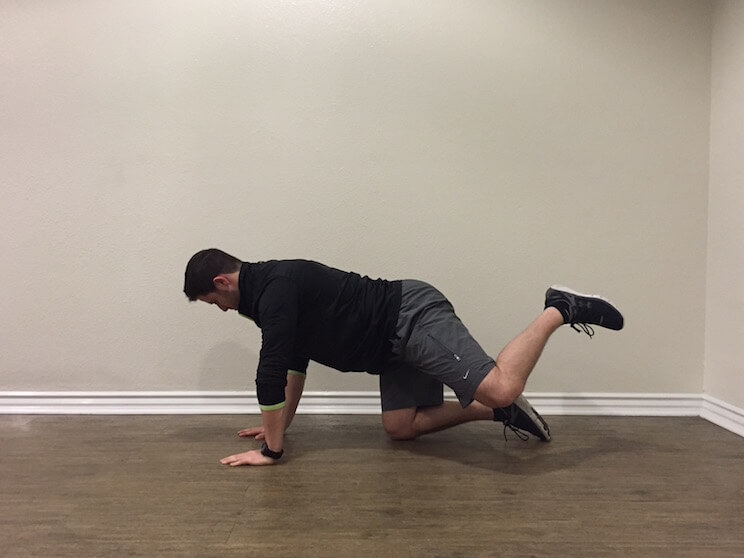
Fire Hydrant | 15 reps, 3X
To perform the fire hydrant, get into an all-fours position. Maintain proper core control, bring one of your legs out at a 45o angle. You are not going straight out to the side or straight backwards; instead, you are going in between those positions. You should feel this in your glutes. Repeat 3 sets of 15.
Single Leg Squat | 10 reps, 2X
To perform the single leg squat, get into a single leg balance position. Keep your other leg to the rear. Engage your core and slowly sit back into a squat like you are sitting into the chair. If you feel your knee start to buckle inwards, decrease the depth, working on control. Perform 2 sets of 10-15.
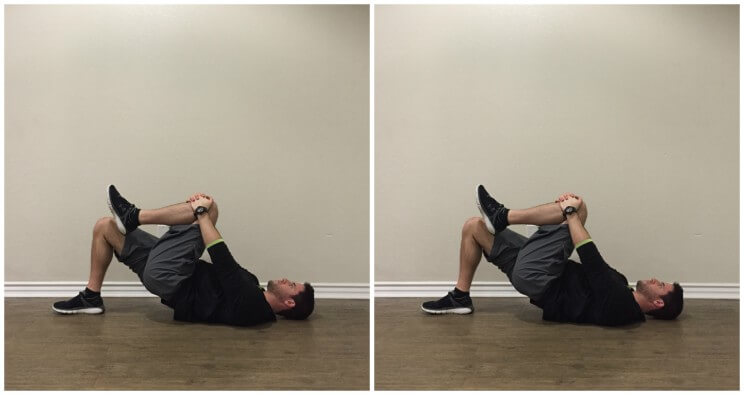
Single Leg Bridge | 10 reps, 3X
To perform the single leg bridge, lie on your back and bend your knees. Bring one of your knees to your chest and hold onto that leg. Next engage through the heel of your leg on the ground and contract your glute and core while bridging up. Repeat 3 sets of 10-15.
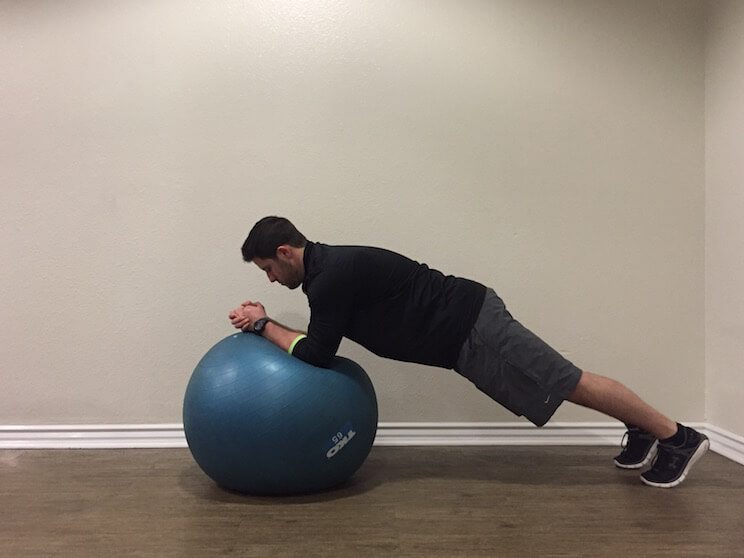
Front Plank on Ball | Hold 30 sec, 4X
Note: Before starting on the stability ball, be sure you have proper stability in the front plank on the floor first.
To perform this exercise, place your forearms on the stability ball. With your feet shoulder-width apart, contract your core muscles and hold yourself up, trying to minimize movement. To make this exercise easier, bring your feet further apart. To make this exercise harder, bring your feet closer together. Repeat for 4 sets of 30-45 seconds.
Quadruped Arm & Legs | 10 reps, 2X
To perform these exercises, get into an all-fours position like the above assessment. Work on minimizing rotation of the trunk during this exercise and keeping a flat back. If opposite arm and leg is too difficult, start with one leg at a time. Repeat 2 sets of 10.
Running is a great form of exercise when done correctly. If you are interested in running, be sure to prepare your body for the demands that will be placed on it. Work on these screens and exercises to assist with your running!
(Read This Next: How to Do a Shoulder Mobility Screen)



 Sweet Potato Gnocchi with Caramelized Brussels Sprouts




Show Comments