Joint pain is just that: a pain. Stiff, sticky, and achy joints are painful, annoying, and can take away from the joy of everyday life. Luckily, there are natural ways to relieve joint stiffness and pain, like with yin yoga poses.
Yin yoga is a slow style of yoga with poses that are held for longer periods of time, typically 2-5 minutes per pose but sometimes even longer.
Yin yoga is well known as a more restorative way to de-stress, reduce anxiety, and loosen up the body compared to more yang-style yoga practices like vinyasa and hatha. What most people don’t realize is that it can also be quite challenging and intense, and it works wonders for joint relief.
Suffering from a sore neck, back and shoulders? Get our mobility guide to ease pain and soreness.
Get The FREE Mobility Guide To Fix Your Pain Today!
How Yin Yoga Relieves Joint Pain
Research shows that loosening the fascia (aka connective tissue) around muscles and joints helps to improve flexibility and soothe the nervous system. Fascia is a fibrous tissue that connects every single cell in our body. Every muscle in the body is encased by fascia, which connects it to the muscle next to it, then the muscle next to that, and so on. Fascia holds our form together, just like the segments of an orange are held together by the tissue in between each segment.
More commonly known types of fascia are our tendons and ligaments. When we continuously put stress on our tendons and ligaments from exercise or postural patterns, they get tense and the blood circulation decreases, thus causing pain in the joint(s) that these specific tendons and ligaments are located.
So, while the yang-style yoga practices like hatha and vinyasa really work to relax the muscles (1), the long holds of poses in a yin practice work much deeper and help to loosen the fascia around the muscles. This leads to increased fluidity and a suppleness in the joints, which in turn helps to relieve joint pain and stiffness (2).
6 Best Yin Yoga Poses to Release Joint Pain
With yin yoga, like all other types of yoga, it is important to listen to your body. A feeling of discomfort is inevitable while holding a pose for an extended period of time, but if you feel sharp pain or it becomes unbearable, it is important to listen to your body and carefully come out of the pose. Finding the right edge is vital in yin yoga: the amount of stress placed on the joints needs to be just enough to bring the benefits of increased fluidity of the joints and range of motion, while too much stress can damage the tissues.
Before beginning, cultivate a slow and steady breath in and out of your nose. Maintain this breath while practicing your yin yoga poses to help you stay focused and connected to your body and what you are feeling.
Melting Heart Pose | 2 min
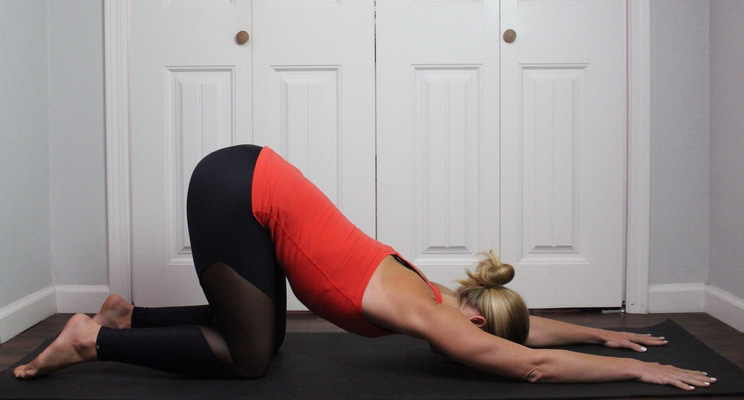
This pose helps to open up the shoulder and humerus joints and release the lower spine and the upper back.
- Begin in a tabletop position on your hands and knees. Keeping your hips stacked above your knees, walk your hands forward to bring your chest towards the floor.
- Continue walking your hands forward until your chest and forehead rest on the floor. Extend your arms all the way forward and keep your hands shoulder-width distance apart.
- Hold for 2 minutes and then slowly release by walking your hands back underneath your shoulders and pressing yourself back up to a tabletop position.
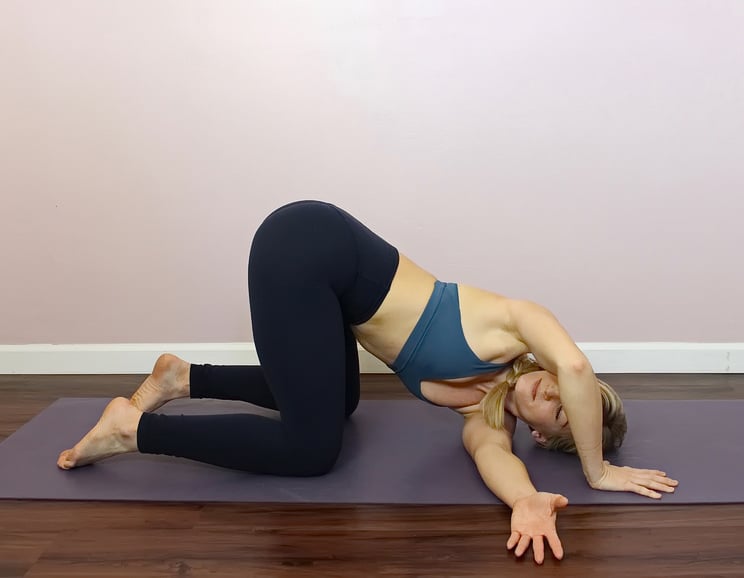
Wide-Knee Child’s Pose with Twist | 2 min per side
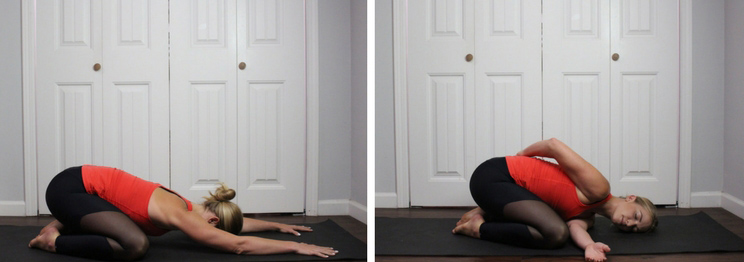
This pose helps to release the hip and knee joints and the spine.
- Start in a tabletop position on your hands and knees. Bring your knees out wide and your big toes together to touch. Sit your hips back onto your heels, then walk your hands out in front of you to lower your chest down to your mat. Bring your forehead to rest down. Pause here for 1 minute to settle in.
- Keep your hips sitting back on your heels and thread your right arm underneath your left to find a twist. Your right shoulder and temple should rest on the mat. Roll open onto the right shoulder a little bit more to feel a stretch on the inside of the right shoulder blade. Then pick up your left arm, bend the elbow, and wrap it around your lower back. Hold for 2 minutes. Place your left hand back down, unwind and come back to your regular wide-knee child’s pose for a few breaths.
- Switch sides and hold for 2 minutes. Then unwind and hold your regular wide-knee child’s pose for a few breaths.
Sleeping Swan | 2 min per side
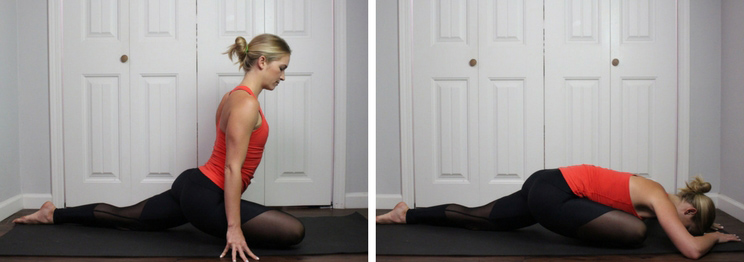
This pose helps to relieve pain and tension in the hip joints and the lower back. This is a great pose to do if you suffer from sciatica.
- Begin in a tabletop position on your hands and knees.
- Slowly pick up your right leg and draw the right knee forward. Line up your right knee behind your right wrist. Your shin should go across the top of your mat but does not need to be parallel. Flex your right toes back towards your shin to protect your knee joint. Square your hips forward and sit up tall. Take 3 slow, controlled breaths here. You should feel a stretch in the right hip. If it feels like too much, or you feel any pain in your knee, remember to always back out of it.
- After 3 breaths, you can choose to keep your chest upright or, if you’d like to feel a deeper stretch in the right hip, begin to lower your chest towards the ground. First walk your hands forward and lower to your forearms, and if you can still handle more, lower to your chest and forehead. Hold for 2 minutes. Then walk your hands up to lift your chest, press into your palms, and lift your right leg up and back. Shake out the right leg and then return to your tabletop position to switch sides.
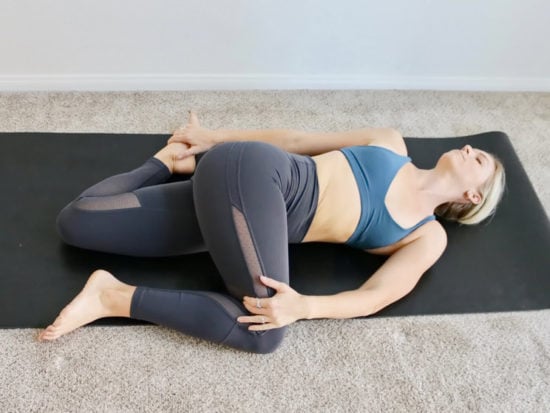
Shoelace Pose with Wrist Stretches | 1 min per side
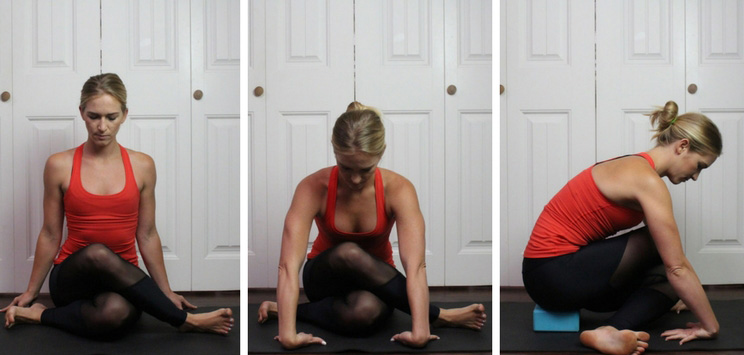
This pose helps to release the joints of the hips, lower back, and the often neglected wrists.
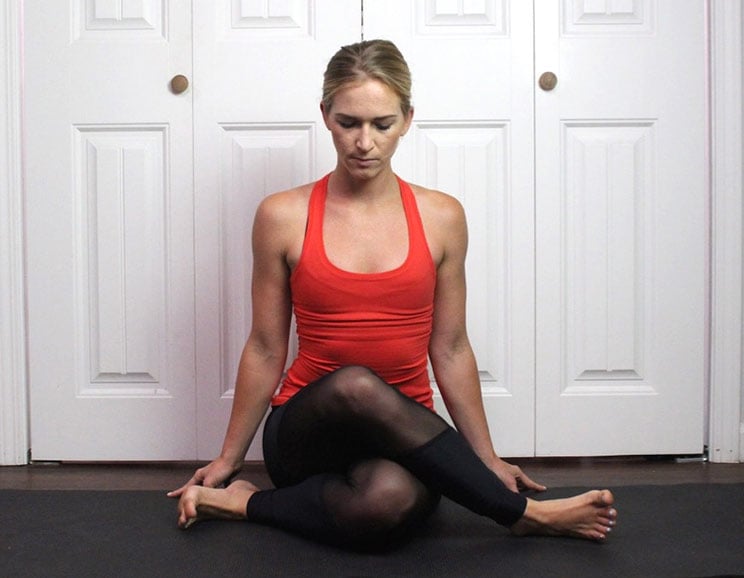
- Begin kneeling on your hands and knees in a tabletop position. Cross your right leg behind your left so that your knees are crossed. Keeping the knees crossed, bring your feet out wide towards the edges of your mat. Slowly lower your hips down between your feet so that you are sitting with your legs crossed in front of you. If this is uncomfortable, place a block underneath your sitting bones.
- Flex your feet to protect your knees and walk your hands back to sit up tall. Pause here for 1 minute. Notice the stretch through the hips.
- Then, find your wrist stretch by flipping your hands so that the tops of the hands are on the ground and the fingertips are pointing towards your. Lean into the hands gently to feel the stretch through the wrists. Hold for 1 minute and then slowly rise up to release and switch sides.
Toe Squat | 2 min
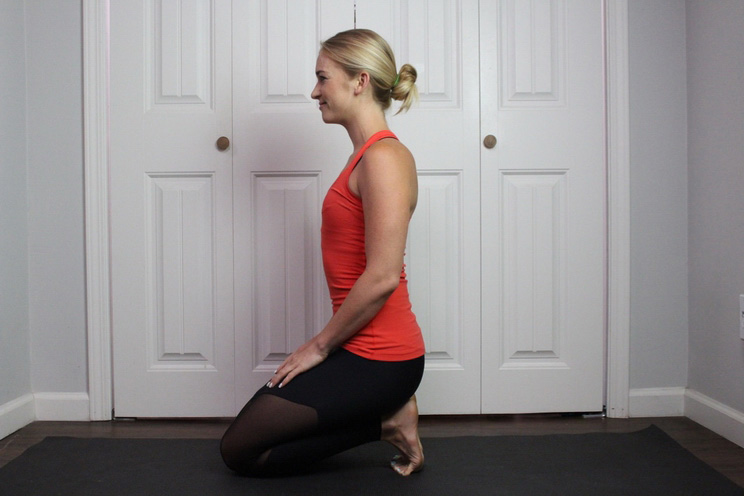
This yin pose releases the joints of the toes, ankles and plantar fascia. While intense, this pose is important in making sure we don’t neglect our feet and ankles.
- Start in a tabletop position with your toes tucked.
- Walk your hands back towards your legs and slowly lower your hips onto your heels. Make sure your toes are tucked under enough so that the weight is on the balls of your feet and not your tiptoes.
- Sit upright with your chest and reach down to readjust your pinky toes to assure that they are tucked under. Place your hands on your thighs, engage your lower belly, and focus on your breath. Hold for 2 minutes. To come out, walk your hands back out to a tabletop position, untuck your toes, and paddle out the tops of the feet on your mat. You’ll feel a rush of blood come back in.
Tip: Like most yin yoga poses, if you are new to this pose, it can feel pretty uncomfortable. Stay focused with your breath and breathe through the discomfort. If it begins to feel painful, then make sure to come out of it.
Supported Fish with Broken Bridge Legs | 3 min
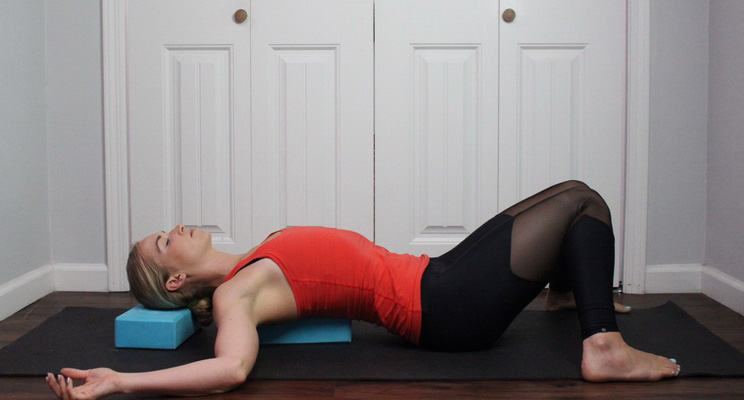
The supported fish yin pose helps to relieve tension in the joints of the chest and shoulders while the broken bridge pose with the legs helps to release the joints of the hips and lower spine.
- To begin, place one block horizontally at the top of your mat and one block a few inches lower going vertically down your mat. The blocks should be on the lowest or the medium setting.
- Sit in front of the blocks with your knees bent and your feet flat on the mat. Lean back into your palms and slowly lower yourself onto the blocks. The block at the top of your mat should support the back of your head and the other block should rest between your shoulder blades. Your butt should stay on the ground at all times.
- Cactus your arms so that your elbows are in line with your shoulders and your palms are face up. Close your eyes and draw deep breaths into your heart space. Hold for 3 minutes.

(Your Next Workout: 10 Easy vs Advanced Yoga Modifications)


 Cauliflower Grilled Cheese Sandwich

Show Comments