An easy guide to minimizing your risk of injury before making the jump to jump training! Plus, a how-to on jumping safely and efficiently.
How many of you love to do classes that involve jumping? Or how many of you would like to have the ability to jump without worrying you’ll get injured? If you answered yes to any of the above, then this article is for you. Find out how to screen yourself and how to train to minimize your risk of injuries before taking on a jump training program.
Jumping is a complex skill set that requires strength, mobility, and power. When we look at the elements of jumping, there are two parts: load and takeoff. Together these create jumping mechanics.
Looking for an easy way to get started working out?
Grab our FREE Beginners Workout Guide - 3 Weeks To Tighter Abs, Sculpted Arms, And Toned Legs, by clicking here!
- The loading phase consists of a sudden drop using hip, knee, and ankle flexion in addition to using a slight forward lean of the trunk and arms.
- The takeoff phase consists of a coordinated trunk and arm swing forward while applying a downward force into the ground.
The key to starting a jump training program is to learn to jump and land softly. The reason this is so important is because our tendons have to adapt to the sudden drop before the takeoff. This is what we call eccentric strength. Most of us think about the push off, which is the concentric strength. Eccentric strength is the ability to pump the brakes. As you can imagine, if you can’t stop, then your body is going to undergo too much force. Too much force repeated over time is a recipe for injury.
By training to softly absorb the landing, our body begins to learn how to time movements better. In other words, our hip, knee and ankle muscles learn to work together so that when we begin to speed up our jumps, we have proper shock absorption for our joints.
Injuries associated with jumping:
One or more of the following causes most of the jumping injuries:
- Poor preparation
- Poor technique
- Overuse, and high ground reaction forces.
Many of these injuries are overuse injuries of the knee and ankle. Anterior (front) knee pain is among the most common symptoms I see treating patients. However, there are also injuries that are more severe. Some of those injuries include stress fractures, ACL tears, and patella dislocations. Training proper jumping mechanics is crucial to staying injury free.
Jumping Screens
Now that we’ve discussed the mechanics required for jump training, let’s talk about how you can screen your own body. A movement screen is an examination tool to break down motion to find specific restrictions. In other words, screens help guide us to find any potential flaws and/or risk factors for poor movement or injury. We will use four primary screens to break down potential mobility restrictions so that you know exactly where to spend most of your time.
Squat (Full Body Assessment)
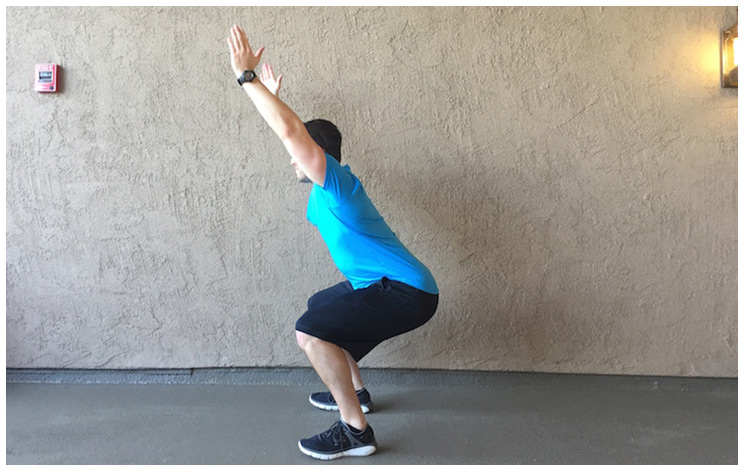
The first screen is a deep squat assessment. This screen helps us get a global look at how our body is moving. The deep squat looks at symmetrical hip, knee, ankle, thoracic spine, and shoulder movement at the same time.
How to Get a “Passing” Grade:
- Squat as low as possible with arms overhead
- Feet facing forward and shoulder-width apart
- Knees over the feet + knees don’t buckle inwards
- Trunk remains upright (parallel or vertical to the tibia bone)
- Heels don’t come off the ground
Mini Jump Screen
The mini jump is an advanced screen but gives the most information on neuromuscular control of the lower body. It lets you assess jumping specifically.
How to Get a “Passing” Grade:
- Knees are aligned at landing
- Knees don’t buckle inwards
- Foot placement is shoulder-width apart
- Land in same place each time
- No delay between jumps
Note: Before starting any screen or jumping program, consult with your doctor first.
Exercises to Prepare You for Jump Training
Hip strength is one of the most important components to build before starting a jump training program. Your hip external rotators and abductors help control your knees from buckling inwards, while your hip extensors control push off and assist when landing.
Squats | 4 sets of 8 reps
Squats are the foundation for jumping. Building up the glutes and legs is important for having proper strength to complete a jump.
To perform a proper squat, be sure to brace your core and initiate the movement from the hips. Everyone has a different anatomical hip structure, and some people may therefore need a slightly wider stance than shoulder-width apart. The key is to avoid flexing your low back at the bottom on the squat.
Once you’ve mastered the body weight squat, you may add a small weight using a kettlebell or dumbbell. Holding the weight in the front of your body helps redistribute the balance between the front and back of your body.
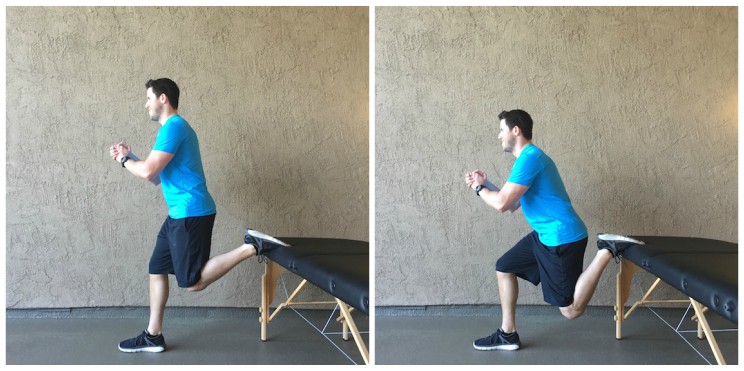
Bulgarian Split Squats | 3 sets of 12 reps
The Bulgarian split squat is a single leg dominant movement that helps train the legs and glutes. To perform this exercise, put one leg in front of the other. Place your rear leg on a bench or chair. Once you have your balance, sit back and squat down, maintaining control of your knee (no buckling inwards).
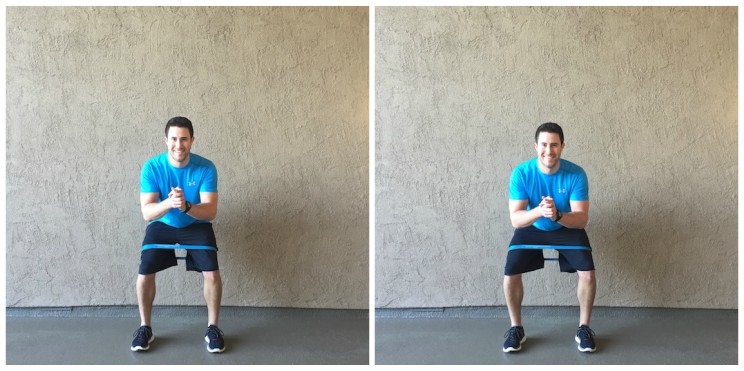
Isometric Glute Holds in Squat | Hold for 3 sets of 30 sec. | At the end of each 30 sec., push knees out for 10 reps
The isometric glute hold is an exercise designed to help you learn how to engage your glutes in a squat position. This will help you learn how to use your glutes in squats and jumps. To perform this exercise, squat down as you did in the first exercise. Next, contract your glutes and hold the squat position. Hold for all 30 seconds and then push your knees in and out to work the external rotators of the hips.
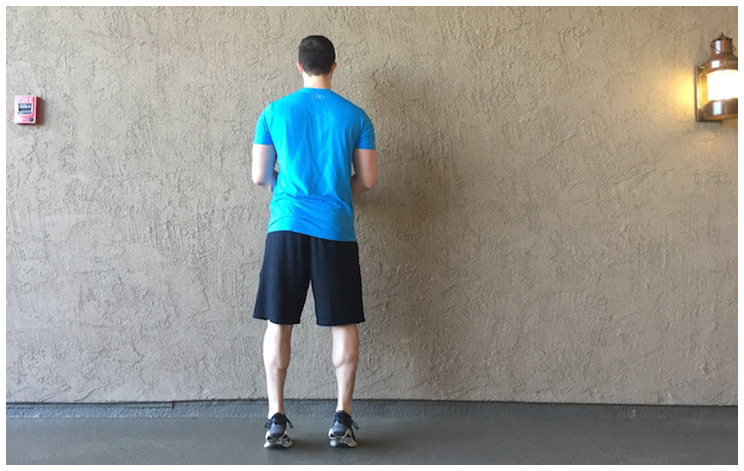
Calf Raise | 3 sets of 15 reps
Strengthening your calves is important for the final push off of your jump. Hold onto a stable surface for balance and push up onto your toes. Be sure to place the emphasis onto your big toe.
Glute Bridge | 3 sets of 8 reps
The bridge is a great glute and core exercise. With your upper back on a table or bench, contract your glutes and push off through your heels. To make this exercise more advanced, use a small weight or medicine ball.

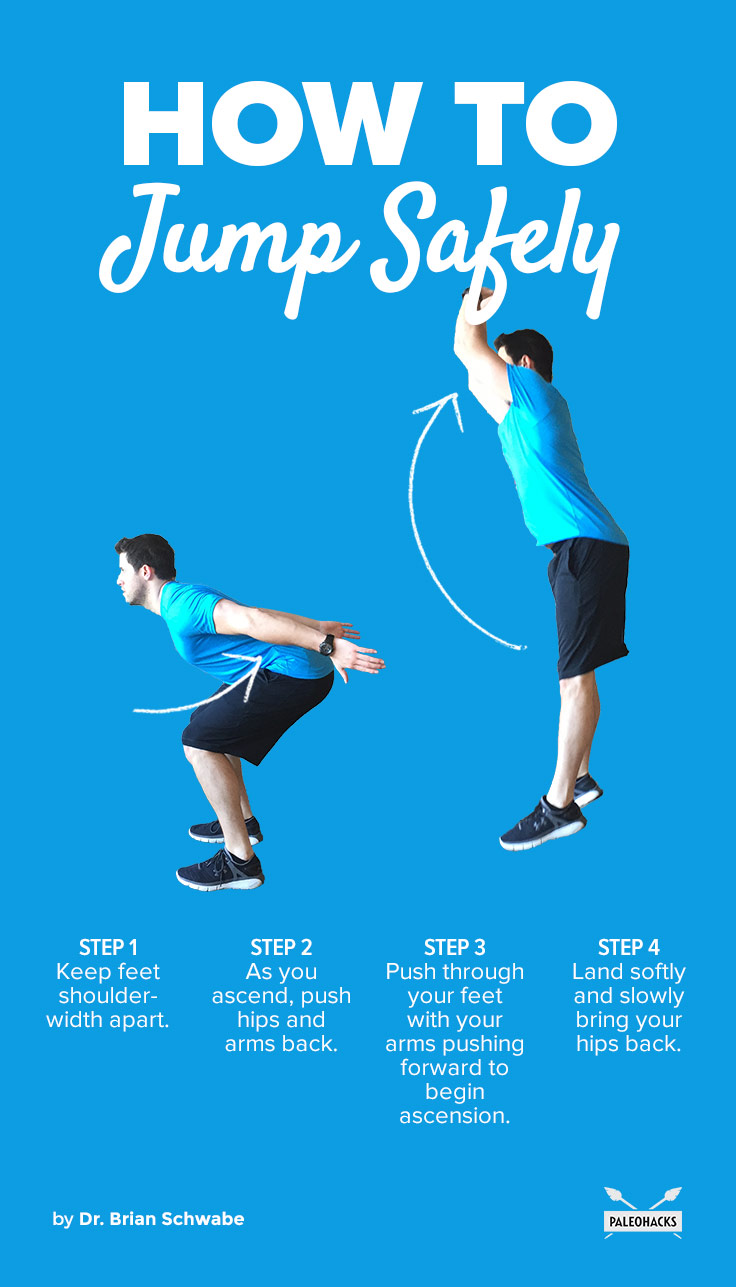
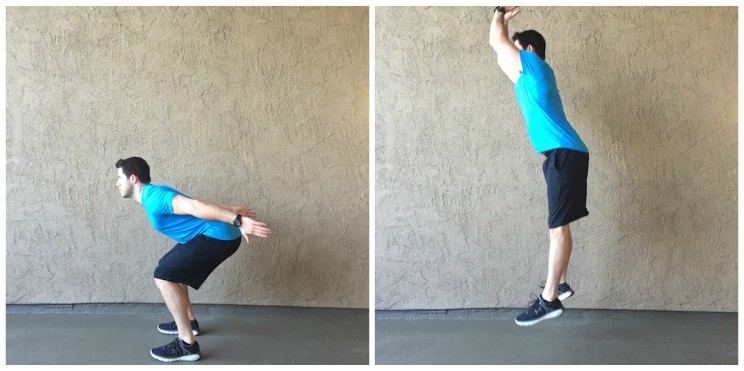
How to Jump Safely
Step 1: Keep your feet shoulder-width apart.
Step 2: As you begin to ascend, push your hips back (similar to a squat) and bring your arms back simultaneously.
Step 3: As your reach the bottom position, push through your feet with your arms pushing forward to begin ascension.
Step 4: Land softly and slowly, bringing your hips back to improve shock absorption.
Be sure to master good technique in jump training before increasing volume or load!
(Your Next Workout: How to Prevent Running Injuries (Screens + Correctives))



 Spicy Kofta Kebabs Baked on Cinnamon Sticks





Show Comments