The splits are an impressive show of flexibility and one of the best stretches you can do to alleviate tightness in your hips and legs.
Splits are often used in many physical practices like martial arts, yoga, gymnastics and dance, and people who do them tend to make them look easy. If you’ve tried the splits and you weren’t able to get all the way down, you might be wondering if you’ll ever get there.
Even if you’re not a yogi, martial artist or gymnast, you may enjoy the stretching benefits and pride you’ll get from being able to nail this awesome move.
Suffering from a sore neck, back and shoulders? Get our mobility guide to ease pain and soreness.
Get The FREE Mobility Guide To Fix Your Pain Today!
Here’s everything you need to know about the splits and how to do them:
When it comes to splits, there are two different types: Front Splits and Side Splits (right and left sides).
You might notice that one side is easier than the other, as it’s different for everyone.
Today, we’re going to walk you through 5 basic stretches you can implement into your routine to see rapid improvement towards nailing your first splits.
How long should you expect it to take?
The rate of progress will be different for everyone. If you’re relatively close to getting the splits already, then you may be able to achieve it in just a few weeks after implementing these 5 moves. At any rate, you should expect it to take you at least a couple of months before you can comfortably do the splits. One day or one week is not a realistic expectation of progress. Your muscles need time stretch, recover, and slowly adapt to the new demands. Don’t rush the process. When training for flexibility, patience is your biggest asset.
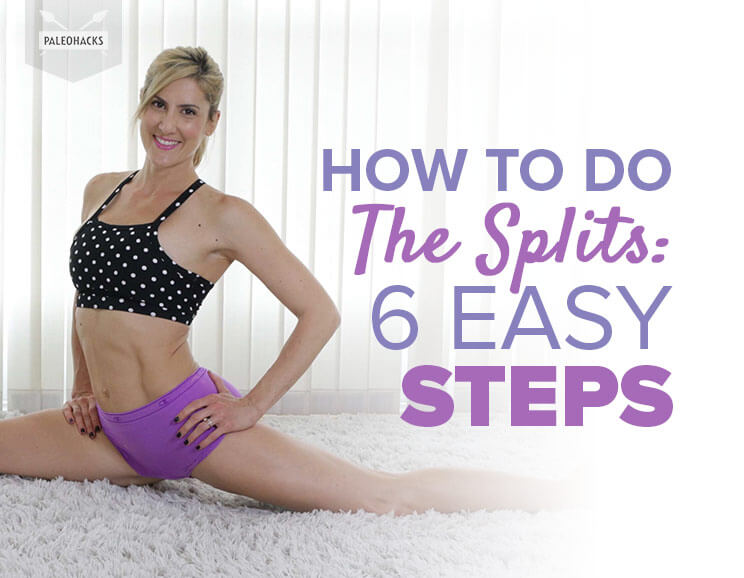
How to Do The Splits: 6 Easy Steps
Do this stretch routine daily (or at least 3 to 4 times per week) to start seeing progress. Remember, patience is key and you’ll eventually get there!
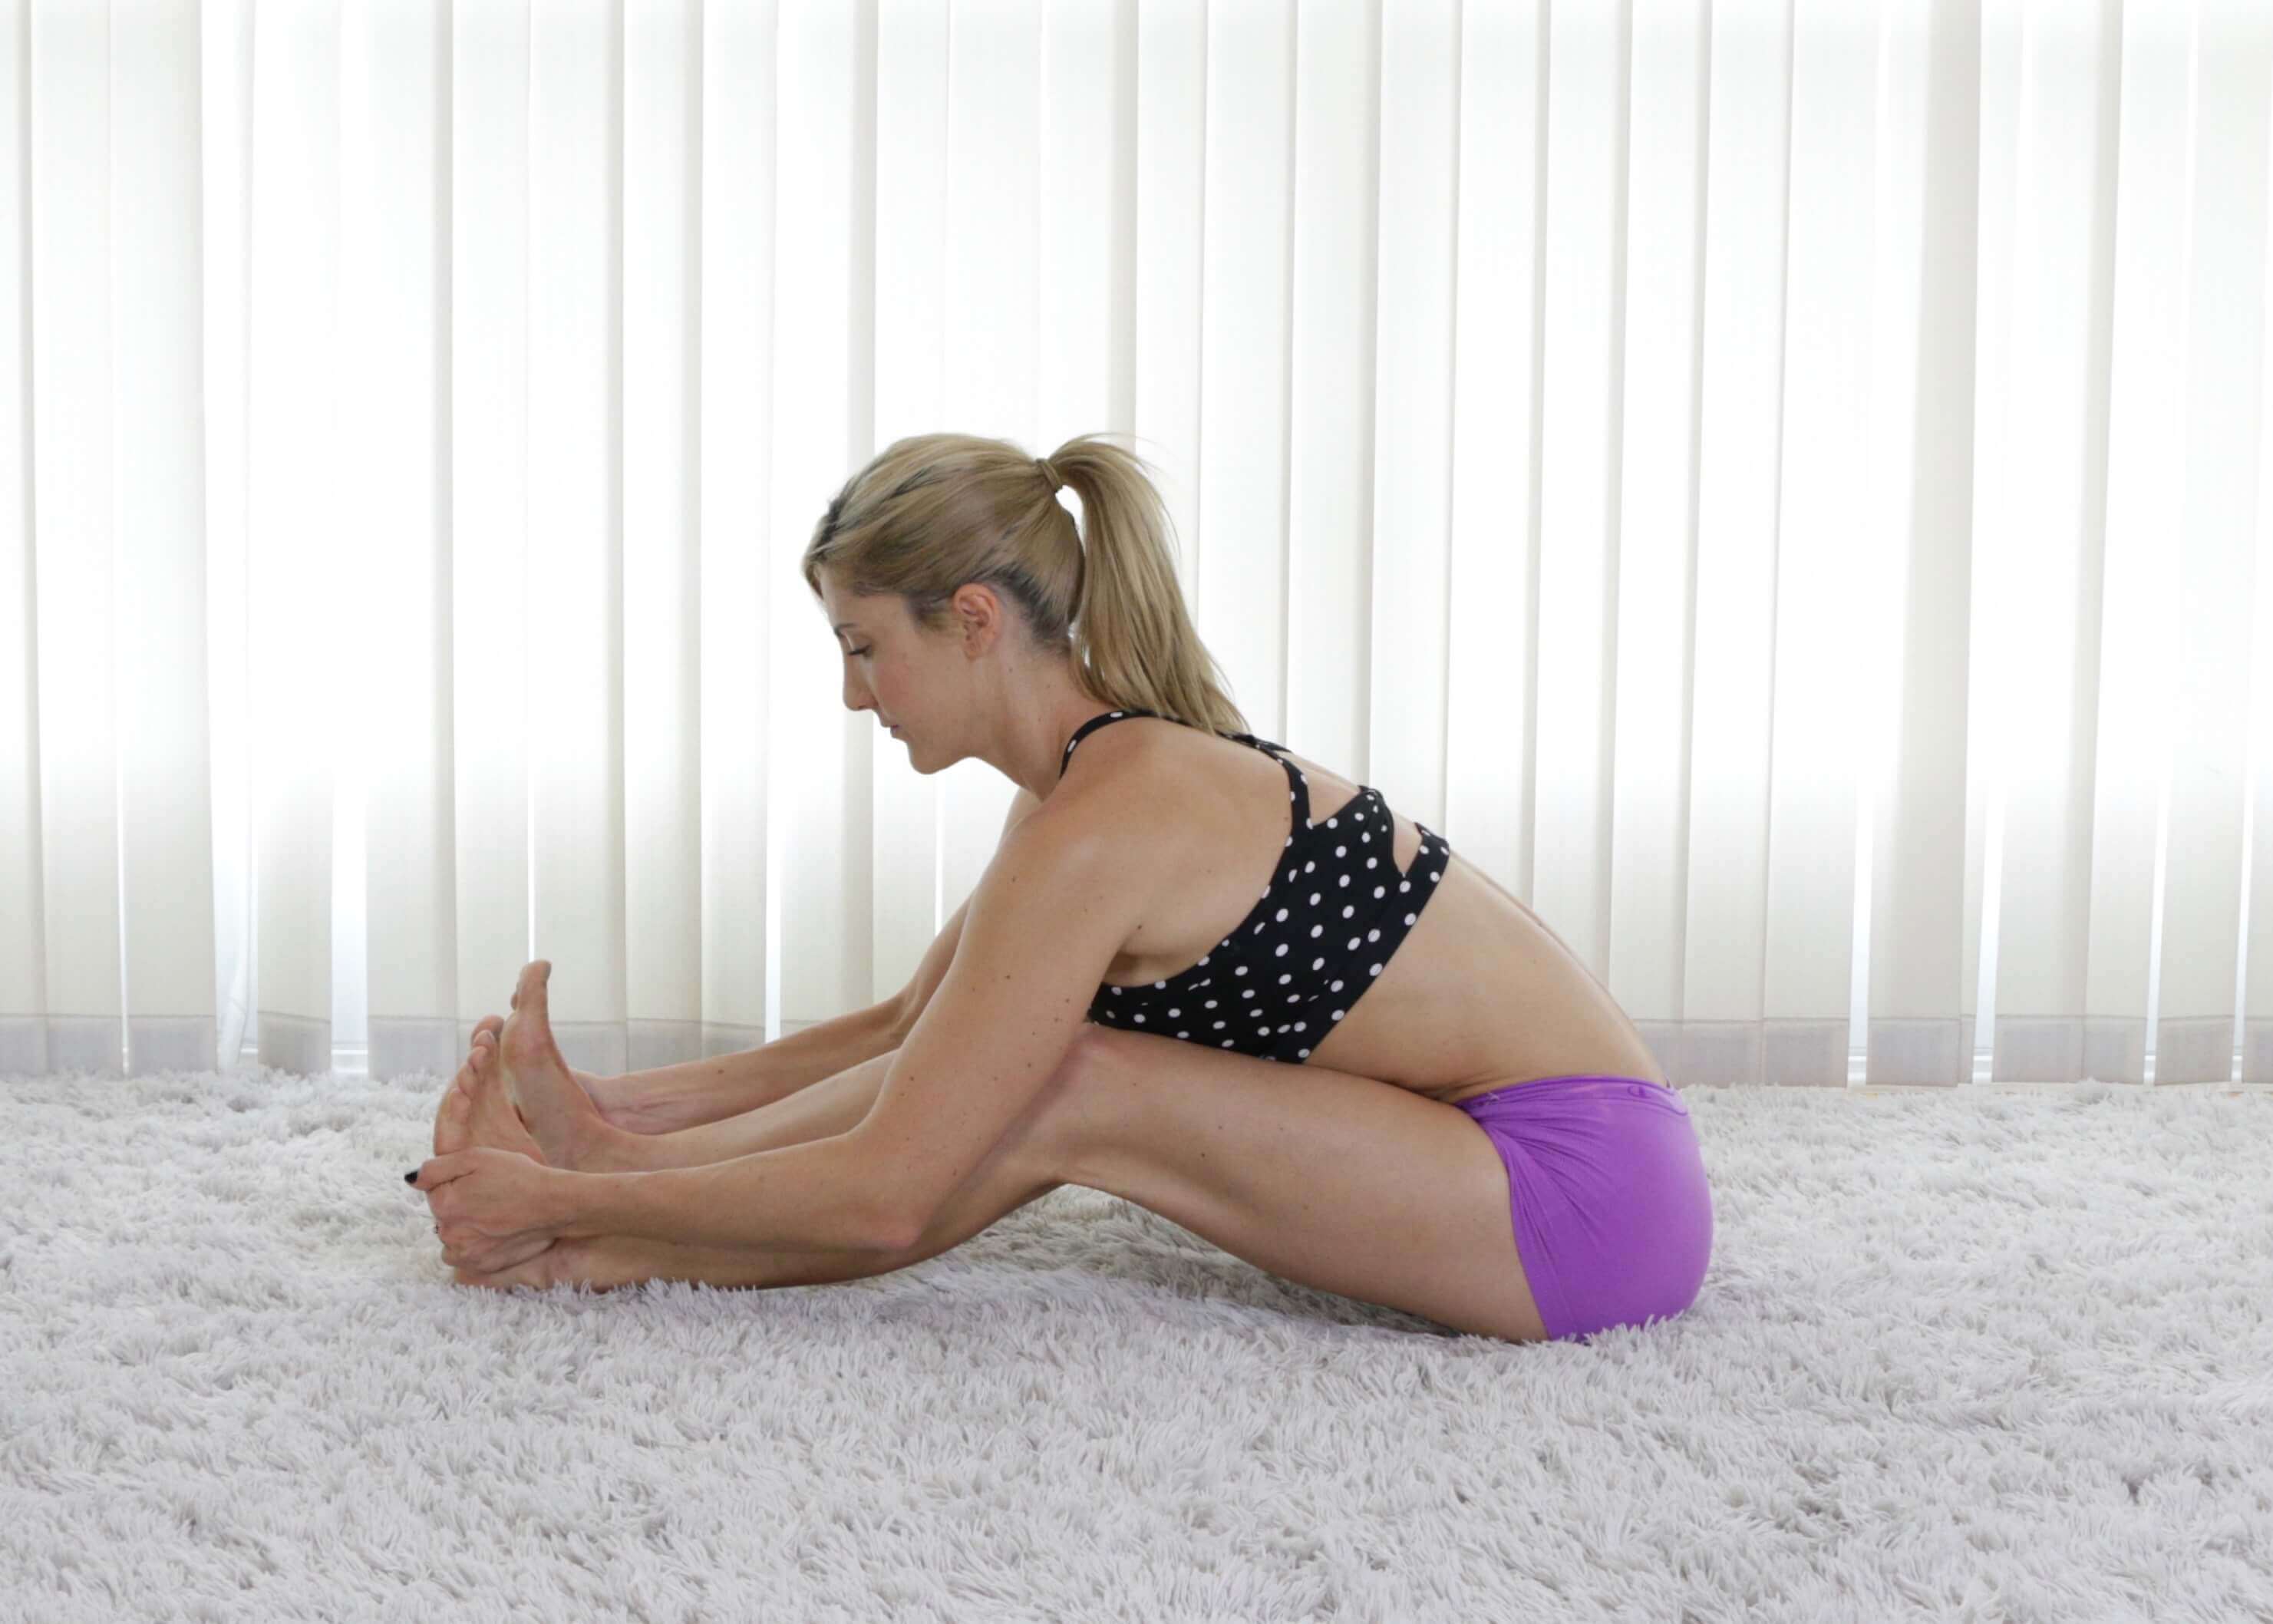
Seated Forward Fold | 60 sec

- Take a seat on the ground and stretch your legs out in front of you.
- Reach forward to grab a hold of your feet and bend your knees so that your chest meets the top of your thighs. This is important, as a gap between your torso and your legs will take away from the stretch.
- Slowly begin to straighten your legs, taking deep breaths and maintaining the contact between your torso and thighs.
Tip: Do not force your legs straight. With deep breathing and time you will slowly work towards straighter legs.
Why it’s important for the splits:
The splits require flexibility of the hamstrings. This seated forward fold stretch is a great way to lengthen your hamstrings. The main benefit of this stretch is that you can control the intensity just by straightening or bending your knees just a little bit. With practice and continuous use of this stretch, your hamstrings will become more flexible and better prepared to do the splits.
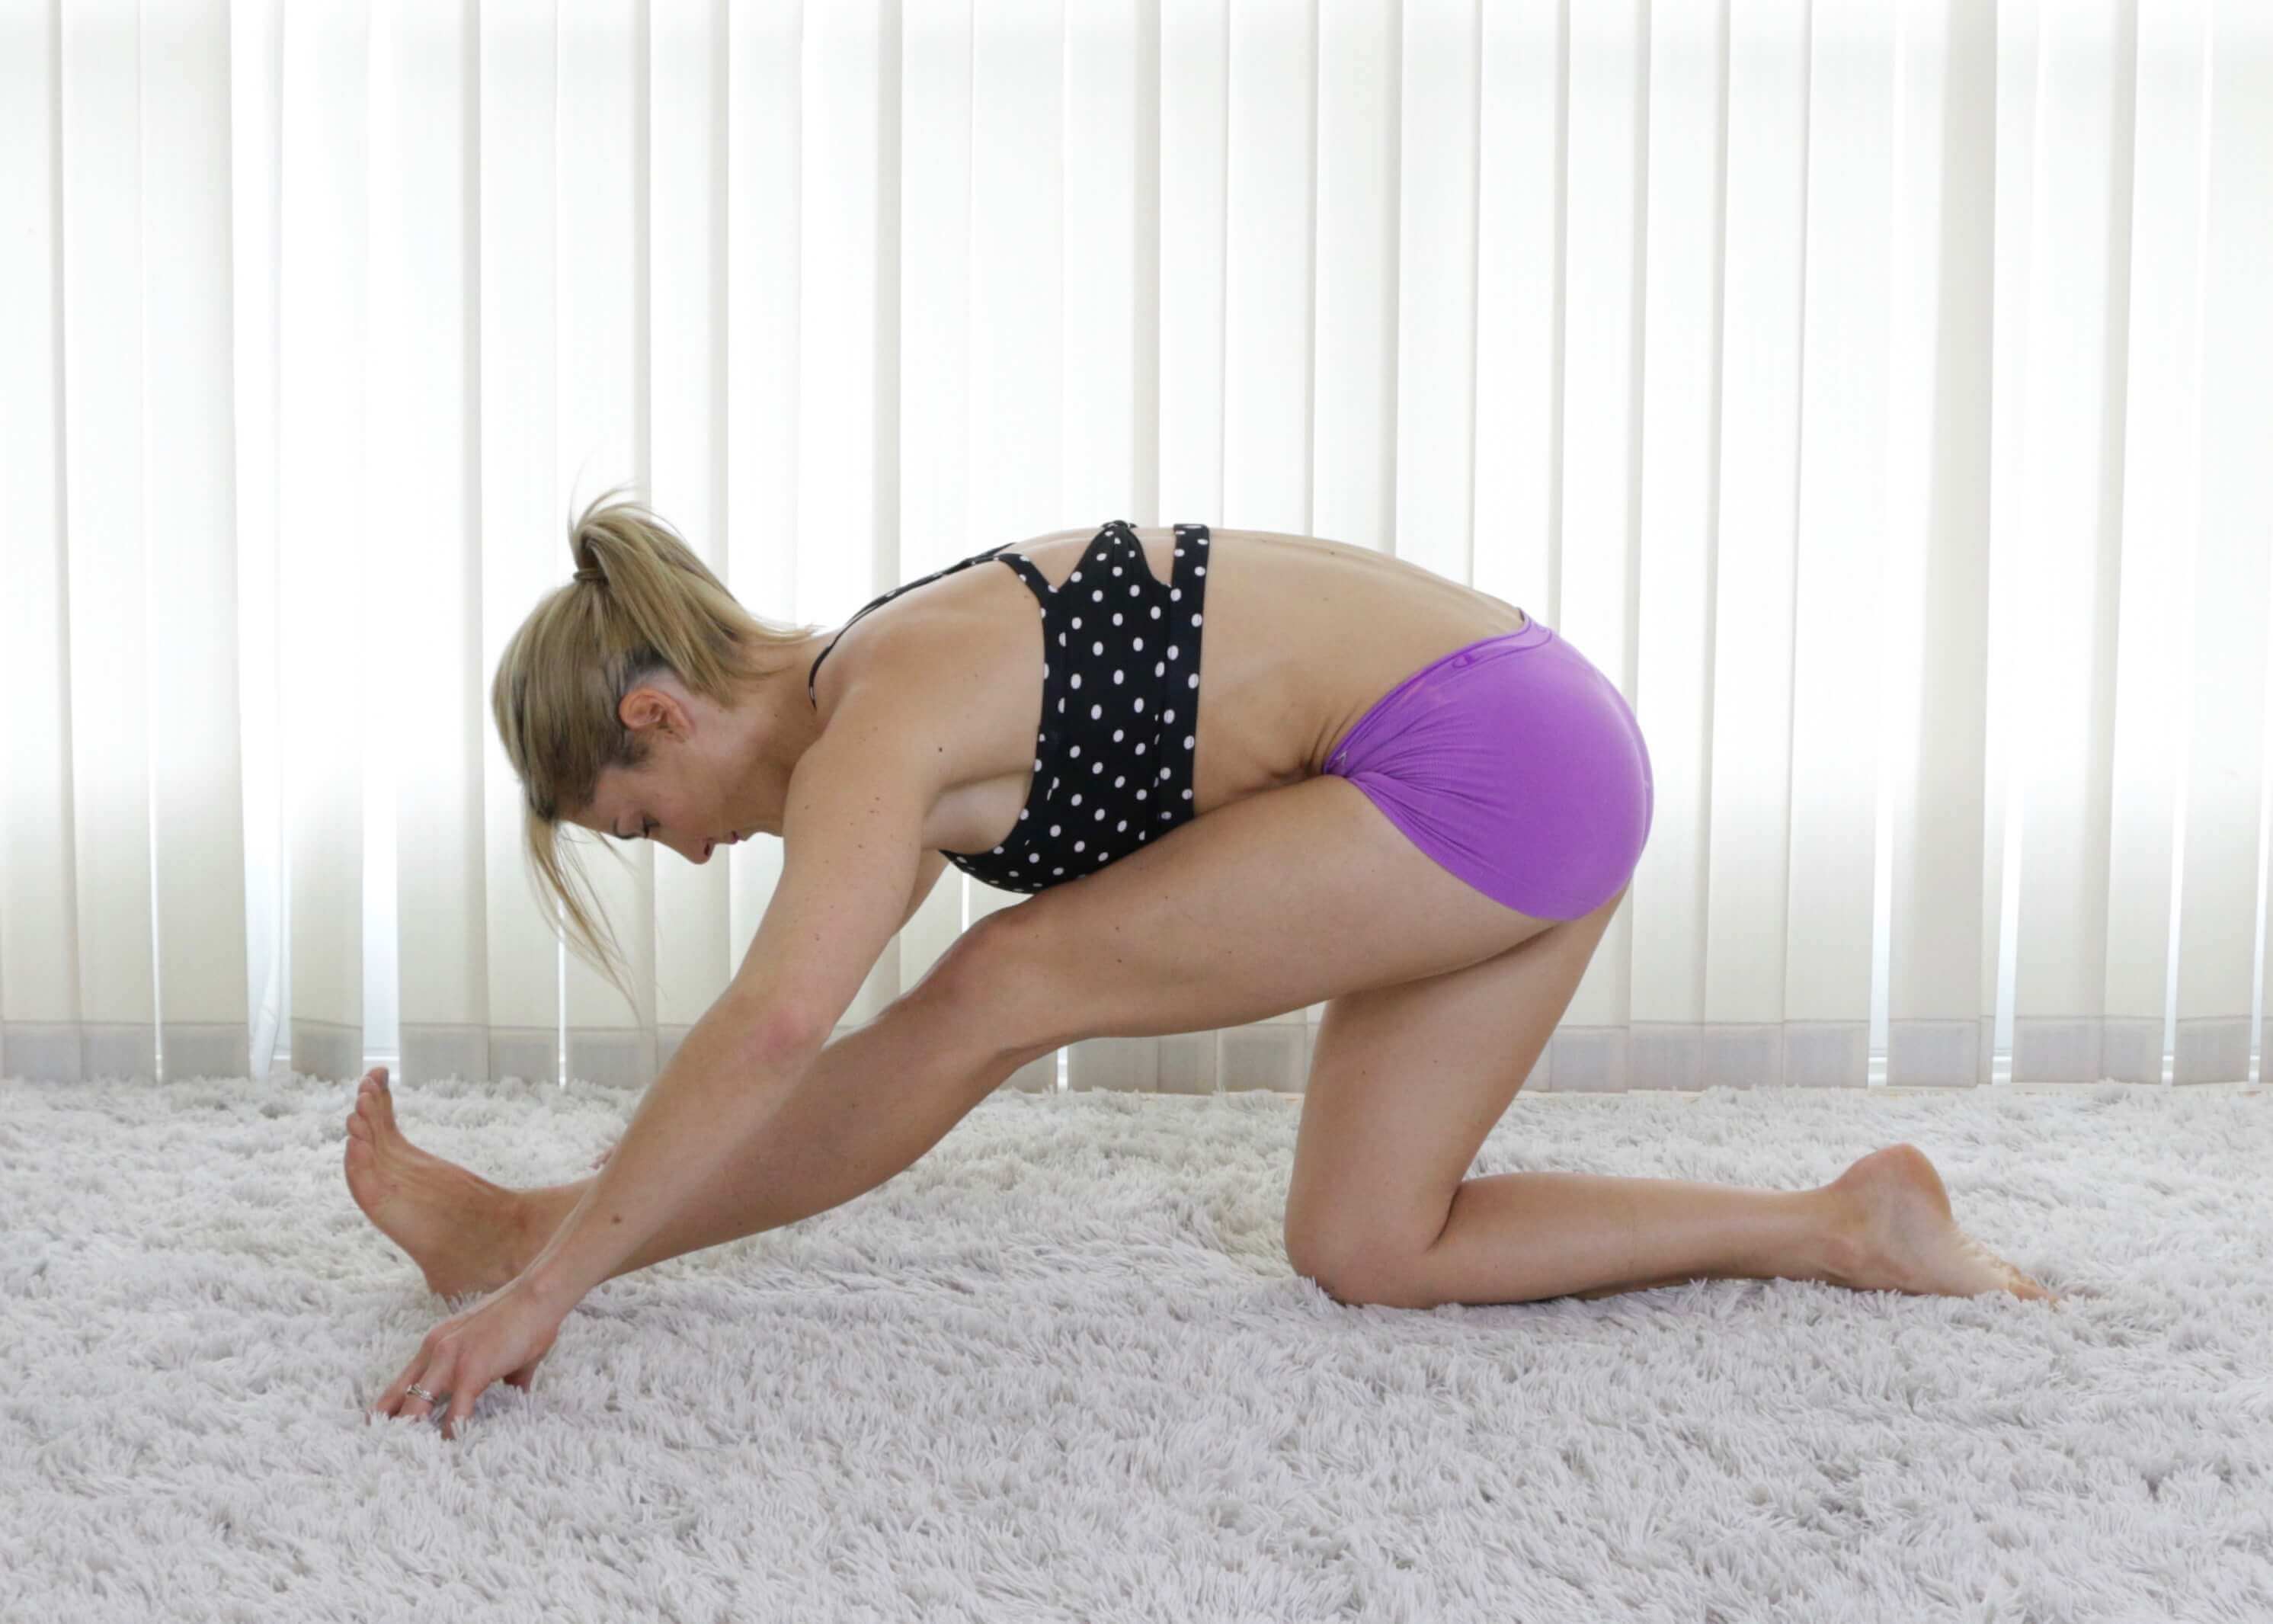
Kneeling Hamstring Stretch | 30 sec per side

- Kneel on one knee and bring the other leg straight out in front of you.
- Square your hips to make sure you are not twisted to the side
- Lower your torso towards your front leg and place your fingertips on the ground on either side of your foot.
- Work the same way you did in the first stretch, starting with a bent knee and slowly straightening it with deep breath and focus.
Tip: Keep your front foot flexed to help make sure your hamstring is in a lengthened position and your muscles are active. Even though you’re stretching, you still need to engage your muscles to help the process along and achieve more length. A passive stretch is not as effective as an active one.
Why it’s important for the splits:
This stretch helps you to lengthen your hamstrings independently, allowing you to correct any imbalances and give each side its own focused attention. If you notice one side is tighter than the other, spend a little extra time there, working to balance out the sides.
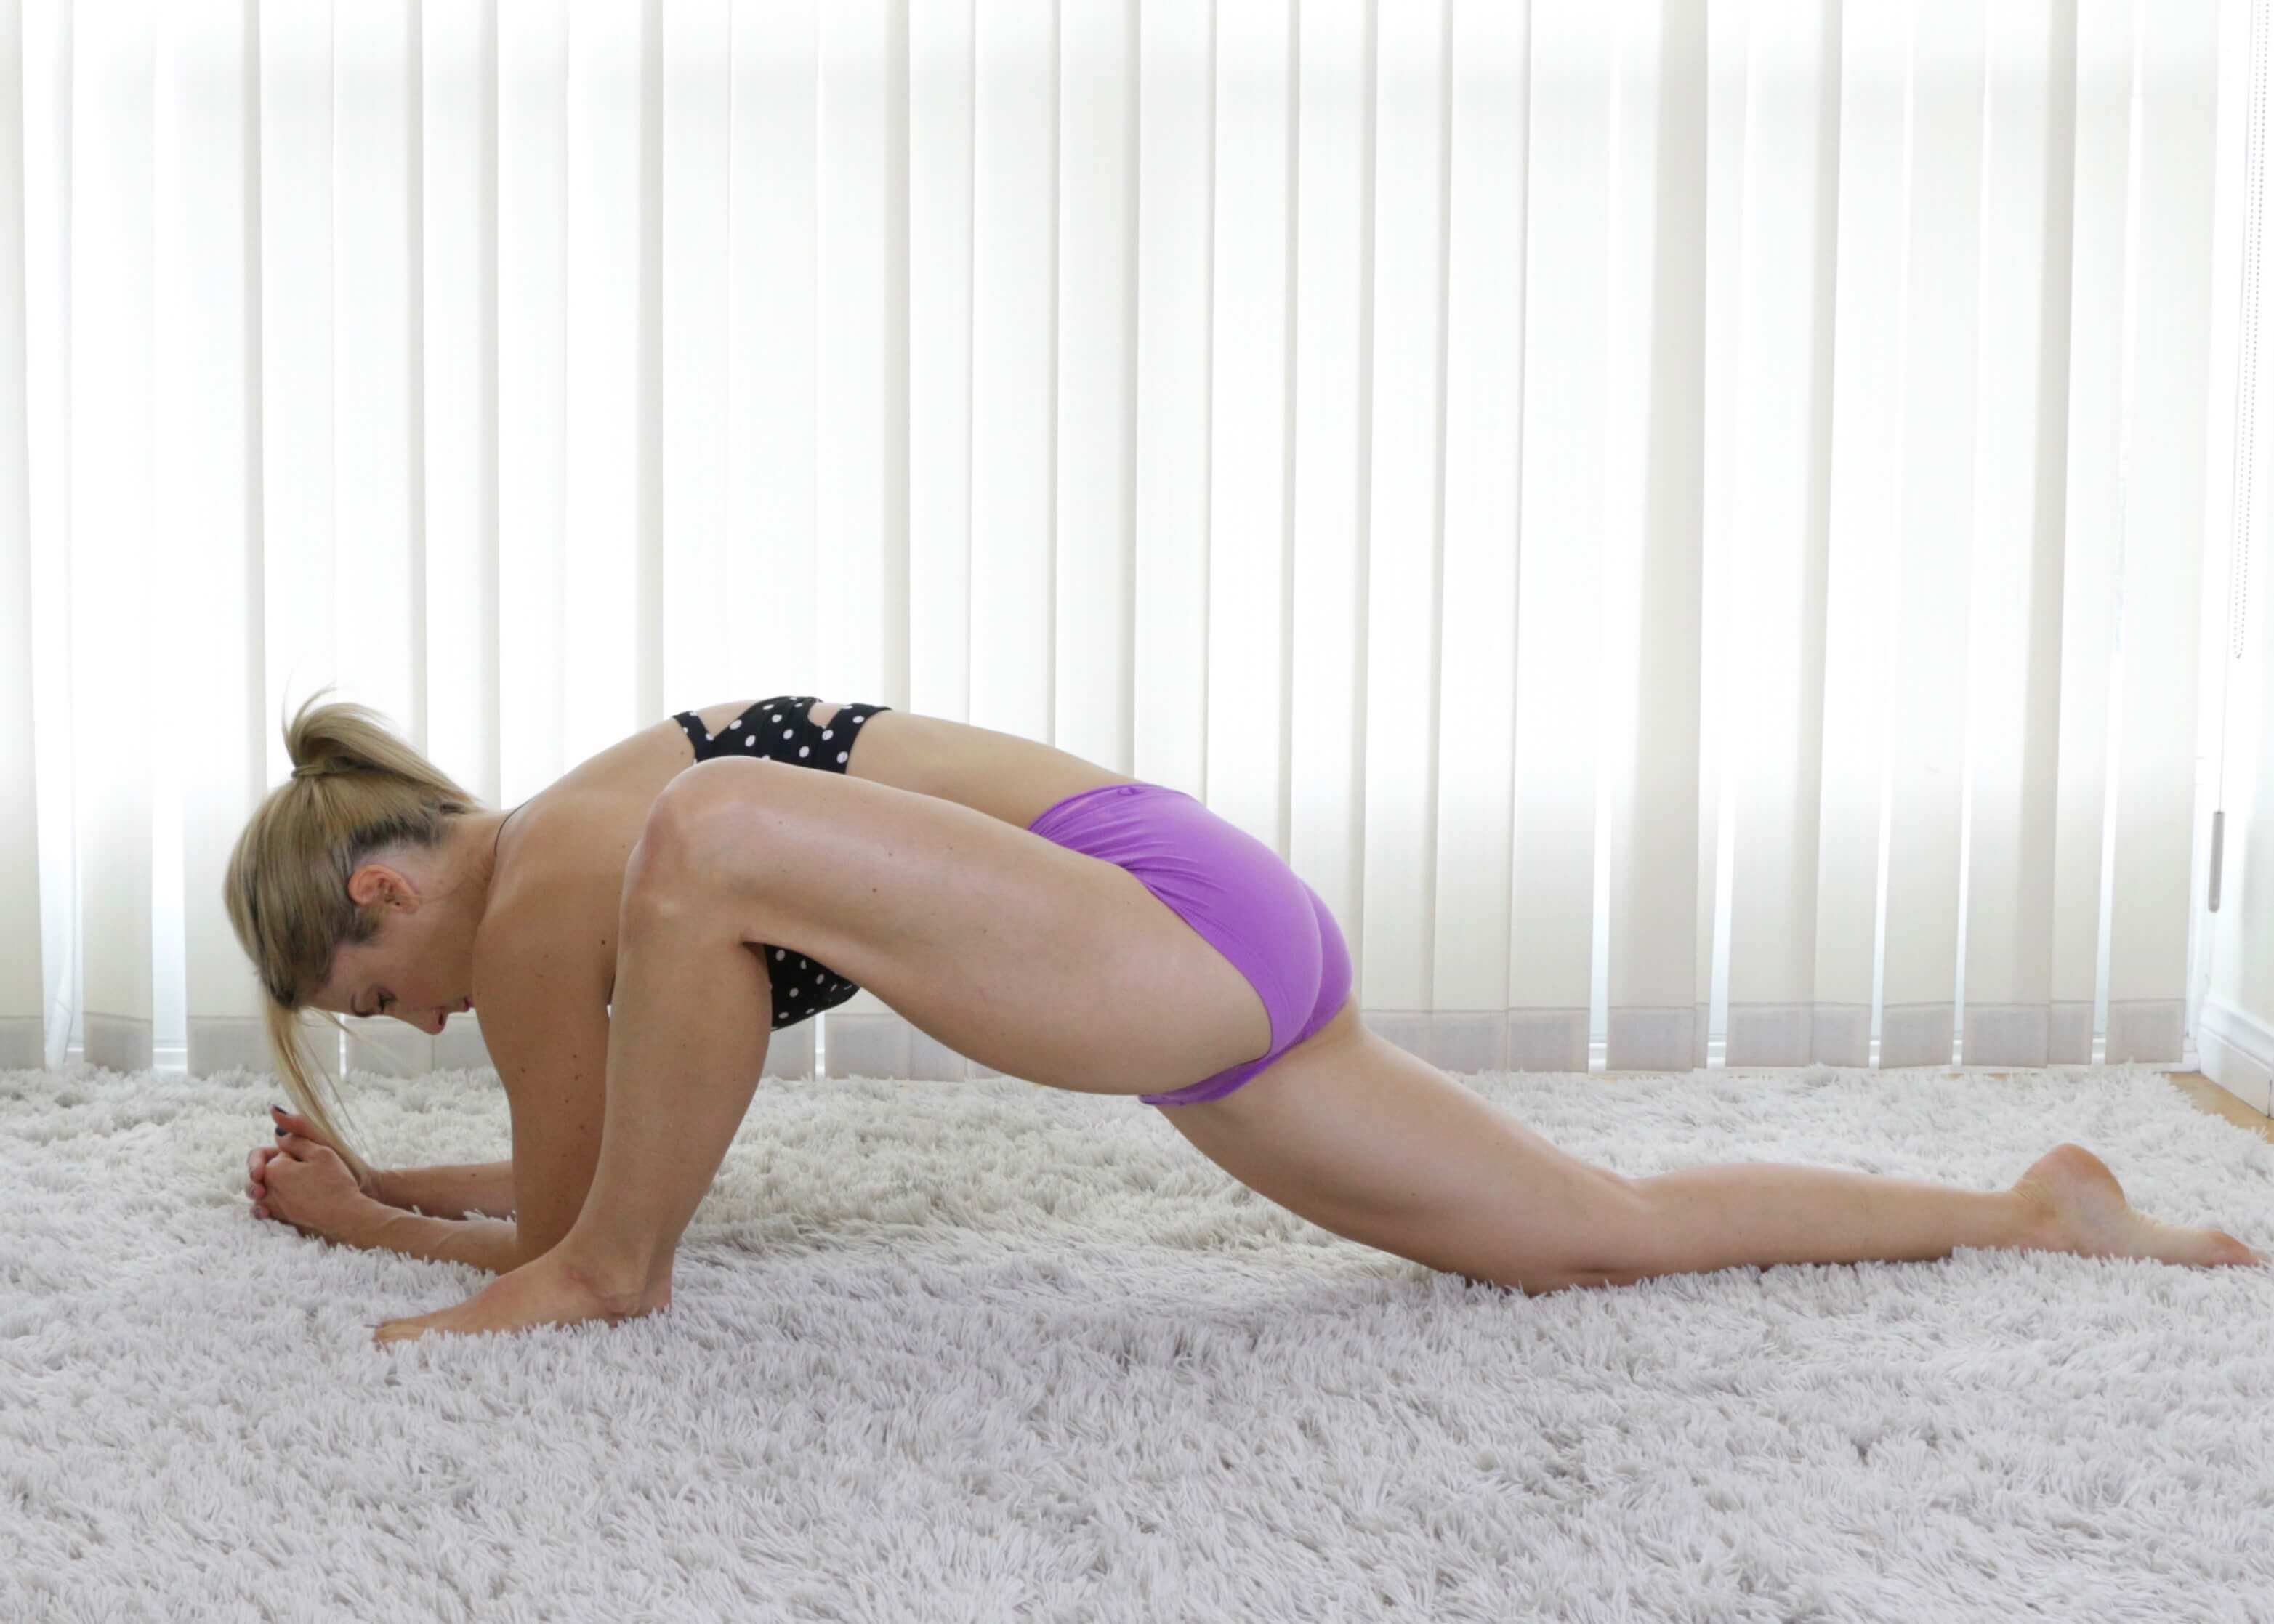
Deep Runner’s Lunge | 30 sec per side

- Start in a lunge position with your front knee bent at a 90-degree angle and your back leg straight.
- Lower your elbows to the floor on the inside of your front leg.
- Work to press your hips towards the ground and slide your back leg farther back.
Tip: If you can’t get your elbows down all the way, then place your hands down on the ground instead or use yoga blocks or props under your elbows. The key movement here is the hips lowering towards the ground, so it’s okay if your torso doesn’t get as low.
Why it’s important for the splits:
The main focus of this stretch is your hip flexors, a very tight area for most people who spend a lot of time sitting. You’ll need flexible, open hips to get into the splits, and this stretch helps you achieve that.
Lunging Quad Stretch | 30 sec per side

- Stay in that same lunge position but lift your back foot up and catch it with your opposite hand.
- Carefully pull your foot towards your butt until you feel the stretch.
- Breathe deep and allow time for your muscles to relax and lengthen.
Why it’s important for the splits:
Tight quads could be preventing you from getting your full splits. If this stretch feels very intense for you, then it’s likely one of the most important for you to focus on. By lengthening your quads, you’ll have an easier time getting your back leg to rest flat against the floor.
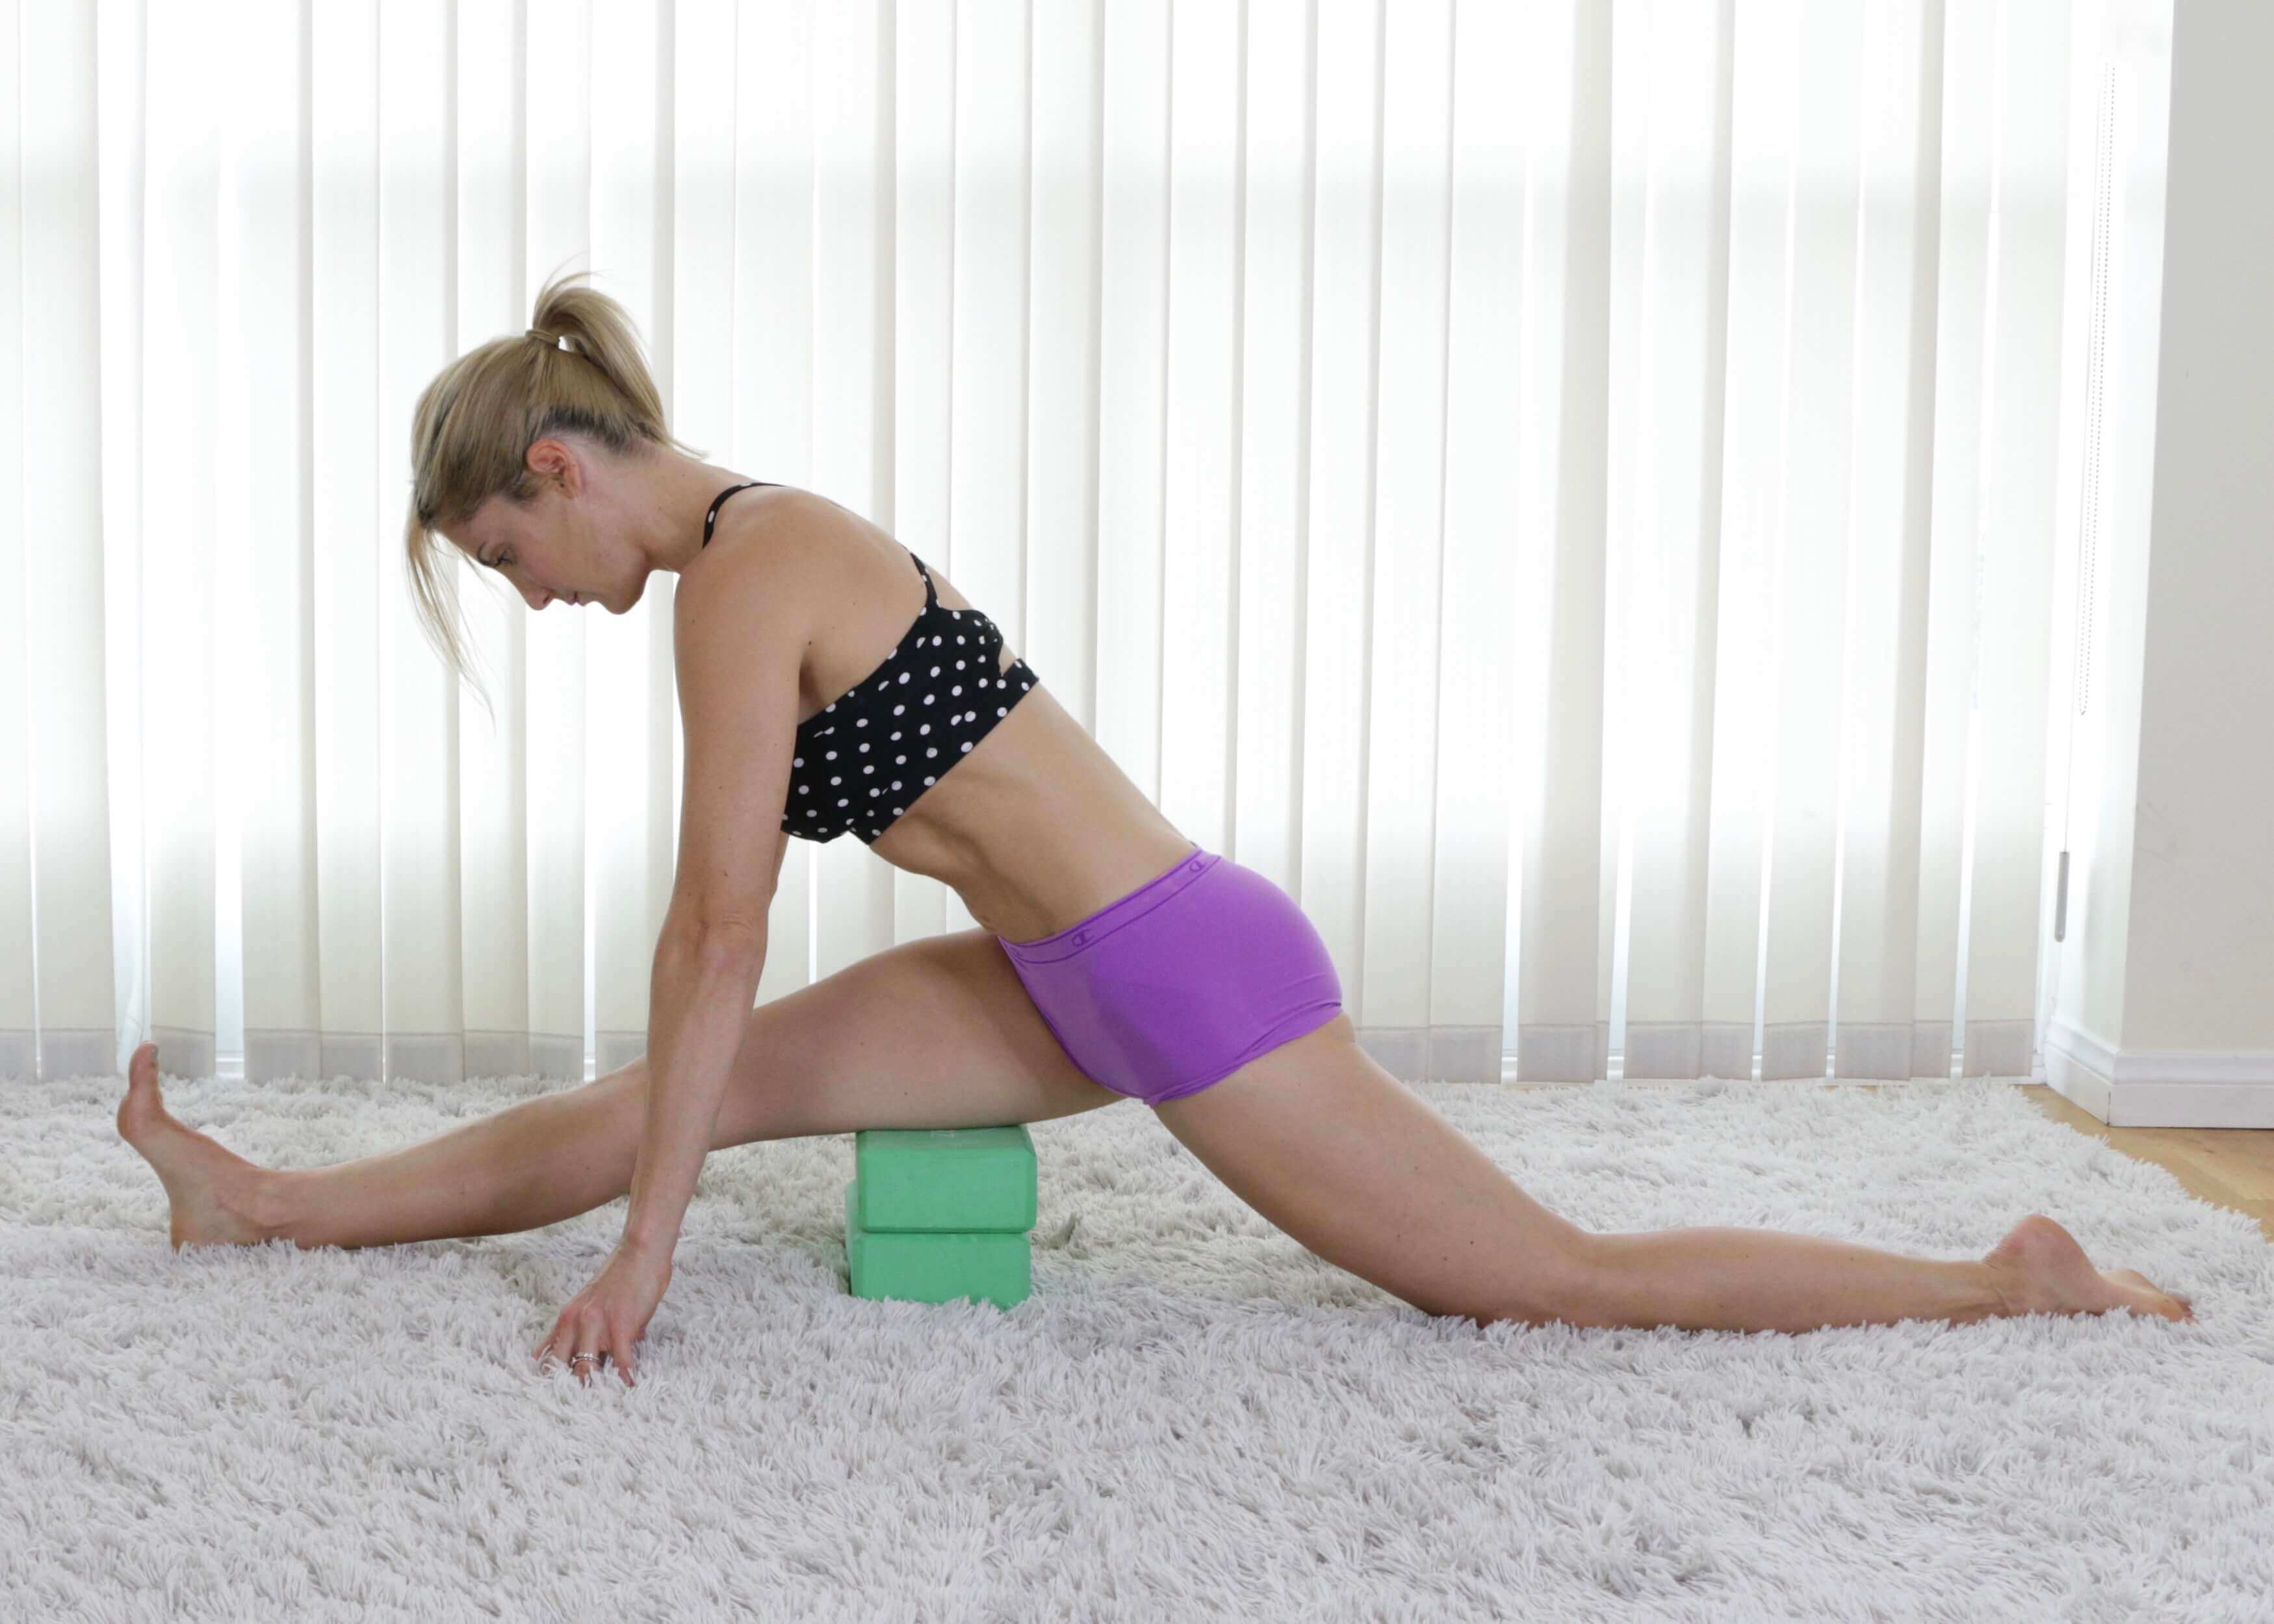
Block Supported Splits | 30 sec per side

- Start in the kneeling hamstring stretch and place 2 yoga blocks directly under your front hamstrings.
- Slide your back leg back to straighten as much as you can.
- Reach your fingers to the ground and lean your torso forward to intensify the stretch.
Tip: If 2 blocks are not enough height for you, then add an additional 1 or 2 blocks. The goal is for you to be able to hold it for a minimum of 30 seconds per side, but the longer you stay, the more comfortable your body will get holding this position. Over time, remove one block, then the next, and before you know it, you’re in the splits!
Why it’s important for the splits:
This stretch is the closest to doing the full splits, so this is great “practice” for the real thing. This supported version will help you get there safely and without forcing it.
The Splits
- If you don’t feel ready to do the full splits, continue to work on the 5 stretches paying special attention to those areas that need the most work. When you are ready to go for it, start with the block supported splits.
- Remove one block, then both, and slowly lower into the full splits by sliding your front heel forward and using your hands on the ground to guide you.
- Breath deeply and focus on relaxation and muscle lengthening.
Tip: Keep in mind that nailing the splits will likely take more than one or even a few practice sessions. If you aren’t able to nail it on your first attempt be patient, schedule this practice into your weekly routine, and keep at it. Practicing consistently and regularly is your best bet.
(Your Next Workout: 9 Yoga Inversions to Help You Nail a Handstand)




 Blueberry Dream Ice Cream with Coconut Milk






Show Comments