Hello, pull-ups! Being able to lift your entire body weight off the floor is an empowering feeling. Follow our easy guide to learn how to do your first pull-up.
Personally, there is no other exercise that makes me feel stronger than finishing an entire pull-up set in the middle of a crowded gym. It’s an amazing rush of adrenaline and one of the most effective moves you can do for your upper body strength.
Before you get started, plan out how many times per week you will practice. Pick a frequency of practice that works with your schedule and stick to it! You’ll need to practice regularly if you want to see results.
Looking for an easy way to get started working out?
Grab our FREE Beginners Workout Guide - 3 Weeks To Tighter Abs, Sculpted Arms, And Toned Legs, by clicking here!
From my experience with clients, your frequency needs to be a minimum of 3 times a week to see improvement. However, keep in mind that practicing pull-ups daily is not recommended, as you may start aggravating your joints and your muscles won’t have enough recovery time to become stronger.
That being said, muscle recovery is crucial for your success. I recommend you choose either a frequency of 3 or 4 days a week. It only takes 10-15 minutes to practice, so it can be easily tagged on to the beginning of other workouts.
How To Do Your First Pull-Up
Here’s where I want you to start.
Step 1: Visualize
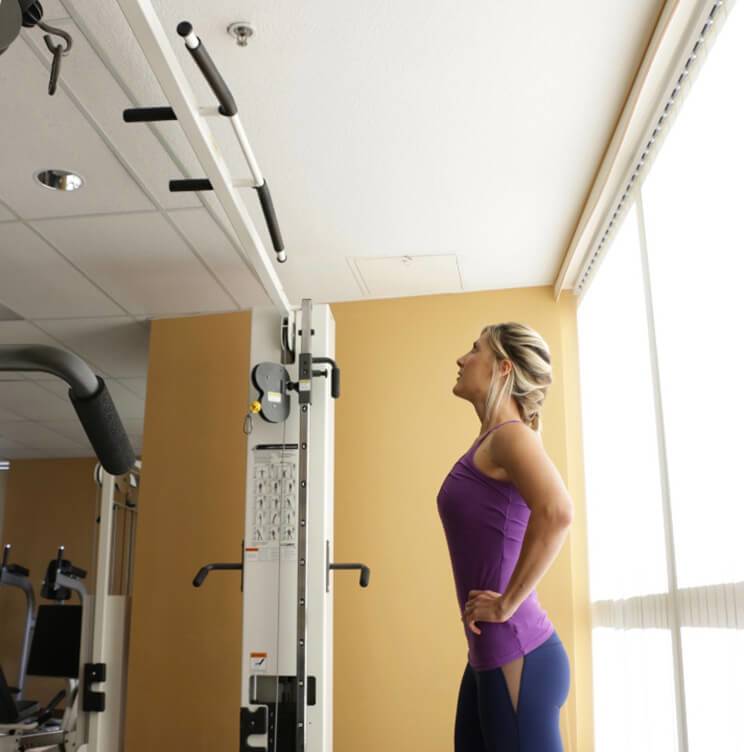
The first step is mental. You’ll need to start envisioning yourself pulling your chin up over the bar.
Quickly stop any negative thoughts or doubts that creep in, trying to tell you that you can’t do it. You can, and you need to know that you can. Not just think it, but really know it. It may sound like a step you can skip, but trust me, if you don’t believe you can do pull-ups, you never will. You must convince yourself not just that it’s possible, but that it WILL happen.
Step 2: Unassisted Reps
Start with Unassisted Reps (try for at least 1!).
Place a bench or step under a pull-up bar so that you can grab onto the bar without having to jump. Now TRY to pull yourself up. Even if you feel like it’s not going to happen, you must try and (I repeat) believe you can.
I want you to do this at the start of each practice session. Soon, you’ll surprise yourself.
If you get one rep, rest, then try for one more.
Keep trying until you have fully exhausted the possibility of doing another.
Step 3: Do 3 Sets of 4 Assisted Reps (1 of 3 Ways)
Whether you were successful with step 2 or not today, you can now move on to some form of assisted reps. Choose 1 of 3 ways below.
Partner Assist
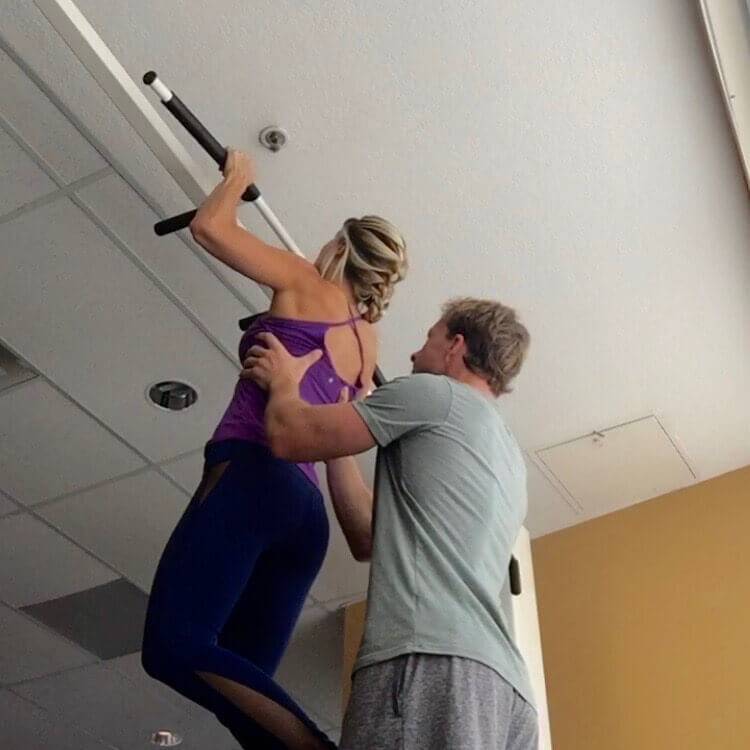
My first choice is partner assist. Ask someone to spot you and give you a little boost.
My favorite spot position is the back of the rib cage. Have your partner place their palms just behind your shoulder blades and press upward, lifting you past your sticking point.
Once you are at the top of the rep, they should remove their hands from your back, allowing you to slowly let yourself down.
Note: Make sure they know when to help and how much help you need. Too much help can take away from your progress. You should be doing most of the work yourself, with just a tiny bit of help if and when necessary.
Repeat for 4 reps, then rest as much as needed before the next set.
If you don’t have a training partner, then opt for one of these next two solo options.
Stretch Band Assist
Here’s how to do a stretch band assist:
The Set up
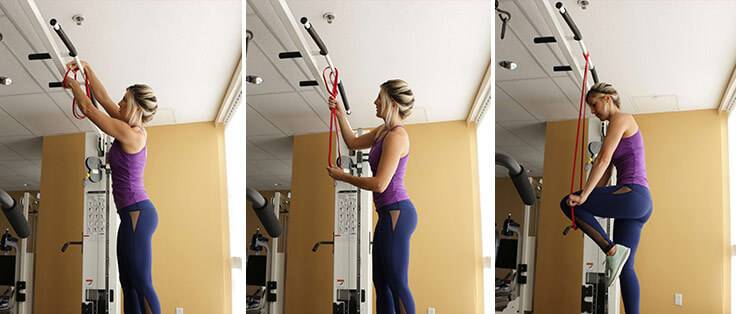
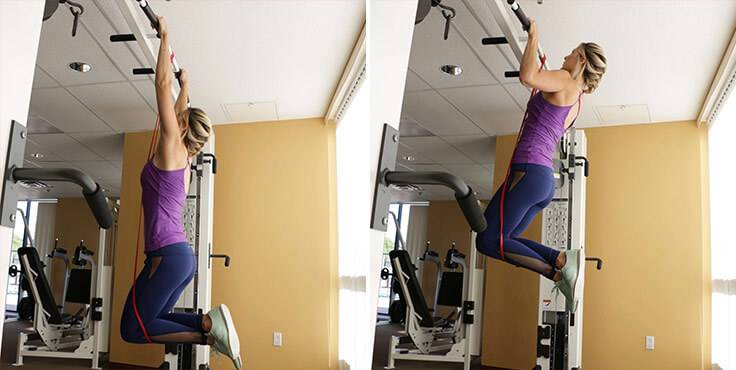
Loop a stretch band around the pull-up bar and tuck one end through the other, so that it’s firmly secured. Using a step underneath it, step up to the loop and place one bent knee inside of the loop.
The Reps
Grab the pull-up bar with both hands and press your knee into the stretch band so it’s tight all the way. Hang so that your weight is supported by the stretch band. Now pull yourself up so that your chin is over the bar. If 4 reps is easy with the strength of the band you’ve chosen, then either do more reps or switch to a lighter resistance band. You should be using a band thin enough that 4 reps is difficult to achieve.
Low Bar Legs Assist
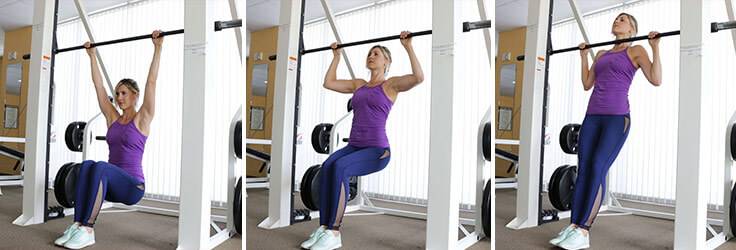
I use a Smith machine for this because you can easily set the bar at any height that works for you, and it locks securely in place. Choose a height that is just about shoulder height when standing next to it. If you don’t have access to a Smith machine, then you can do this with a regular pull-up bar, but you’ll need a step or platform high enough that the bar is shoulder height when standing next to it.
Start by standing behind the bar. Place your hands about shoulder-width apart and take a firm grip. Lower your butt towards the floor and walk your feet out about 1 foot in front of you so you can plant your feet close together and flat on the floor.
Make sure your arms are straight all the way and your butt is not touching the floor.
Now, engage your shoulder blades, focus on the contraction of your lat muscles, and pull your chin up over the bar.
You can use your legs as much as needed to help you get to the top, but try not to use too much leg strength. You should primarily feel it in your back muscles.
Hold that top position for a moment, then slowly lower back to the starting position. Take your time on the way down and make sure you’re focused on your back.
Repeat for 4 reps, then rest as much as needed before the next set.
Step 4: Do 3 Sets of 6 Negative Reps
Place a bench or step under the bar. The bench should be high enough that when you stand on the bench, you see the bar right in front of your forehead.
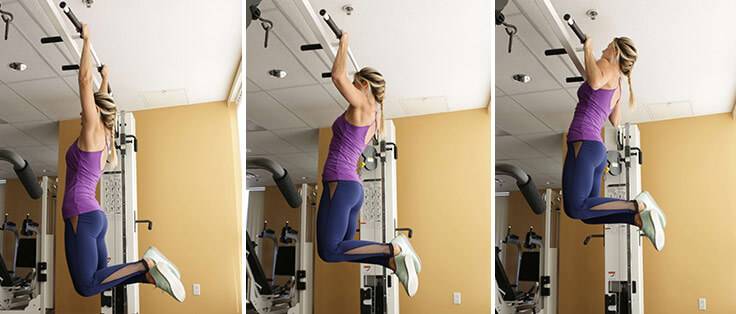
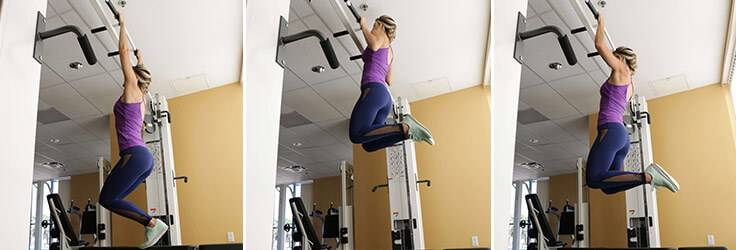
Grab onto the bar, straighten your arms and bend your knees. Then hop and pull your chin up over the bar, tucking your heels up towards your butt.
Hold that top position for a moment, keep breathing, and slowly control your weight down until your arms are all the way straight.
Keep your feet tucked up for the entire descent until your arms are fully straight, after which you can carefully place your feet back onto the bench.
Even though these are not technically “pull-ups” (they’re more like a let-down), they do a great job of building your eccentric strength, which will result in rapid progression towards being able to do the concentric portion of the movement: the pull-up.
Stay as relaxed as possible in your neck and shoulders and allow your lats to do most of the work. Also be careful not to squeeze the handle bars too much with your grip, as this will overwork your forearms and distract from the strength you’re really trying to build.
Continue for 3 sets of 6 reps, resting as long as needed between sets.
Step 5: Do 3 Sets of 8 Kneeling Cable Pull-down Reps
The final step to building up your back strength. Kneeling Cable pull-downs. I want you to finish every practice session with these so that you leave nothing on the table.
The cable machine is great for this, as you can easily adjust the weight.
Pick a weight heavy enough that you struggle to get 8 reps; this ensures that you’re still building strength rather than endurance, and you’re giving it everything you’ve got left.
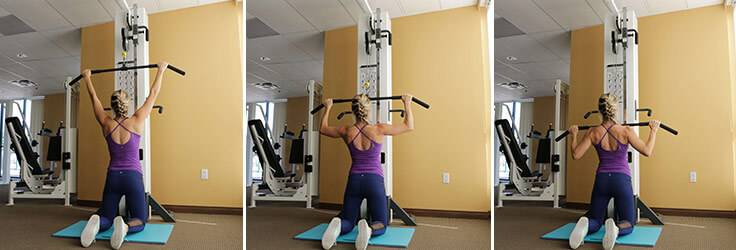
Start with a bar attached to a high pulley, and kneel in front of it. Straighten your hips to simulate the position your body would be in when doing a pull-up.
As you pull the handle bar towards your collarbone, imagine (with your eyes closed) that you are doing a pull-up. Keep your core and glutes fired up, just as you would on a pull-up.
Complete a set of 8 reps, then rest about 1 minute and do it again, adjusting the weight if you need it to be lighter or heavier to get to 8 reps without ease.
Complete one more (the third) set, and then you’re done with your pull-up practice.
The Workout
- Visualize yourself pulling up
- TRY to do a pull-up
- 3 Sets of 4 Assisted Reps (Choose 1 of 3 options)
- 3 Sets of 6 Negative Reps
- 3 Sets of 8 Kneeling Cable Pull-down Reps
This entire practice, which should take about 10-15 minutes, can be tagged onto the beginning of any workout. You can also do it at the end of your workout as well, but I recommend the beginning as you’ll be freshest and strongest then.
To see the fastest and best results possible, follow a schedule of at least 3 and up to 4 days per week of practice, ideally spaced apart throughout the week so it’s every other day. Make sure to rest on days in between.
Key tip: Do not hold your breath during these reps! It’s natural for newbies to hold their breath and strain to try to get a little higher. Depriving your muscles of oxygen will only make the move harder. Practice calming yourself down, exhaling on the exertion and inhaling on the lengthening.


 Homemade Collagen Marshmallows Recipe for Firmer, Healthy Skin




Show Comments