Looking for a challenging workout that will tone your legs and strengthen your core, but is also gentle on your joints? This leg-toning stability ball workout has got you covered.
The stability ball is one of my favorite pieces of workout equipment. It’s affordable, extremely versatile, beneficial for rehabilitation, and increases the challenge of many functional-movement exercises. Plus, it doesn’t hurt that it can double as a desk chair.
Who Should Use the Stability Ball
A primary benefit of the stability ball is to develop balance and core strength, but with a little imagination, the ball can also be used for a challenging, full-body workout. This versatility makes it suitable for most people, from rehabilitation clients to pregnant women and elite athletes.
How to Choose a Stability Ball
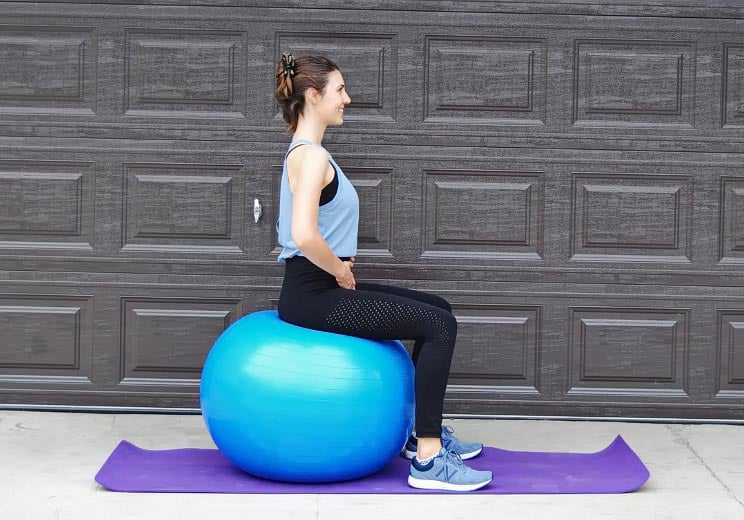
A properly-sized stability ball allows you to sit on it with your knees and hips at 90 degrees.
Types of exercises that can be done with the stability ball: Many traditional body-weight and free-weight movements can be transitioned to the stability ball. Some of my favorites include:
- Planks
- Knee tucks
- Bridges
- Crunches
- Squats
- Romanian deadlifts
- Spinal extensions
I also love using the stability ball for single-leg exercises. In the leg-toning workout below, I’ve included four single-leg exercises, but you could increase that challenge by playing around with single-leg bridging or single-leg wall squats. The sky’s the limit, folks!
Benefit of Single-Leg Exercises
Single-leg exercises have a lot going for them. They highlight muscle and mobility imbalances between right and left sides, improve balance and stability, and are generally more efficient for strengthening the legs and core than bilateral movements.
Muscle and mobility imbalances: Most people have one side that is stronger and/or more flexible than the other; imbalances in the lower limbs cans lead to imbalances throughout the entire body (1). Single-leg exercises highlight these imbalances, enabling you to create a training program that restores equal strength and flexibility to both sides of the body. Fixing muscle and mobility imbalances will increase support for the pelvis and spine, improve overall alignment, and help you perform functional movements with ease. (2)
Improve balance and stability: Using the stability ball for any exercise will challenge your balance, but none more so than single-leg exercises. This kind of balance training, also known as proprioceptive training, helps to stabilize and build strength within the muscles and joints (3). Training on an unstable surface recruits more muscle fibers without needing to increase the overall load, making it a safe and efficient form of training for people at many fitness levels. Your inner and outer hips and thighs, as well as your core and oblique muscles, are particularly challenged during single-leg exercises.
Efficient muscle development: Training one leg at a time will strengthen more muscles in that leg than performing that same movement with both feet on the ground. The combination of proprioception and increased resistance (your total moving weight is supported by one leg) makes unilateral exercises particularly effective. Single-leg exercises also allow for more focus to be spent on the individual muscles, rather than the general movement, which can be beneficial for building overall strength (4).
Leg-Toning Stability Ball Workout
This workout starts with you lying on the ground, which provides maximum support as you get used to the stability ball; the floor work isolates the hamstrings, inner thighs and quadriceps. Once the leg and core muscles are warmed up, the challenge increases with standing exercises, single-leg exercises, and planks.
To increase resistance, hold a free weight at your chest for moves #6 and #7 (wall squats).
1. Triple Threat A (Straight Leg Pelvic Lift)
Begin by lying on your back with your heels on top of the ball. The legs are straight; the inner thighs, inner knees and inner ankles squeeze together. Keep your arms against the floor, engage your glutes and hamstrings, and press the hips up to the ceiling; your spine is in a straight line from the throat to the feet. Hold at the top for a moment before lowering back down. Repeat 15 times.
Tip: Continue to squeeze your legs and butt even when you lower. This eccentric contraction is half the work!
2. Triple Threat B (Bent Knee Pelvic Lift)
Begin by lying on your back with your feet flat on top of the ball. The knees are bent; the inner thighs, inner knees and inner ankles squeeze together. Keep your arms against the floor, engage your glutes and hamstrings, and press the hips up to the ceiling; your spine is in a straight line from the throat to the knees. Hold at the top for a moment before lowering back down. Repeat 15 times.
3. Triple Threat C (Bridging)
This move combines Part A and B. Begin by lying on your back with your heels on top of the ball. The legs are straight; the inner thighs, inner knees and inner ankles squeeze together. Keep your arms against the floor, engage your glutes and hamstrings, and press the hips up to the ceiling. Keep the hips lifted as you bend and straighten the legs 15 times (the ball will move with your feet). After 15 repetitions, lower back down and shake out your legs.
Tip: Keep the legs squeezing together throughout the entire exercise.
Complete Triple Threat A, B, and C back-to-back without resting.
Optional: Repeat the entire Triple Threat for two more rounds before continuing. This is a great warm-up for the rest of the workout!
4. Wide Footwork
Begin by lying on your back with your knees bent and open, and dig your heels into the sides of the ball. Engage your glutes and inner thighs, and press the hips up to the ceiling (this position will be much lower than the previous pelvic lift). Bend and straighten the legs 10 times before lowering.
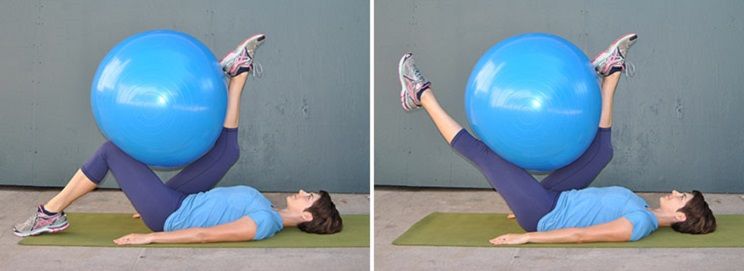
5. Quad Kick
This exercise strengthens the inner quadricep muscle and is particularly good for runners. If your hamstrings are very tight, this exercise may be challenging; try using a smaller ball or decreasing your range of motion. Begin by lying on your back. Bend your knees and place the feet flat on the floor, about shoulder-distance apart. Place the ball against the right thigh, above the knee, and place the left leg on top of the ball. Draw your navel to your spine and firmly press your lower back into the floor. Engage your right quadricep and straighten the right leg, pressing the thigh up against the ball. Hold for a moment before bending the knee and tapping the foot to the floor. Repeat 20 times per leg.
Tip: Do not place the ball directly on the knee cap—it needs to be higher on the thigh.
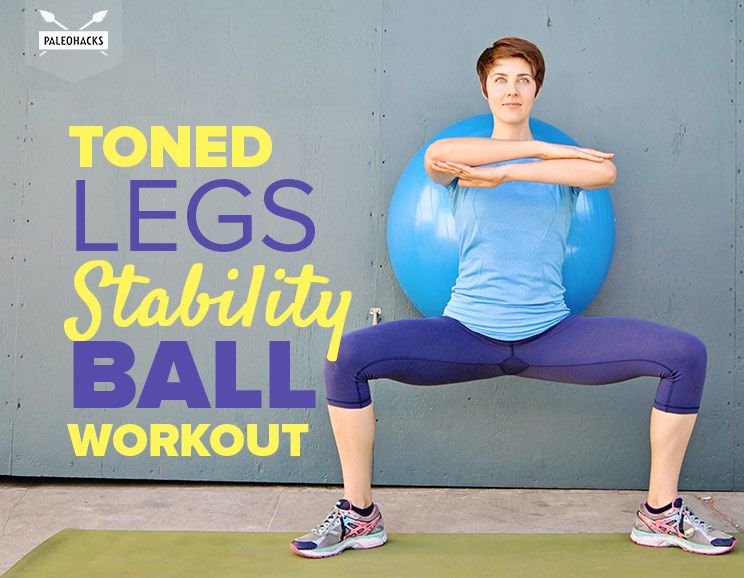
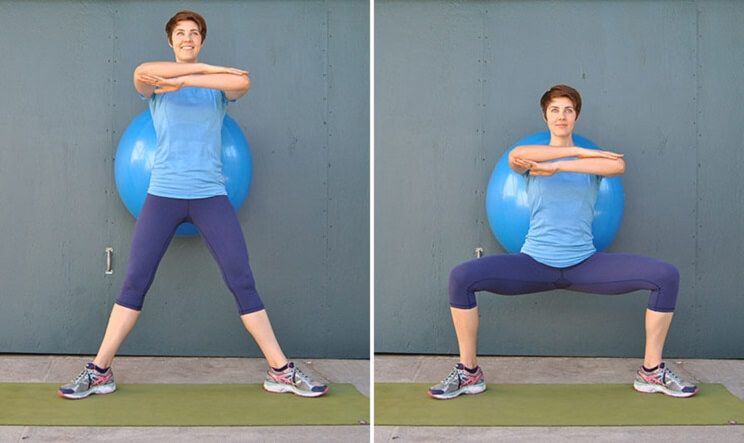
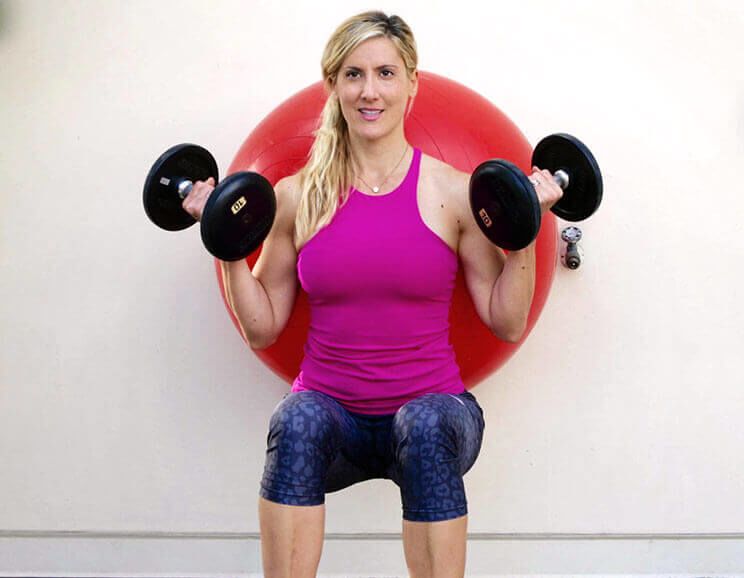
6. Wall Squats Wide
Begin by standing with the ball resting between the lower back and the wall. The feet are wider than the hips and turned out; the toes point towards the two corners of the room. Squeeze your backside and slowly bend your knees into a wide squat; your knees should be at 90 degrees and directly above the ankles. Pause at the bottom for a moment before returning to the starting position. Repeat 20 times.
Tip: Keep more weight in the heel of the foot to protect the knees.
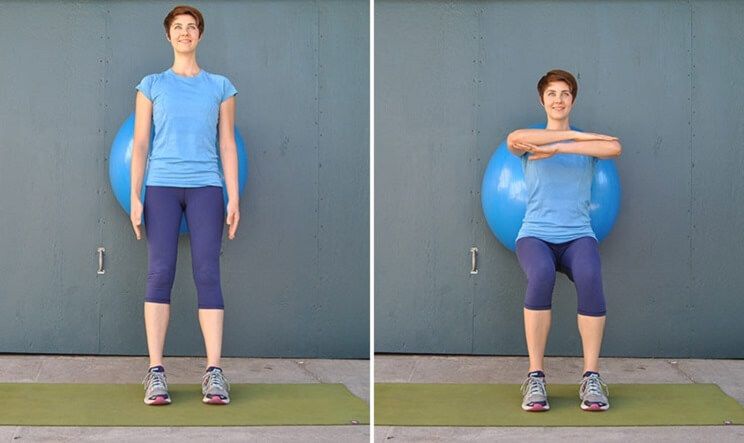
7. Wall Squats Narrow (Plus Heel Raise)
Begin by standing with the ball resting between the lower back and the wall. The feet are shoulder-distance apart and the toes point directly forward. Walk the feet a little further away from you, so that you’re leaning into the ball just a little bit. Squeeze your backside and slowly bend your knees into a 90-degree squat; your knees should be directly above your ankles, not your toes. Pause at the bottom for a moment, lower and lift your heels once, and then return to the starting position. Repeat 20 times.
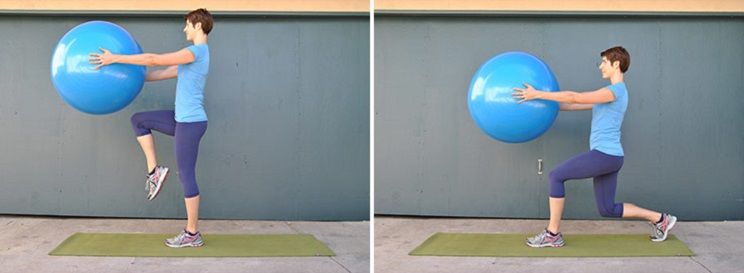
8. Back Lunge Balance
Begin by standing on the left foot with the right knee lifted to hip height; the ball is between the hands. Step the right foot back into a lunge position, where both knees are bent to 90 degrees. Squeeze the legs and return to the starting position, lifting the right knee. Repeat 10 times per leg.
Tip: Your core will help you balance, keep the abs engaged and the back straight. You can always return to standing with both feet on the ground.
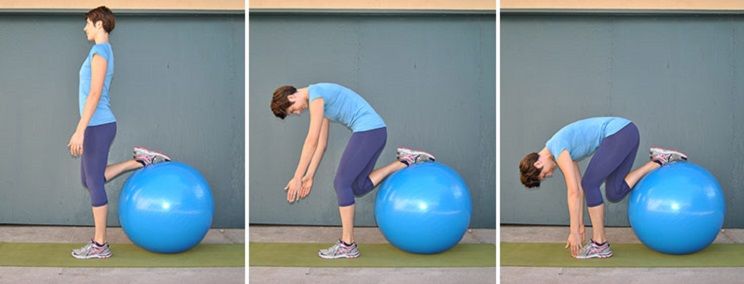
9. Single-Leg Roll Downs
Begin by standing on your left foot with your right foot resting on top of the ball behind you; the right knee is quite bent. The arms are down by your side. Slightly bend your left knee, engage your abdominals, and roll the spine down so that your fingers almost reach the floor. Squeeze your left leg and slowly roll back up to standing. Repeat 10 times per leg.
Tip: This is a challenging move! Focus on stabilizing with all of the muscles above the supporting leg’s knee; even standing still will build strength and improve balance.
10. Warrior Three
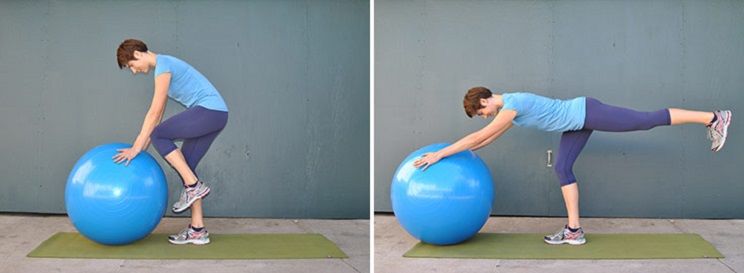
Begin by standing on your left foot with both hands on top of the ball. Round your spine and pull your right knee towards the ball, holding for balance. From here, shoot your right leg back and push the ball forward until your spine is in a straight line and your standing leg is slightly bent. Engage your abdominals and the left glute and hamstring to return to the starting position. Repeat 10 times per leg.
11. Knee Tucks
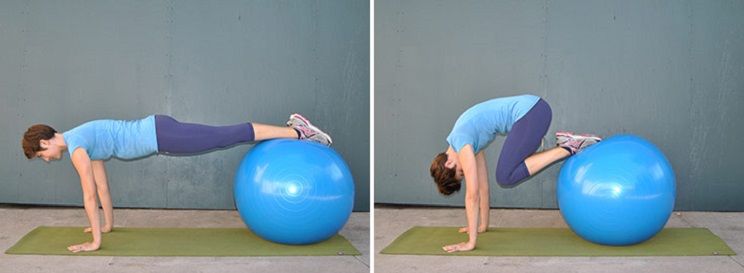
Begin in plank position with both feet on top of the ball; your shoulders are above the wrists and your abdominals are firmly pulled up to your back. Pull your knees towards your chest (the ball will move with you) and then press back to the starting position. Repeat 15 times. This move works your abs, arms and quadriceps.
(Your Next Workout: 26 Medicine Ball Workouts Your Body Craves)






 The Best (and Prettiest) Apple Crumble
Show Comments