Suffering from sore, tight hips? Here are easy ways to fix the pain using just a tennis ball.
Self-Myofascial Release (SMR) is a game changer when it comes to workout recovery and pain release.
SMR treats skeletal muscle immobility and pain by relaxing contracted muscles, improving blood and lymphatic circulation, and stimulating the stretch reflex in muscles. (1) Common tools for SMR include foam rollers, massage balls, lacrosse balls, and tennis balls. We love tennis balls for SMR because they are small and lightweight, portable, and have just the right about of firmness to dig deep into the fascia without causing too much soreness.
Suffering from a sore neck, back and shoulders? Get our mobility guide to ease pain and soreness.
Get The FREE Mobility Guide To Fix Your Pain Today!
SMR works for two different purposes: releasing fascia and releasing trigger points.
Fascia is connective tissue in the body that acts as a thick sheath surrounding the muscles. It can get tight just like the muscles that it surrounds. However, unlike muscles, stretching has little effect in releasing tightness in fascia. The only way to get a complete stretch and release for your fascia is to do some myofascial release.
Trigger points are a specific spot in the muscle – often referred to as a “knot” – where the muscle fibers have decreased blood circulation, increased contraction, and a buildup of toxic waste. A trigger point can also exist in one of two states. First, as an active trigger point. These are actively painful, causing you to feel pain on the trigger point or around it. Second, as a latent trigger point. These are typically pain free unless poked or touched.
There are also two types of trigger point pain: primary trigger point and referred pain. A primary trigger point is when the pain is located at a tense muscle spot, whereas referred pain is when the pain manifests itself in an area away from the trigger point. It is most important to treat the trigger point that causes the referred pain.
Trigger points and tight hips can lead to:
- Lower back pain
- Sciatica
- Piriformis Syndrome
- Leg and hip pain
- Poor posture
- Circulatory problems
- Digestive problems
- Low immunity
12 Ways To Use A Tennis Ball To Release Tight Hips
- Warm the hips first, either through light exercise or with a heating pad.
- When you find a point of tension or pain, hold the tennis ball on the spot for 20 seconds. The pressure should cause a satisfying release of tension.
- Breathe deeply.
- Stop if it is too painful or doesn’t feel right.
- Static stretch the area afterwards.
Gluteal Complex
The gluteal muscles consist of the gluteus maximus, medius, and minimus. Other muscles in the gluteal complex include the tensor fascia latae (TFL) and the deep hip rotators beneath the gluteal muscles such as the piriformis, obturator externus, and the quadratus femoris.
Gluteus Maximus, Medius, and Minimus
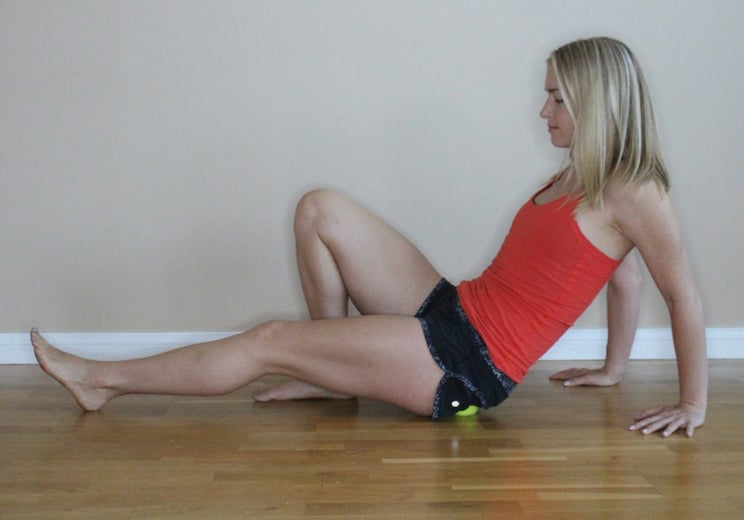
Tight glutes can lead to hip pain, poor balance, and poor posture.
- Start by placing the ball on the floor. Then, sit down on the ball so that it’s pressing into the center of your right gluteal muscles.
- Straighten your right leg out in front of you and keep your left knee bent. Use your hands to control the amount of pressure you are applying on the ball.
- Slowly roll in a circular motion on the ball, pausing for 20 seconds when you find a painful spot. As you continue to roll circularly, internally and externally rotate from the hip of the leg you are working on in order to reach knots that are hidden deep inside the hip joint.
Glute Figure 4
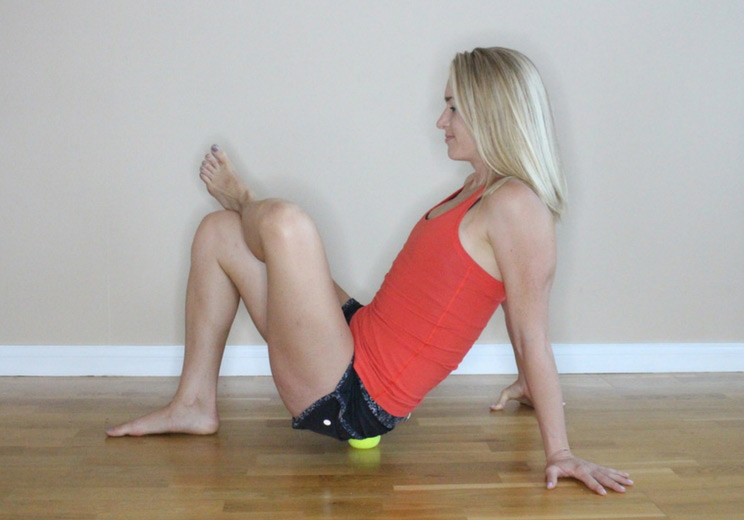
This variation helps you to get deeper into the glutes, piriformis, obturator externus, and quadratus femoris.
- Start by placing the ball on the floor and sit down on the ball so that it’s resting under your right gluteal muscles. Place your hands down behind you for support.
- Bend your right knee and cross the ankle over the left thigh.
- Use your hands to support your weight and roll in a circular motion, stopping when you find a knot.
Standing Glute Release
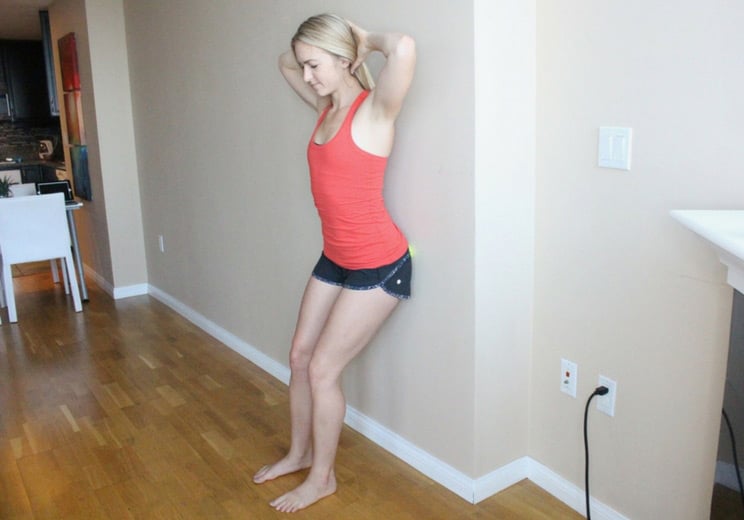
- Begin standing next to a wall.
- Place the ball against the wall and then lean your right glutes against it.
- Roll in circular motions, stopping when you find a tight spot.
Piriformis Figure 4
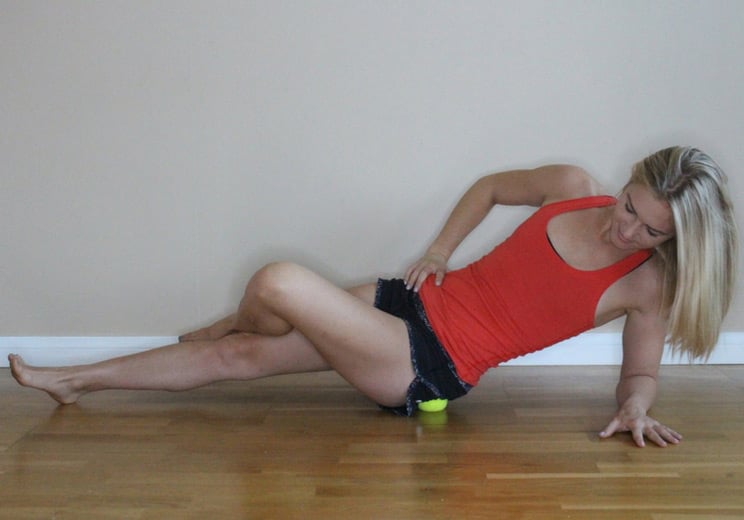
The piriformis is a flat, pyramid-shaped muscle located near the gluteus medius that helps to rotate the hip. When tightened or enlarged, it can entrap the sciatic nerve and other major nerves and blood vessels, often leading to conditions such as piriformis syndrome (2) and sciatica.
- To begin, place the ball on the floor.
- Sit on the ball so it’s positioned underneath the piriformis – right below the gluteus minimus – on the outside of your right hip. Your left leg should be straight out in front of you. Bend your right leg and cross the right ankle over your left thigh.
- Take small circular movements around the area, pausing for at least 20 seconds every time you find a knot or feel referred pain.
Standing Figure 4
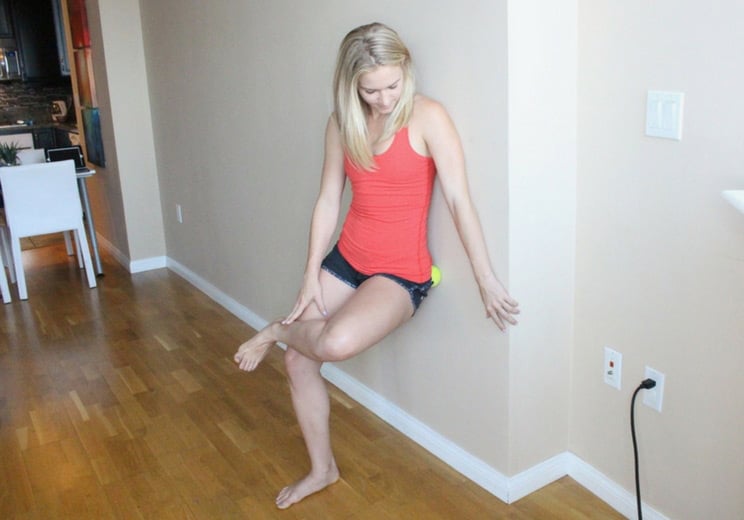
- Begin standing next to a wall holding your tennis ball.
- Lean back against the wall and bend your right knee to place the right ankle on the left thigh. Place the ball behind you and position your piriformis over the ball.
- Lean back against the ball and take small movements to roll the ball up and down, then side to side. Pause for 20 seconds or until you feel the pain release when you find a tight spot and then move on.
Tensor Fascia Latae (TFL)
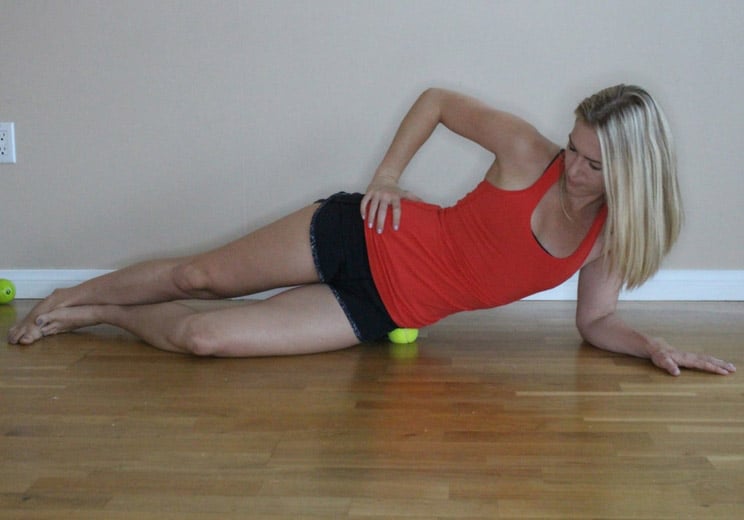
The TFL is a tiny muscle located above the IT band. It helps to keep the balance of the pelvis while standing, walking, and running (3). Tightness of the TFL can lead to hip pain and weakness.
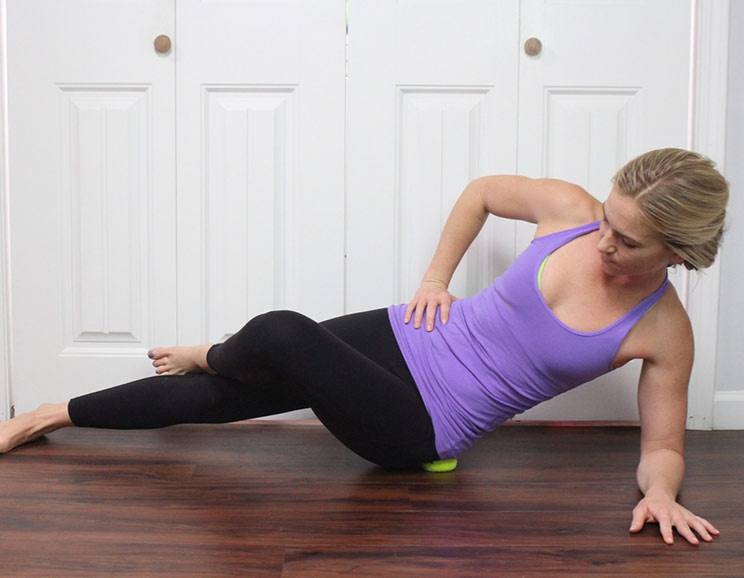
- Begin by placing your ball on the floor. Then lie down next to it on your right side.
- Prop yourself up on your right forearm and lift your hips up to slide the ball underneath your right hip. Lower your right hip back down on the ball so that it comes to rest below your hip bone and above your IT band.
- Take small movements to find a tight spot and then hold until you feel the pain release.
Standing TFL
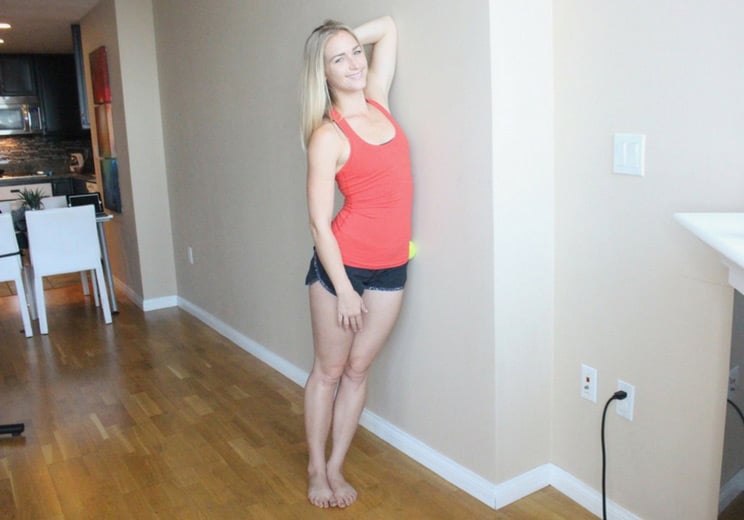
- Start standing next to a wall so that your right side is facing it.
- Place your tennis ball on the wall and then position yourself so that the ball rests underneath your TFL. Lean against the ball to apply pressure.
- Take small movements until you find a tense spot and then hold until the pain releases.
IT Band
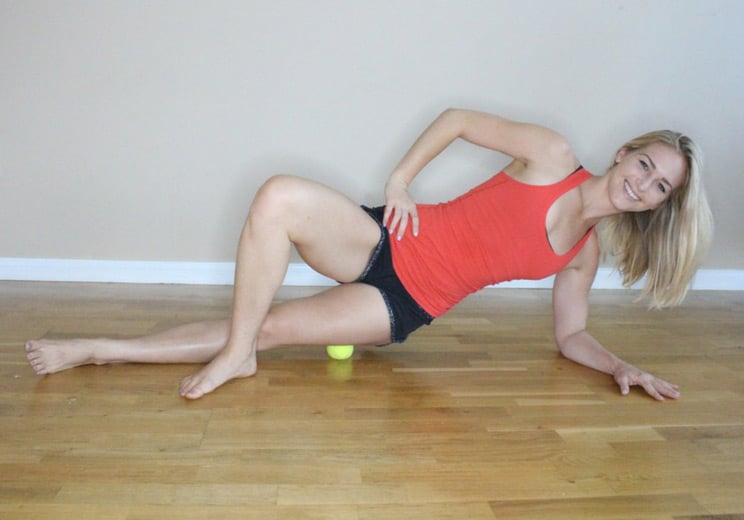
The IT band – the iliotibial tract – is a long strip of connective tissue that connects the TFL to the lower leg. When tight, the IT band can cause hip pain and weakness as well as knee pain.
- Start by placing your ball on the floor.
- Lie on the ball so that it’s above the knee on the outside of your thigh. Support yourself with your forearm closest to the ground.
- Slowly roll up toward the hip, stopping when you feel a point of tension.
Hip Flexors
Your hip flexors are made up of the Psoas Major and the Iliacus. These muscles allow for flexion of the leg at the hip joint. Tightness leads directly to lower back pain since the psoas is connected to the lumbar 1-5 vertebrae.
Iliacus
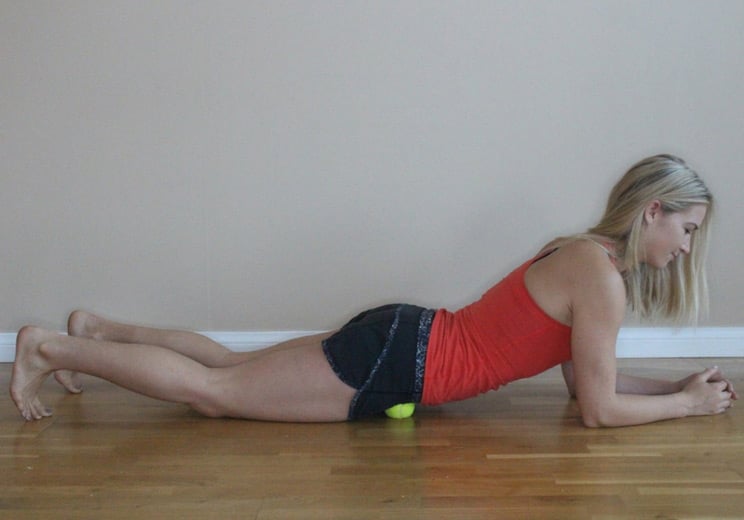
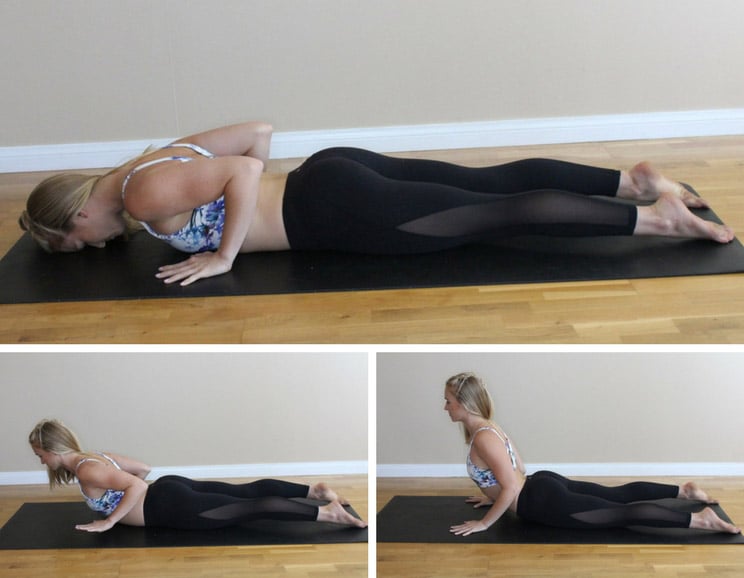
- To begin, lie down on the floor on your belly.
- Place the tennis ball below your right hip bone.
- Take small movements side to side until you find a tight spot. Hold for 20 seconds or longer until you feel the pain release and then move on. After you’ve completed the right side, switch to the left.
Psoas Major
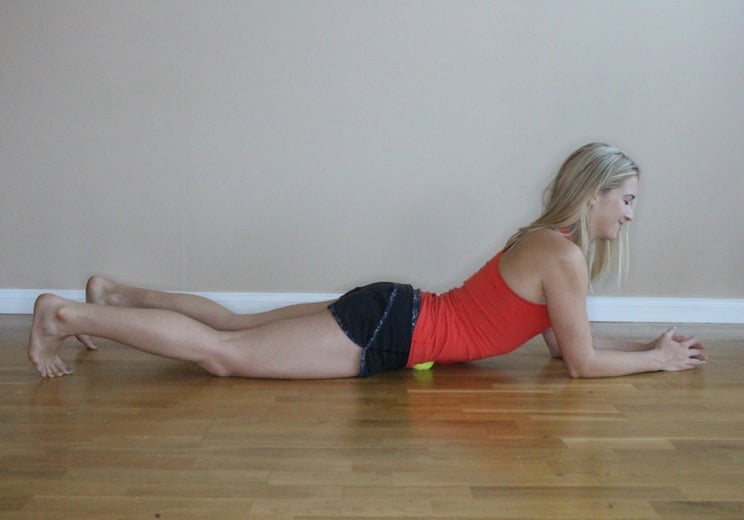
- Begin kneeling on the floor. Place the tennis ball out in front of you and then lower yourself down onto the ball so that it rests directly inside of your pointy hip bone.
- Let your weight rest on the ball and prop yourself up onto your forearms. It should feel as though the ball is pressing up and into your abdomen.
- Take some small rolls forward and back, stopping for 20 seconds when you feel pain on the spot or in the lower back.
Psoas Major 2
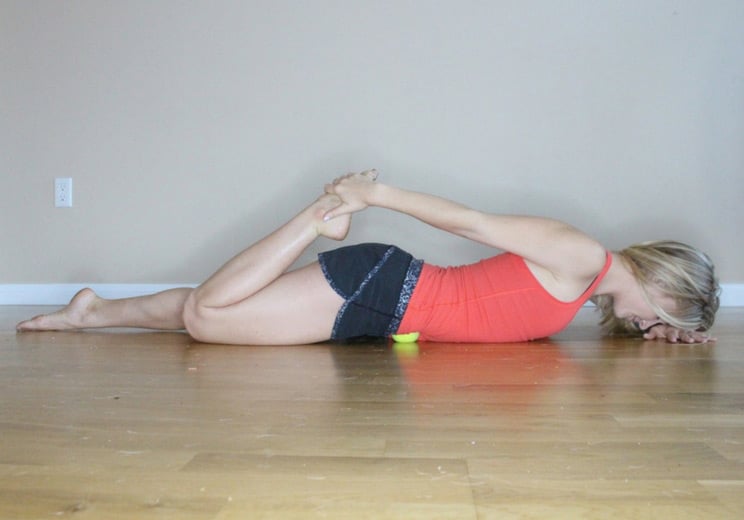
The second variation incorporates a quad stretch to help release the hip flexors and get deeper into the psoas with the tennis ball.
- Begin kneeling on the floor. Place the tennis ball out in front of you and then lower yourself down onto the ball so that it rests directly inside of your pointy hip bone on the right side.
- Let your weight rest on the ball and prop yourself up onto your forearms.
- Bend your right knee and reach your right arm back to catch the right foot with your hand. Lower your head down onto the back of your left hand and hold. Once you feel the tension release, switch sides.
SI Joint
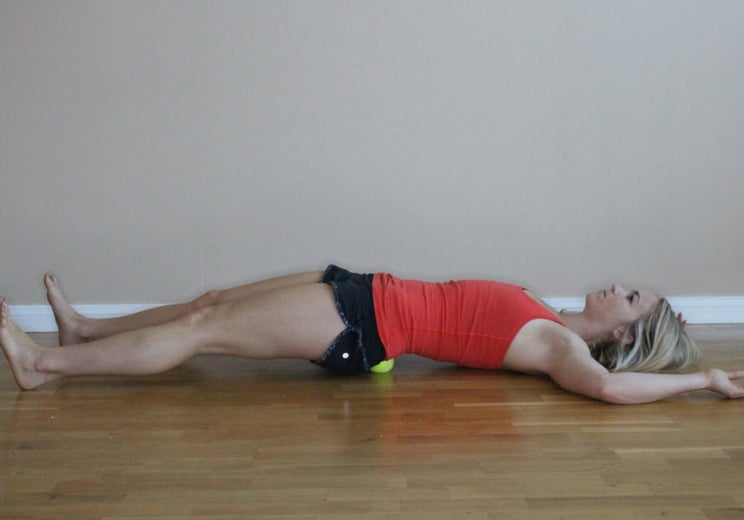
This joint is a moveable joint that connects the sacrum to the iliac which is part of pelvis. This joint tends to become tight in women due to hormonal changes, pregnancy, labor and tight muscles.
- To start, lie on your back with your knees bent and feet on the ground.
- Lift your hips up and place two tennis balls beneath your pelvis about 2-4 inches apart.
- Lie on the balls for 1-2 minutes with the legs straight out in front of you. You can play with moving the balls around to target different muscle fibers and find different points of tension.

(Your Next Workout: 12 Tennis Ball Hacks to Release Tight Legs)


 Cranberry Recipes: 30 Decadent Desserts, Dinners, and Side Dishes
Show Comments