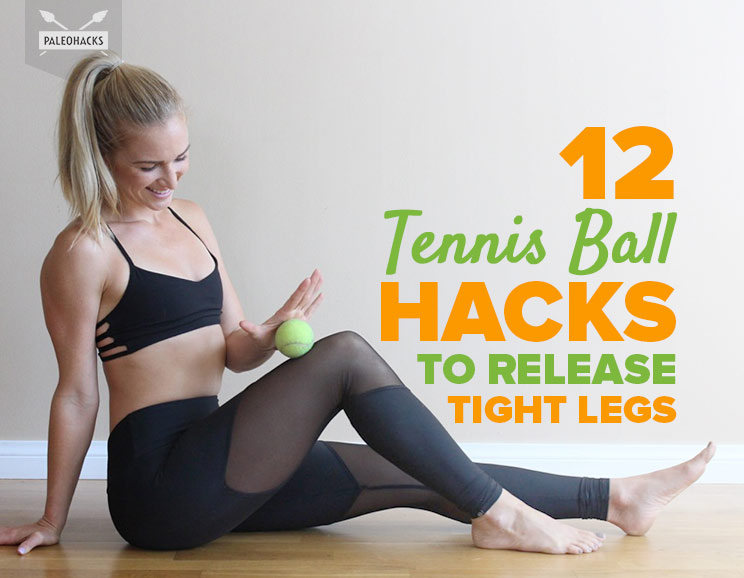
While it would be amazing to be able to get a massage every time your legs got sore or tight, sometimes the best (and most budget-friendly) is DIY. These 12 tennis ball hacks proves it!
If you are exercising regularly, chances are that you’ve found yourself with muscle and joint soreness at some point. One of the most important parts of getting into shape, though, is getting proper rest between workouts, along with regular stretching and self-massage to help release fascia and trigger points.
What Is Fascia?
Fascia is connective tissue that acts as a thick sheath surrounding the muscles in your body. Just like muscles, it can get tight, but unlike muscles, stretching has little effect in releasing tightness. The only way to get a complete stretch and release for your fascia is to do some myofascial release.
What Are Trigger Points?
A trigger point is a specific spot in the muscle – often referred to as a “knot” – where the muscle fibers are overactive and cannot relax (1).
A trigger point can exist in one of two states. First, as an active trigger point. These are actively painful, causing you to feel pain on the trigger point or around it. Second, as a latent trigger point. These are typically pain-free unless poked or touched. Both of these states of trigger pain can cause bigger issues, including sending pain to other areas of the body that may seem completely unrelated. Trigger points are known to cause neck pain, TMJ (lockjaw), back pain, headaches, carpal tunnel, tennis elbow, and even joint pain.
Looking for an easy way to get started working out? Grab our FREE Beginners Workout Guide – 3 Weeks To Tighter Abs, Sculpted Arms, And Toned Legs, by clicking here!
How Does Self-Myofascial Release (SMR) Help?
Self-Myofascial Release (2) treats skeletal muscle immobility and pain by relaxing contracted muscles, improving blood and lymphatic circulation, and stimulating the stretch reflex in muscles. While foam rollers are great, they can tend to be a bit bulky and are too large when you are trying to get into one specific small spot. Tennis balls, on the other hand, are lightweight, small, and very portable, making it so that you can them anywhere. They also make it easier to get deeper into individual trigger points since they cover a smaller surface area.
How to Use a Tennis Ball
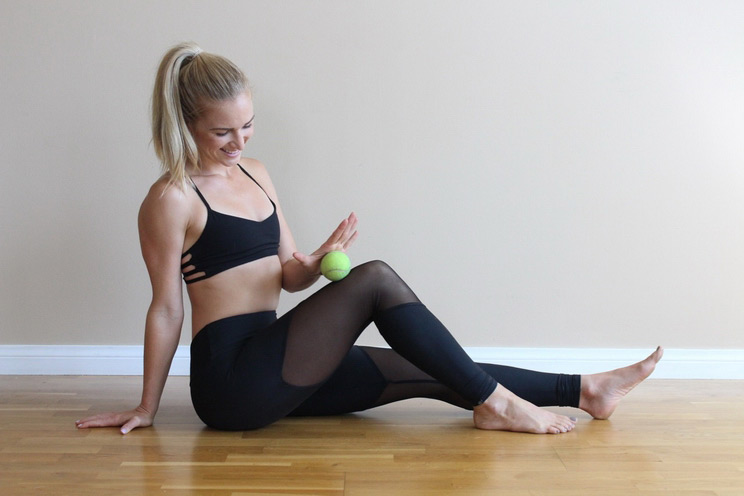
Releasing fascia and trigger points can be painful and cause soreness afterwards. When releasing a trigger point, the pain should be a satisfying type of pain, like when you get a deep tissue massage. Here are some rules to follow while practicing SMR with tennis balls:
- Consider warming the area beforehand. It can be a quick walk or jog, or even placing a heat pad over the area.
- When you find a point of tension, hold the ball in place and keep the pressure gentle but sustained. Again, the sensation should be satisfying, not sore.
- Hold for 10-20 seconds and breathe deeply. You want to hold the spot until you feel the pain release.
- Stop if it doesn’t feel right. This is a good rule of thumb with any type of exercise and/or pose.
- Static stretch the muscle afterwards.
All you need is a tennis ball and a yoga block.
Calves
Our calf muscles are made up of the gastrocnemius – the largest calf muscle – and the soleus – a large, flat muscle that lies underneath the gastrocnemius. Trigger points in these muscles can lead to pain in the back of the knee, calf, and the instep of the foot.
Full Calf Release
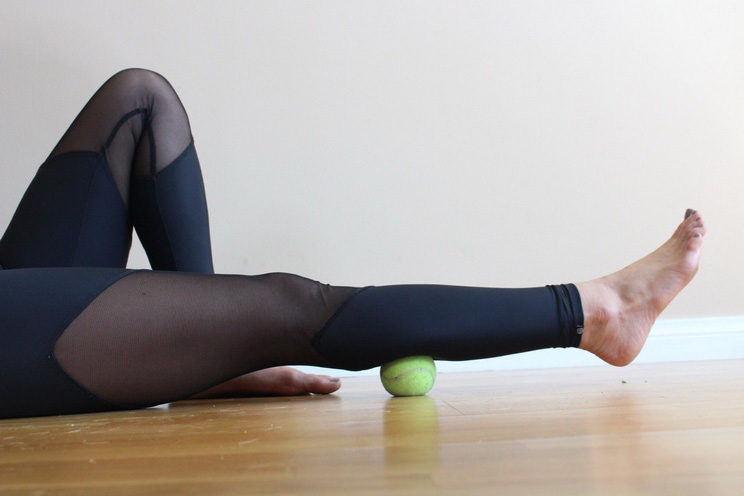
- Start by placing your ball on the floor.
- Position your lower leg so that the ball is placed directly above your Achilles tendon. Place your left foot on the floor to help you roll forward and back on the ball.
- Slide your body forward to roll the ball up towards your knee. Stop whenever you find a knot, hold for 20 seconds, and then move on.
Soleus Release
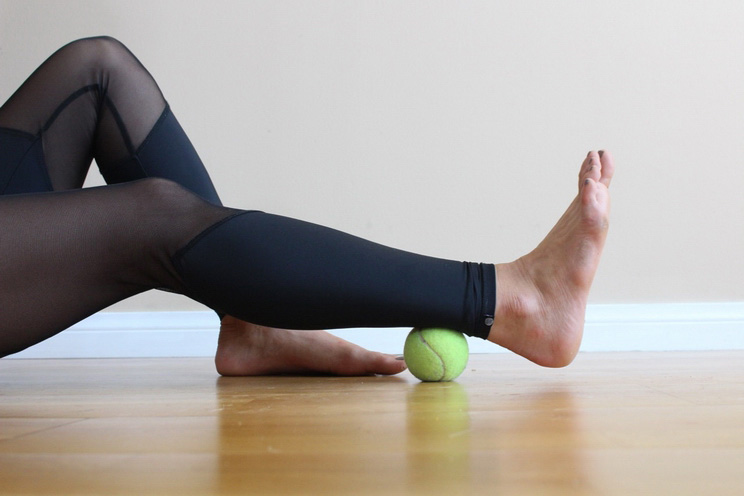
- Begin by placing your tennis ball on the floor.
- Position your lower leg on the tennis ball so that it rests right above the Achilles tendon.
- Let the full weight of your leg press down on the ball. Take tiny movements until you find a tight spot, then hold for 20 seconds.
Medial Soleus Release
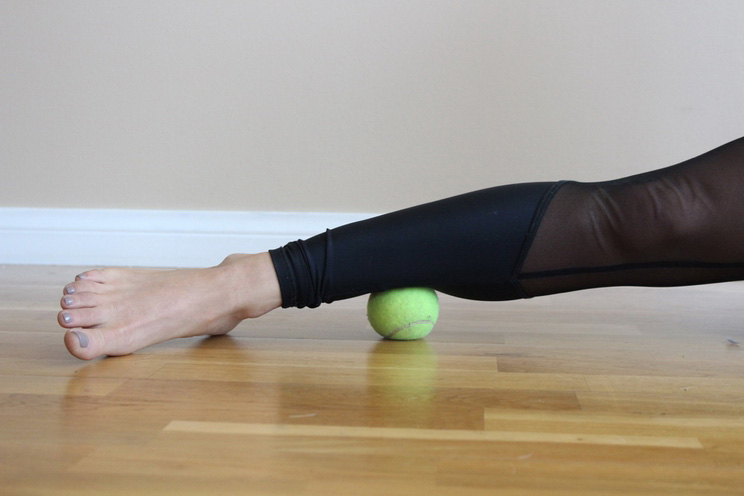
- Place the ball on the floor.
- Then lie down on one side so that you can position the ball on the inside of your calf, above the ankle.
- Take small movements up and down until you find a knot, then hold for 20 seconds.
Gastrocnemius Release
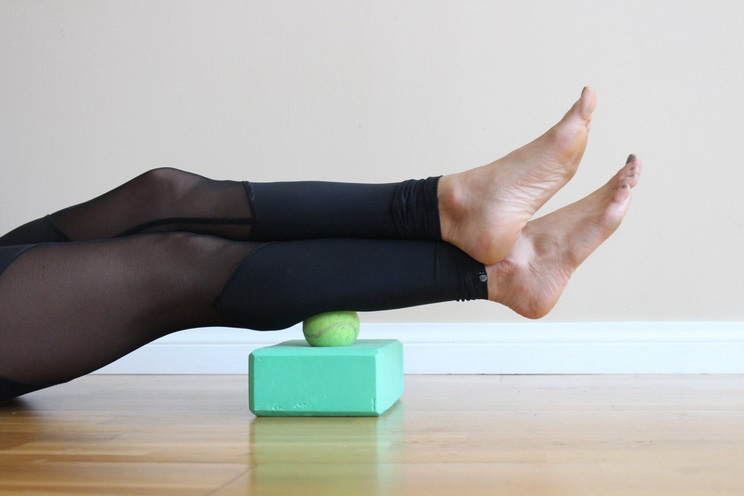
- To begin, sit on the floor. Place a yoga block in front of you and put your tennis ball on top of it. Position your right leg so that the meaty part of your calf is resting on the ball.
- Place your other leg over the leg you are massaging and cross your ankles. Then place your palms down by your sides with straight arms.
- Press up with your arms to lift your hips and feel the tennis ball press into your calf. You can make small movements until you find a point of tension. Hold down for at least 20 seconds and then gently release.
Tibialis Anterior
This is the largest muscle found on the front of the leg. It is located in the shin region, on the lateral (outer) side of the shin bone. The tibialis anterior contracts to lift the foot and stabilizes the foot during walking and running.
Tibialis Anterior Release
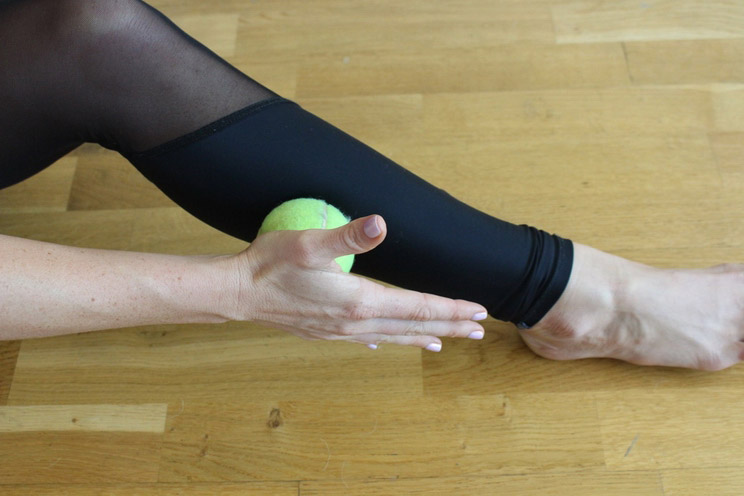
- Start by placing one foot on a step in front of you.
- Place your tennis ball against the muscle and hold it with your palm.
- Use firm pressure to slowly roll the tennis ball up and down the tibialis anterior, stopping when you find a point of tension.
Tibialis Anterior Release with Block
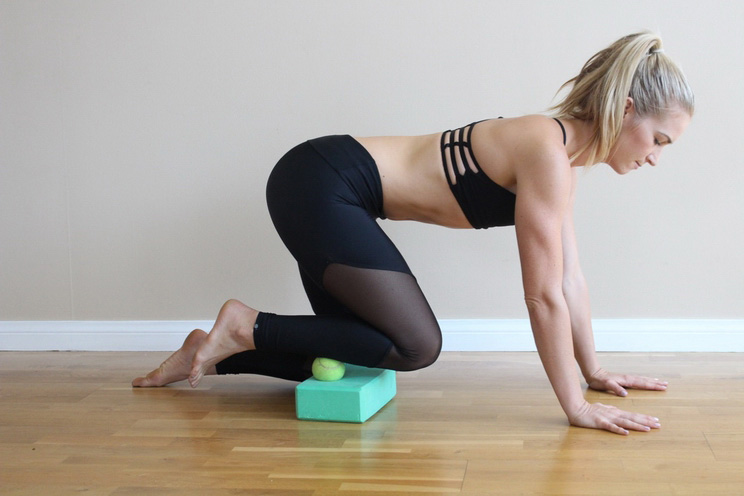
- To begin, place a yoga block on the floor and place your tennis ball on top of it.
- Kneel down over the block in a tabletop position on your hands and knees. Place the lower part of the tibialis anterior of one leg on top of the block, using your arms and core to control the amount of pressure you are applying.
- Walk your hands forward to roll the ball up your tibialis anterior towards your knee. Stop for 20 seconds whenever you find a point of tension.
Peroneals
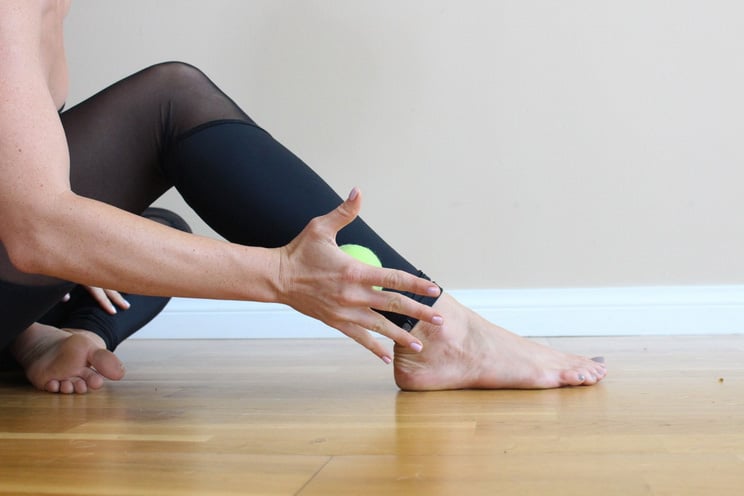
These are a group of 3 muscles that are found outside of the calf. They help to control balance and movements of the foot such as extension and abduction. When tight, it can lead to ankle pain and weakness.
- Start by lying down on your side.
- Place the ball under the outside of your lower leg, right above the ankle.
- Roll up slowly, stopping for 20 seconds when you find a point of tenderness. Hold until you feel the pain release and then move on.
Quadriceps
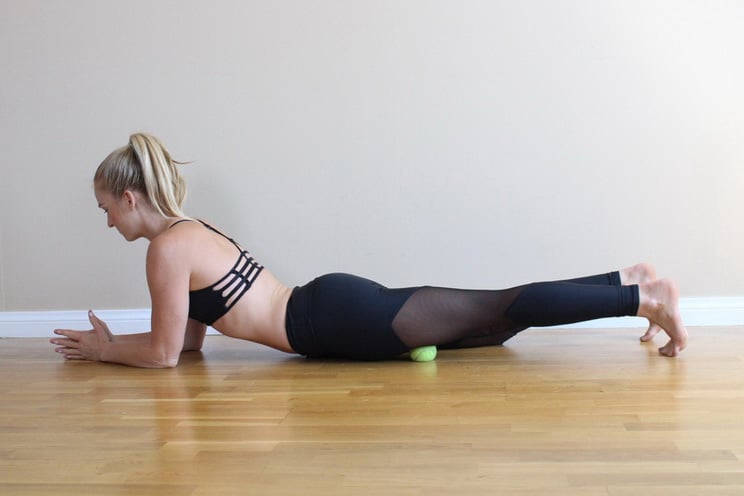
This group of four muscles runs from above the knee up to the hip bone. They help with straightening out the knee and assist in bending the knee. Tight quadriceps can lead to knee and hip pain.
- To start, place the tennis ball on the ground.
- Lie down on the ball so that it is directly above the knee.
- Slowly roll the ball up the thigh towards the hip bone. Hold whenever you find a tight spot.
Vastus Medialis and Sartorius
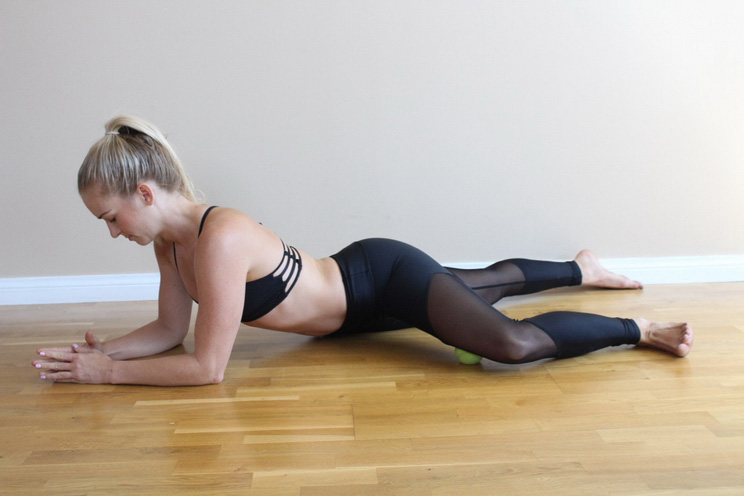
These muscles are located on the inner thigh. Tightness in these muscles can lead to knee pain and weakness.
- Begin by placing a ball on the floor.
- Lie down next to the ball on your belly and prop yourself up with your forearms. Bend your leg and place it on top of the ball so that it rests right above your knee on your inner thigh.
- Roll the ball up your inner thigh towards your groin, pausing to hold when you feel a trigger point or a knot.
IT Band
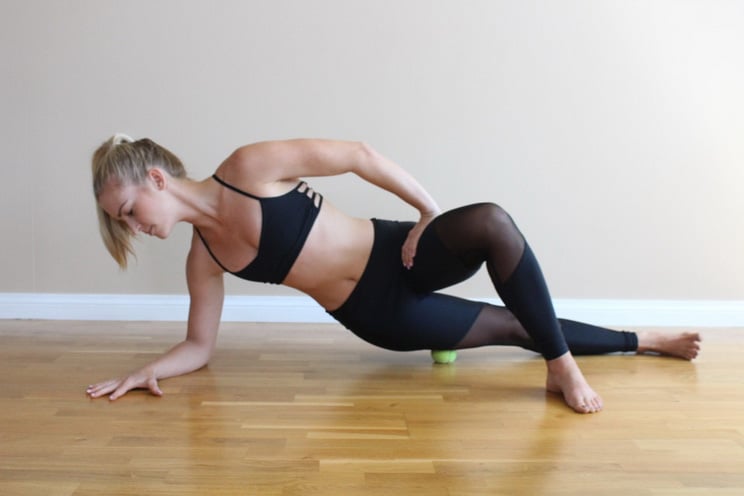
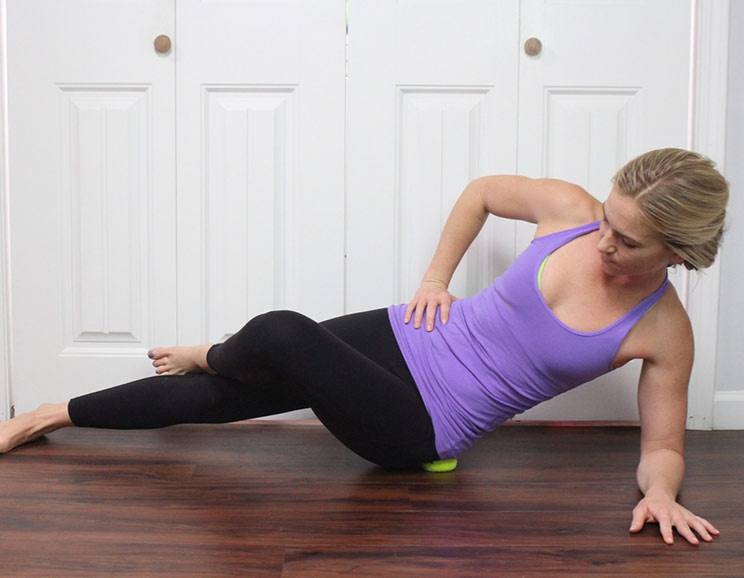
The IT band is a band of fascia along the outside of your thigh. Tightness can lead to knee pain and weakness.
- Start by placing the ball on the ground.
- Lie on the ball so that it is right above the knee on the outside of your thigh. Support yourself with the forearm closest to the ground.
- Slowly roll up towards the hip, stopping to hold when you find a point of tension.
Hamstrings
This group of 3 posterior thigh muscles is located on the back of the thigh from above the knee up to the glutes. Tightened hamstrings can lead to pain in the back of the knee, in the glutes, or in the back of the thighs.
Hamstrings Release
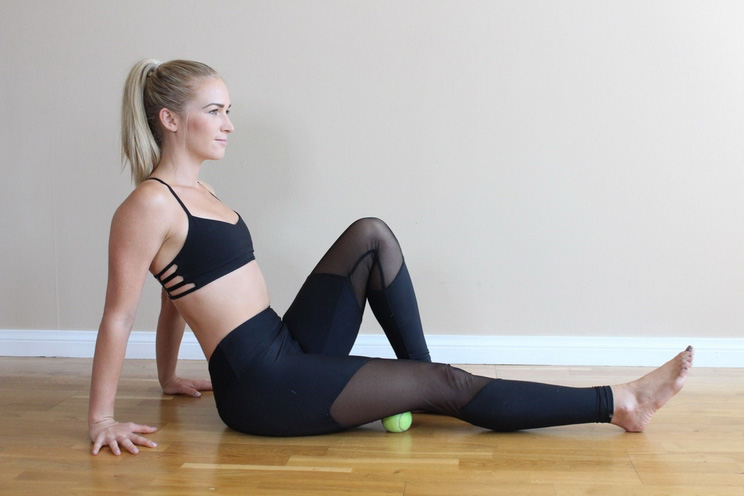
- Begin by placing the ball on the ground.
- Sit on the floor and place your leg on the ball so that it rests directly above the back of your knee.
- Roll on the ball towards your glutes, stopping to hold for 20 seconds each time you find a knot.
Hamstrings Release with Block
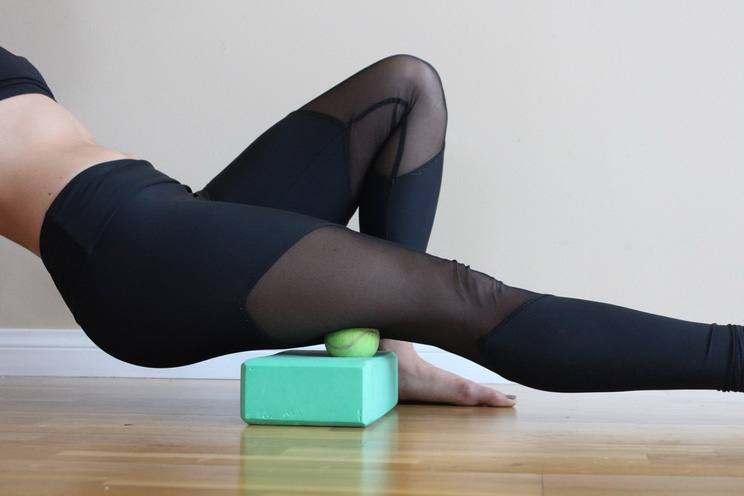
- Start by placing a yoga block on the floor, then put your tennis ball on top of it.
- Sit on the floor facing the block, bend one knee and place the foot on the floor. Take the other leg straight out in front of you and position it so that the ball is resting under the hamstrings, right above the knee.
- Use your hands to help readjust you as you slide over the ball and find tight spots. Once you do, hold for 20 seconds or until the pain subsides, then continue up the leg until you are right below the glutes.

(Your Next Workout: 9 Tennis Ball Hacks to Relieve Sore Muscles)


 Sweet Potato Pecan Pie Recipe
Show Comments