Ditch dull crunches with this 10 minute bodyweight ab workout – no equipment required.
Aesthetics aside, the benefits of a strong core include spinal support, good posture and agile
movement. Unfortunately, while many traditional ab exercises feel effective, they’re not doing your body any favors.
Many of the ab workouts that you’ve come to know and love actually reduce the overall functionality of your movement practice, and don’t provide the much-needed support to your physical structure that today’s workout will. Here’s why:
Traditional ab exercises isolate your 6-pack at the expense of your core strength.
Your core muscles lie underneath the six-pack; they include the deep abdominals, lower back muscles and those of the pelvis. The core is best activated from a neutral position, where the spine maintains its natural curves; exercises that isolate the six-pack force the body out of neutral posture and into flexion (more on that in a moment), jeopardizing the control of the core.
Get our FREE Beginners Workout Guide
3 weeks to Tighter Abs, Sculpted Arms, and Toned Legs here!
There is no reason (except vanity) to do exercises that strengthen your six-pack muscles at the expense of your entire core system – it’s like building a nice house on a rocky beach, while it might look good temporarily, without a strong foundation something will collapse.
Traditional ab exercises reinforce a slouched lifestyle position
Even those of us with good core strength, need to minimize the number of crunches that we do each week. Modern day life keeps most Americans rounded over a computer, phone or steering wheel for much of the day, so the last thing that your body needs is to spend time on exercises that reinforce that posture.
To counterbalance our modern movement patterns, and release pressure from the neck and back, I recommend prioritizing core stabilization and spinal mobility, with limited time spent in the classic crunched position.
In this 10 minute ab workout, you’ll be relying on your own bodyweight to challenge the stabilization of your spine. The first seven exercises require you to maintain that neutral spine position (the back remains mostly flat with a slight hint of its natural curve at the lumbar spine), and only the last three add an upper body lift…by which stage your core will be fired-up and ready to roll!
10 Minute Bodyweight Workout for Toned Abs
- Repeat each exercise for 45 seconds
- Take a 15 second break
- Continue 45 seconds on, 15 seconds off, until you’ve done all 10 exercises
Single Leg Lifts
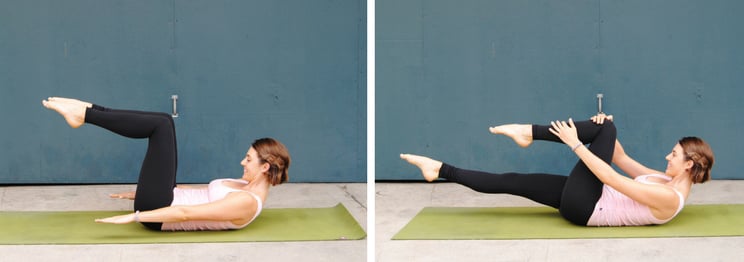
This basic Pilates move strengthens the deep low belly muscles, while keeping your spine supported on the floor.
- Begin on your back in a neutral pelvic position. Place your feet hip distance apart and press the arms down by the side.
- INHALE through your nose to prepare.
- EXHALE through your mouth, engage your abdominals and lift one knee to tabletop position.
- INHALE, hold at the top.
- EXHALE, keep your abdominals engaged (they should be flat, not pushing up to your shirt) as you place the foot back down.
- Switch sides on the next EXHALE, continue to alternate for 45 seconds.
Dead Bug
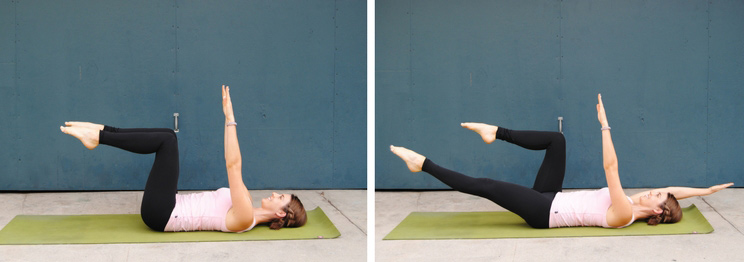
This exercise increases the challenge of the Single Leg Lift, by alternating the arm and leg reaching out of the trunk. Your goal is to not wobble from side-to-side on the hips. At any stage, you can place the non-working foot down on the floor as a support.
- Begin on your back in a neutral pelvic position. Engage your abs and lift both knees to tabletop position. Reach both arms straight up to the ceiling.
- INHALE through your nose to prepare.
- EXHALE through your mouth, extend your right leg forward and reach your left arm back, keeping the lower back flat to the floor,
- INHALE return to the starting position.
- EXHALE, extend your left leg forward and reach your right arm back.
- Continue to alternate for 45 seconds.
All-Fours Abs
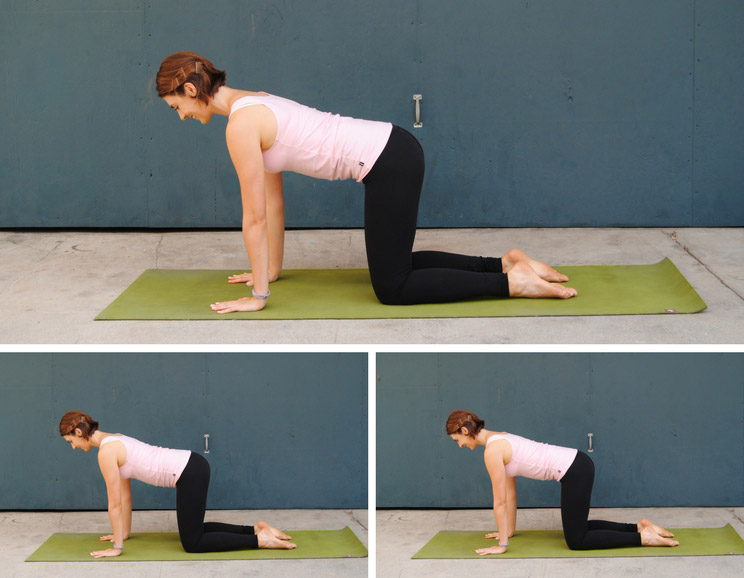
This move is the foundation of your plank. It helps you internally engage your abdominals by lifting your navel towards your spine, against the resistance of gravity. Keep your spine flat during this sequence.
- Begin on all-fours position, place your wrists under your shoulders and your knees under your hips.
- INHALE through the nose, allow the belly to puff up towards the floor like a balloon.
- EXHALE through the mouth, engage your abdominals and contract your navel to your spine, flattening the belly.
- Continue to alternate, allowing the belly to slowly expand and contract with your breath, for 45 seconds.
Kneeling Ab Lifts
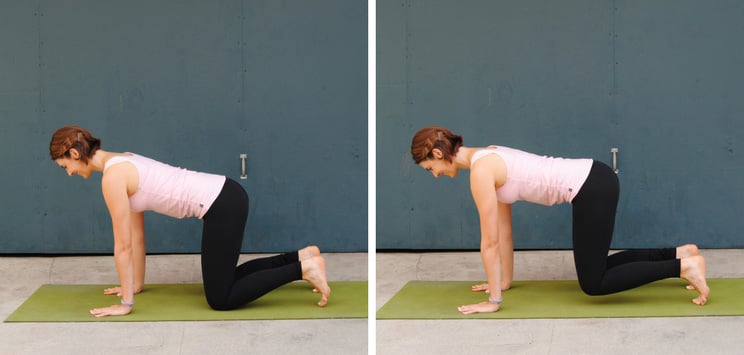
To advance “All-Fours Abs,” we will now lift the knees with the abdominals. Again, keep your spine flat.
- Begin on all-fours position, place your wrists under your shoulders and your knees under your hips.
- INHALE through the nose, allow the belly to puff up towards the floor like a balloon.
- EXHALE through the mouth, engage your abdominals and contract your navel to your spine, and then lift the knees to hover one-inch away from the mat.
- INHALE hold the hover.
- EXHALE release the knees.
- Continue to lift and lower the knees, holding your position on the inhale breath and moving on the exhale.
Single Leg Spinal Balance
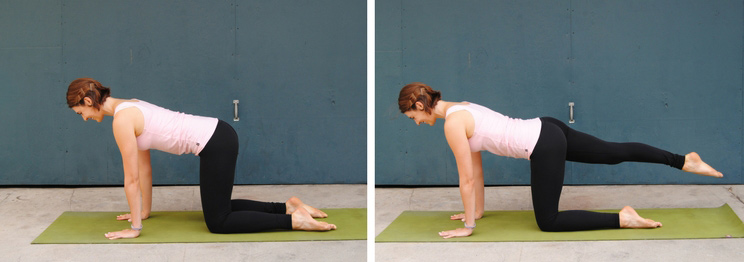
Another progression, now we take one limb away from the floor. With each new move your abs working hard to stabilize your spine. Continue to pay attention to the navel hugging up to the lower back, and limiting the amount of work in your arms and legs.
- Begin on all-fours position, place your wrists under your shoulders and your knees under your hips.
- INHALE through the nose, extend the right leg straight back, lifting the foot from the floor.
- EXHALE through the mouth, return the knee to the floor.
- INHALE, extend the left leg back.
- EXHALE, return the knee to the floor.
- Continue to alternate, keeping your abs engaged at all times and minimize the rocking of the hips from side-to-side.
Skewed Spinal Balance
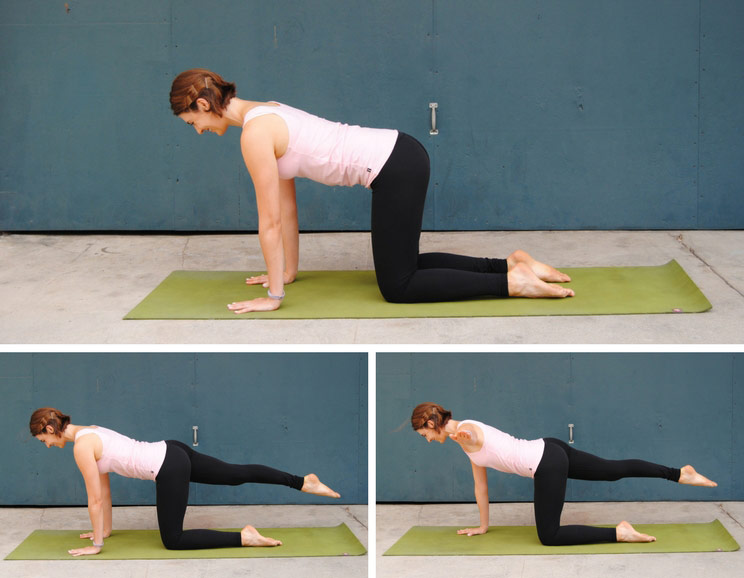
In this variation of the spinal balance, we are taking the arm to the side instead of overhead. This is helpful if you have tight shoulders as it lets you work on shoulder stabilization within your own range-of-motion.
- Begin on all-fours position, place your wrists under your shoulders and your knees under your hips.
- INHALE through the nose, extend the right leg straight back, and reach the left arm straight out to the left side.
- Hold as you EXHALE and INHALE.
- EXHALE, return the knee and hand to the floor.
- INHALE, extend the left leg straight back, and reach the right arm straight out to the right side.
- Hold as you EXHALE and INHALE.
- EXHALE, return the knee and hand to the floor.
- Continue to alternate for 45 seconds.
Plank Step Backs
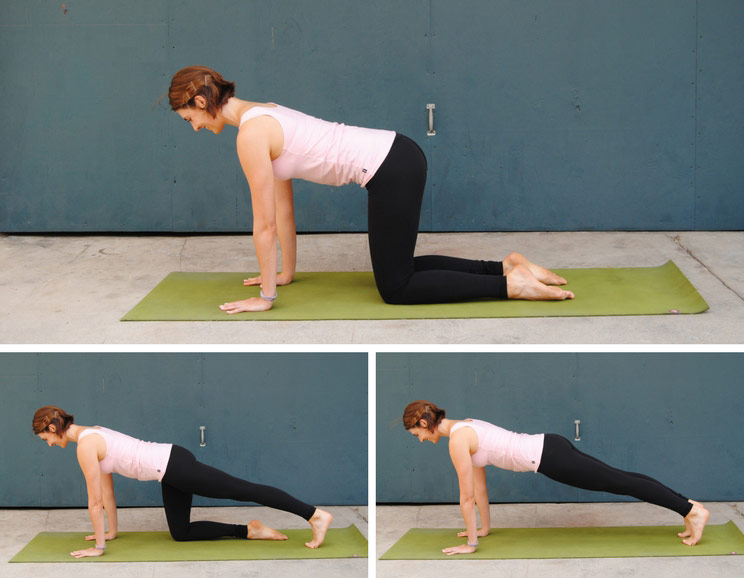
Instead of holding a static plank, your pelvic stability is challenged by the constant shifting of your feet and knees. Keep your hips as still as possible, and as always, abs are lifted and strong!
- Begin on all-fours position, place your wrists under your shoulders and your knees under your hips.
- INHALE through the nose to prepare.
- EXHALE, step back, right leg, left leg, to full plank.
- Hold for the INHALE.
- EXHALE, return the knees to the floor, without moving your hips.
- Repeat for 45 seconds.
Single Leg Stretch
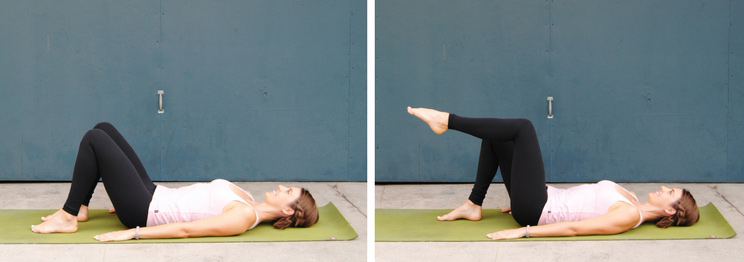
Now that your core is warmed up, we can add some flexion. Keep your neck in line with your spine, and use your upper abs to lift your chest towards the knee.
- Begin on your back in a neutral pelvic position. Engage your abs and lift both knees to tabletop position. Hover both arms by your side.
- INHALE extend your right leg.
- EXHALE switch sides.
- Option: touch the fingers to the knee that’s closest to your chest.
- Continue to alternate for 45 seconds.
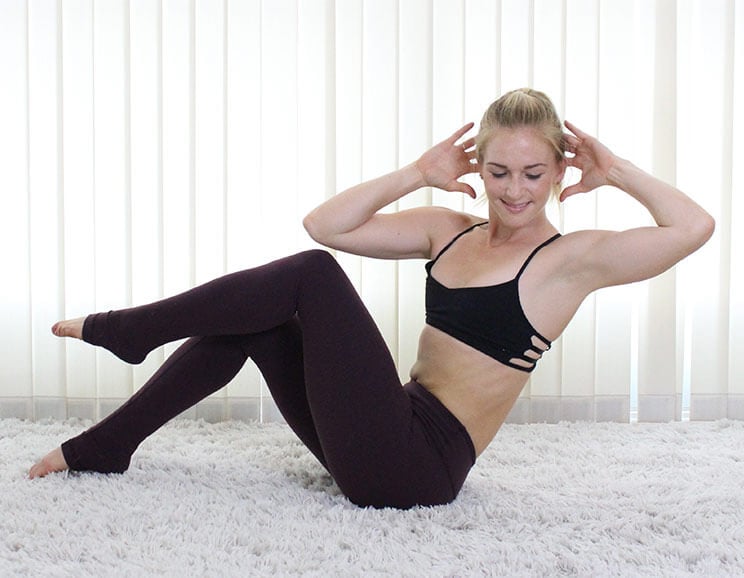
3 Stage Oblique Hold
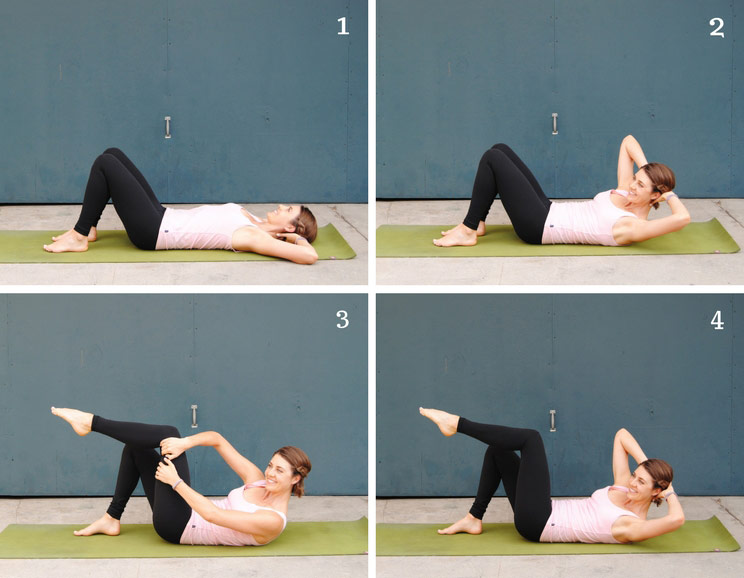
This move slows down your normal criss-cross series, to bring more resistance to your core without adding external weight. It’s also a good opportunity to check-in with your form.
- Begin on your back in a neutral pelvic position. Place your feet hips distance apart and take the hands behind the head.
- INHALE through the nose to prepare.
- EXHALE through the mouth, lift the head and chest and rotate to the right side.
- Hold on to the right thigh and use your arms to lift a little higher, and twist a little deeper.
- Take the hands back to the head and STAY. Continue to breathe, in and out, for three whole breaths. Relax.
- Repeat on the other side.
- Take a total of two on either side.
Bent Knee Roll Back
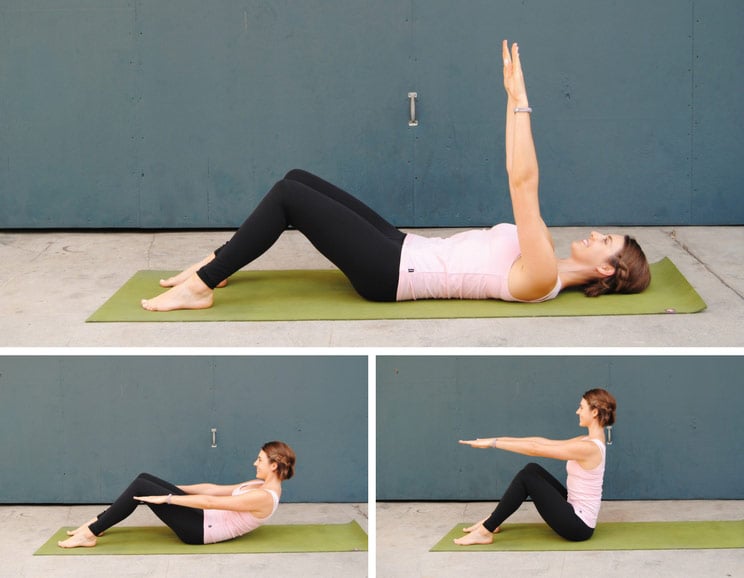
This final move requires spinal mobility as well as abdominal strength. It is very functional since it engages the internal and external abdominals, challenging your abs against gravity. You can use your hands on your thighs for assistance if needed.
- Begin on your back in a neutral pelvic position. Place your feet hips distance apart and hover the arms by the sides.
- INHALE through the nose to prepare.
- EXHALE through the mouth, lift the head and chest and roll all the way up to seated.
- INHALE at the top.
- EXHALE, control your spine back down to the mat.
- Continue to roll up and down, moving slowly, for 45 seconds.

(Your Next Workout: 41 Core Exercises to Flatten Your Belly)


 The Best Homemade Paleo Italian Breadcrumbs

Show Comments