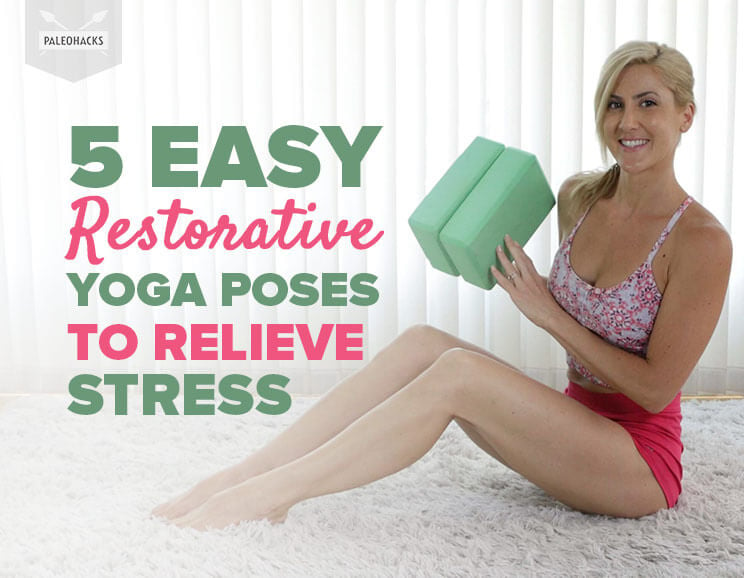
Restorative Yoga is a unique form of yoga practice that focuses on helping you relax and rejuvenate.
The goal of Restorative Yoga is to perform poses that are comfortable and supportive, allowing you to let go and feel the benefits of total relaxation.
By using props such as a blanket and/or blocks, you can support your body in ways that help you to soften your muscles and to breathe deeply.
Suffering from a sore neck, back and shoulders? Get our mobility guide to ease pain and soreness.
Get The FREE Mobility Guide To Fix Your Pain Today!
If this is your first time trying Restorative Yoga, I recommend staying in each pose for about 30 seconds or as long as you can. In the future, you can build up to staying between five to eight minutes in each pose.
Although the poses do look peaceful and simple to do, getting into a truly restful position can be very challenging for beginners. Be patient and make small adjustments until you feel at peace. When your body is fully able to relax, your mind is more likely to slow down and savor the moment.
Tip: If you would like to include a blanket, a sandbag over your eyes, pillows, or any other props to get comfy, then feel free to do so.
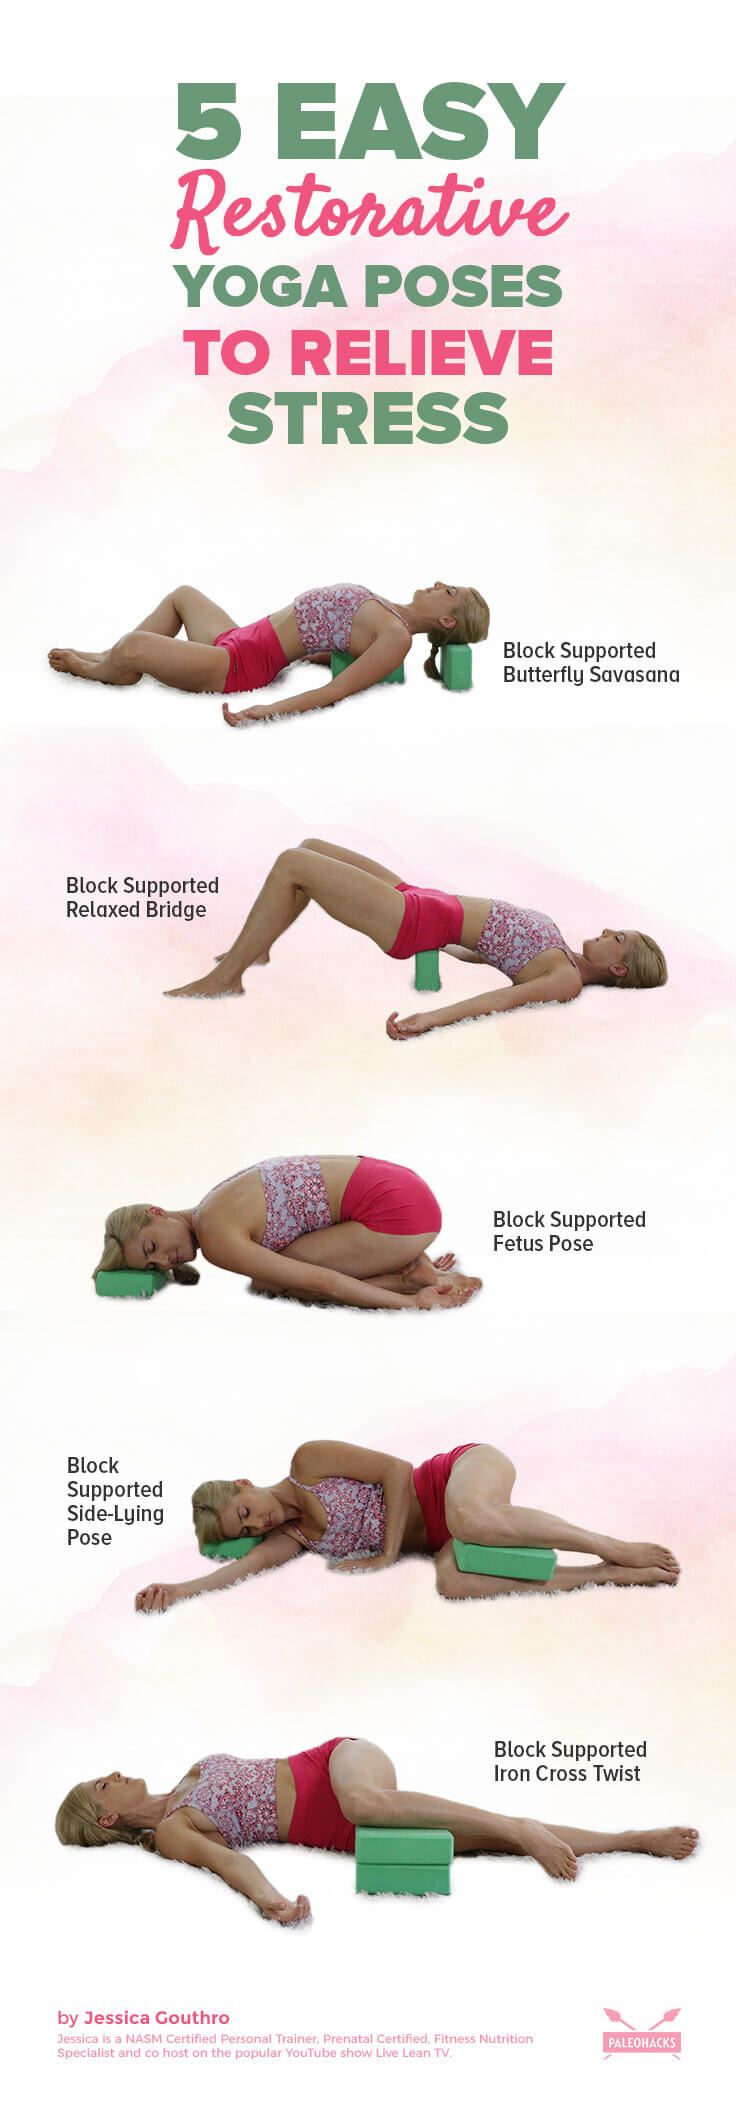
5 Easy Restorative Yoga Poses
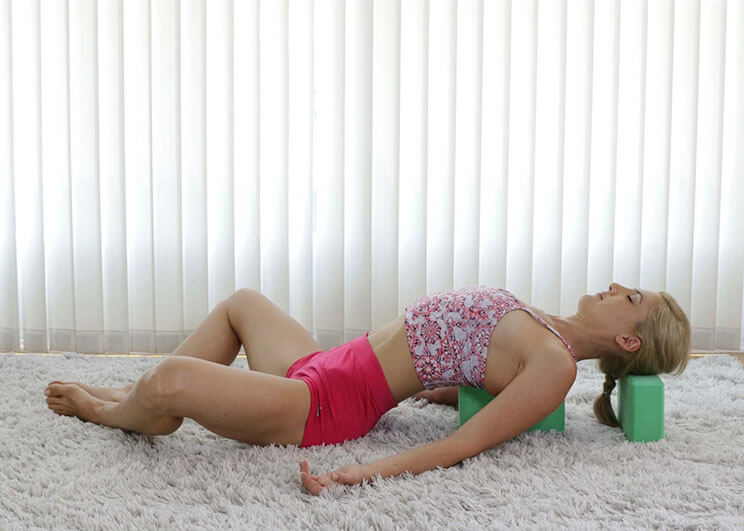
Block Supported Butterfly Savasana
This amazing pose helps you to relax and will open tight hip flexors, chest and shoulder muscles. It is ideal at the end of a long, stressful day.
- Set up your blocks about four to five inches apart, the top one horizontal and the bottom one vertical.
- Sit about six inches in front of the bottom block and lie back so that the bottom block is right between your shoulder blades and your head rests on the top block.
- Adjust the blocks as needed until you feel comfortable.
- Place the soles of your feet together and allow your knees to fall open.
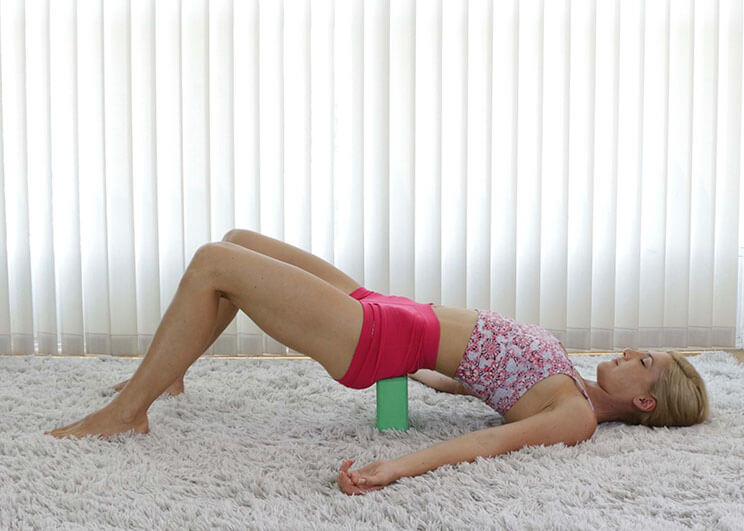
Block Supported Relaxed Bridge
Feeling tightness in your lower back? This pose is excellent at decompressing the lower spine and allowing gravity to unlock the stiffness.
- Lie down on your back.
- Place your feet flat on the ground and press up to a bridge pose.
- Slide a block right under your hips, at the base of your spine, and relax onto the block.
Block Supported Fetus Pose
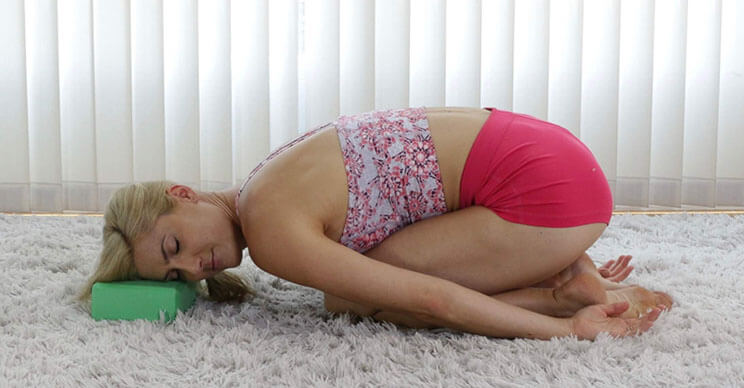
- Kneel on your shins and sit back on your heels.
- Place a block about one foot in front of you, flat on its side.
- Lower your forehead onto the block, turning your head to one side. You may switch sides after a while, or place your forehead straight on the block for symmetry.
- Stretch your arms down by your sides, relaxing your shoulders.
Block Supported Side-Lying Pose
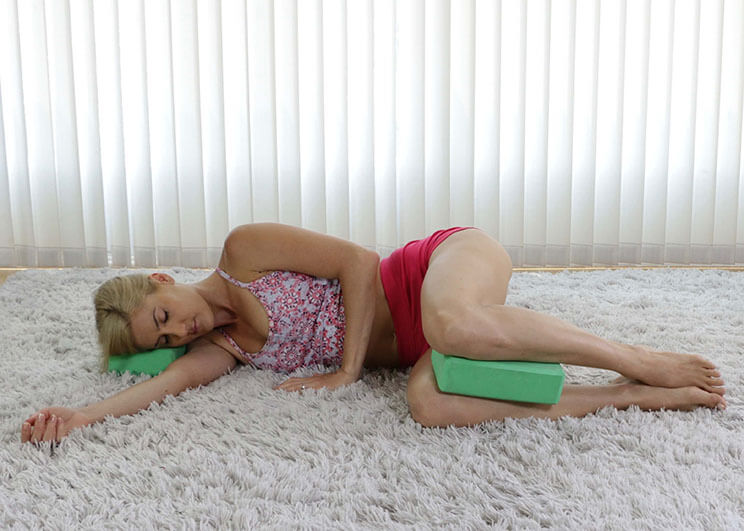
- Lie on your side and bend your knees to a 90 degree angle.
- Place one block between your knees.
- Place another block under your head.
- Stretch your bottom arm out on the ground in front of you and allow your top arm to rest comfortably by your belly.
Note: Make sure to do the same on the other side.
Block Supported Iron Cross Twist
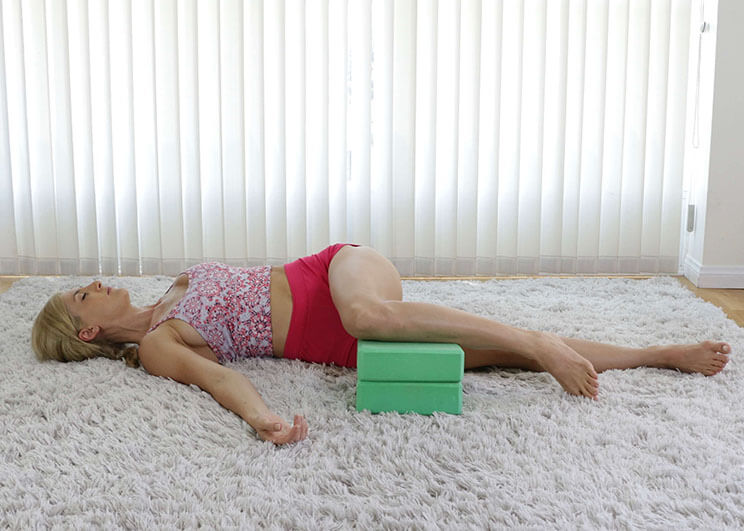
- Lie on your back and stretch your arms out to your sides.
- Bend one knee up to hip height and cross it over your midline to twist your hips to the side.
- Place two blocks under that knee to allow you to rest in this twisted position.
Note: Make sure to do the same on the other side.
Final Notes
Do not be discouraged if your first attempt at Restorative Yoga isn’t successful. For many fitness-minded people, the thought of heading out to run five miles is easier than sitting still for 30 minutes. Over time, and with practice, you will learn to still your body and your mind with more ease, and the long-term effects on your life will be invaluable.
(Your Next Workout: 5 Essential Yin Yoga Poses for Stress Relief)

 Whole30 Breakfast Recipes: 30 Healthy, Delicious Ideas

Show Comments